Video Models
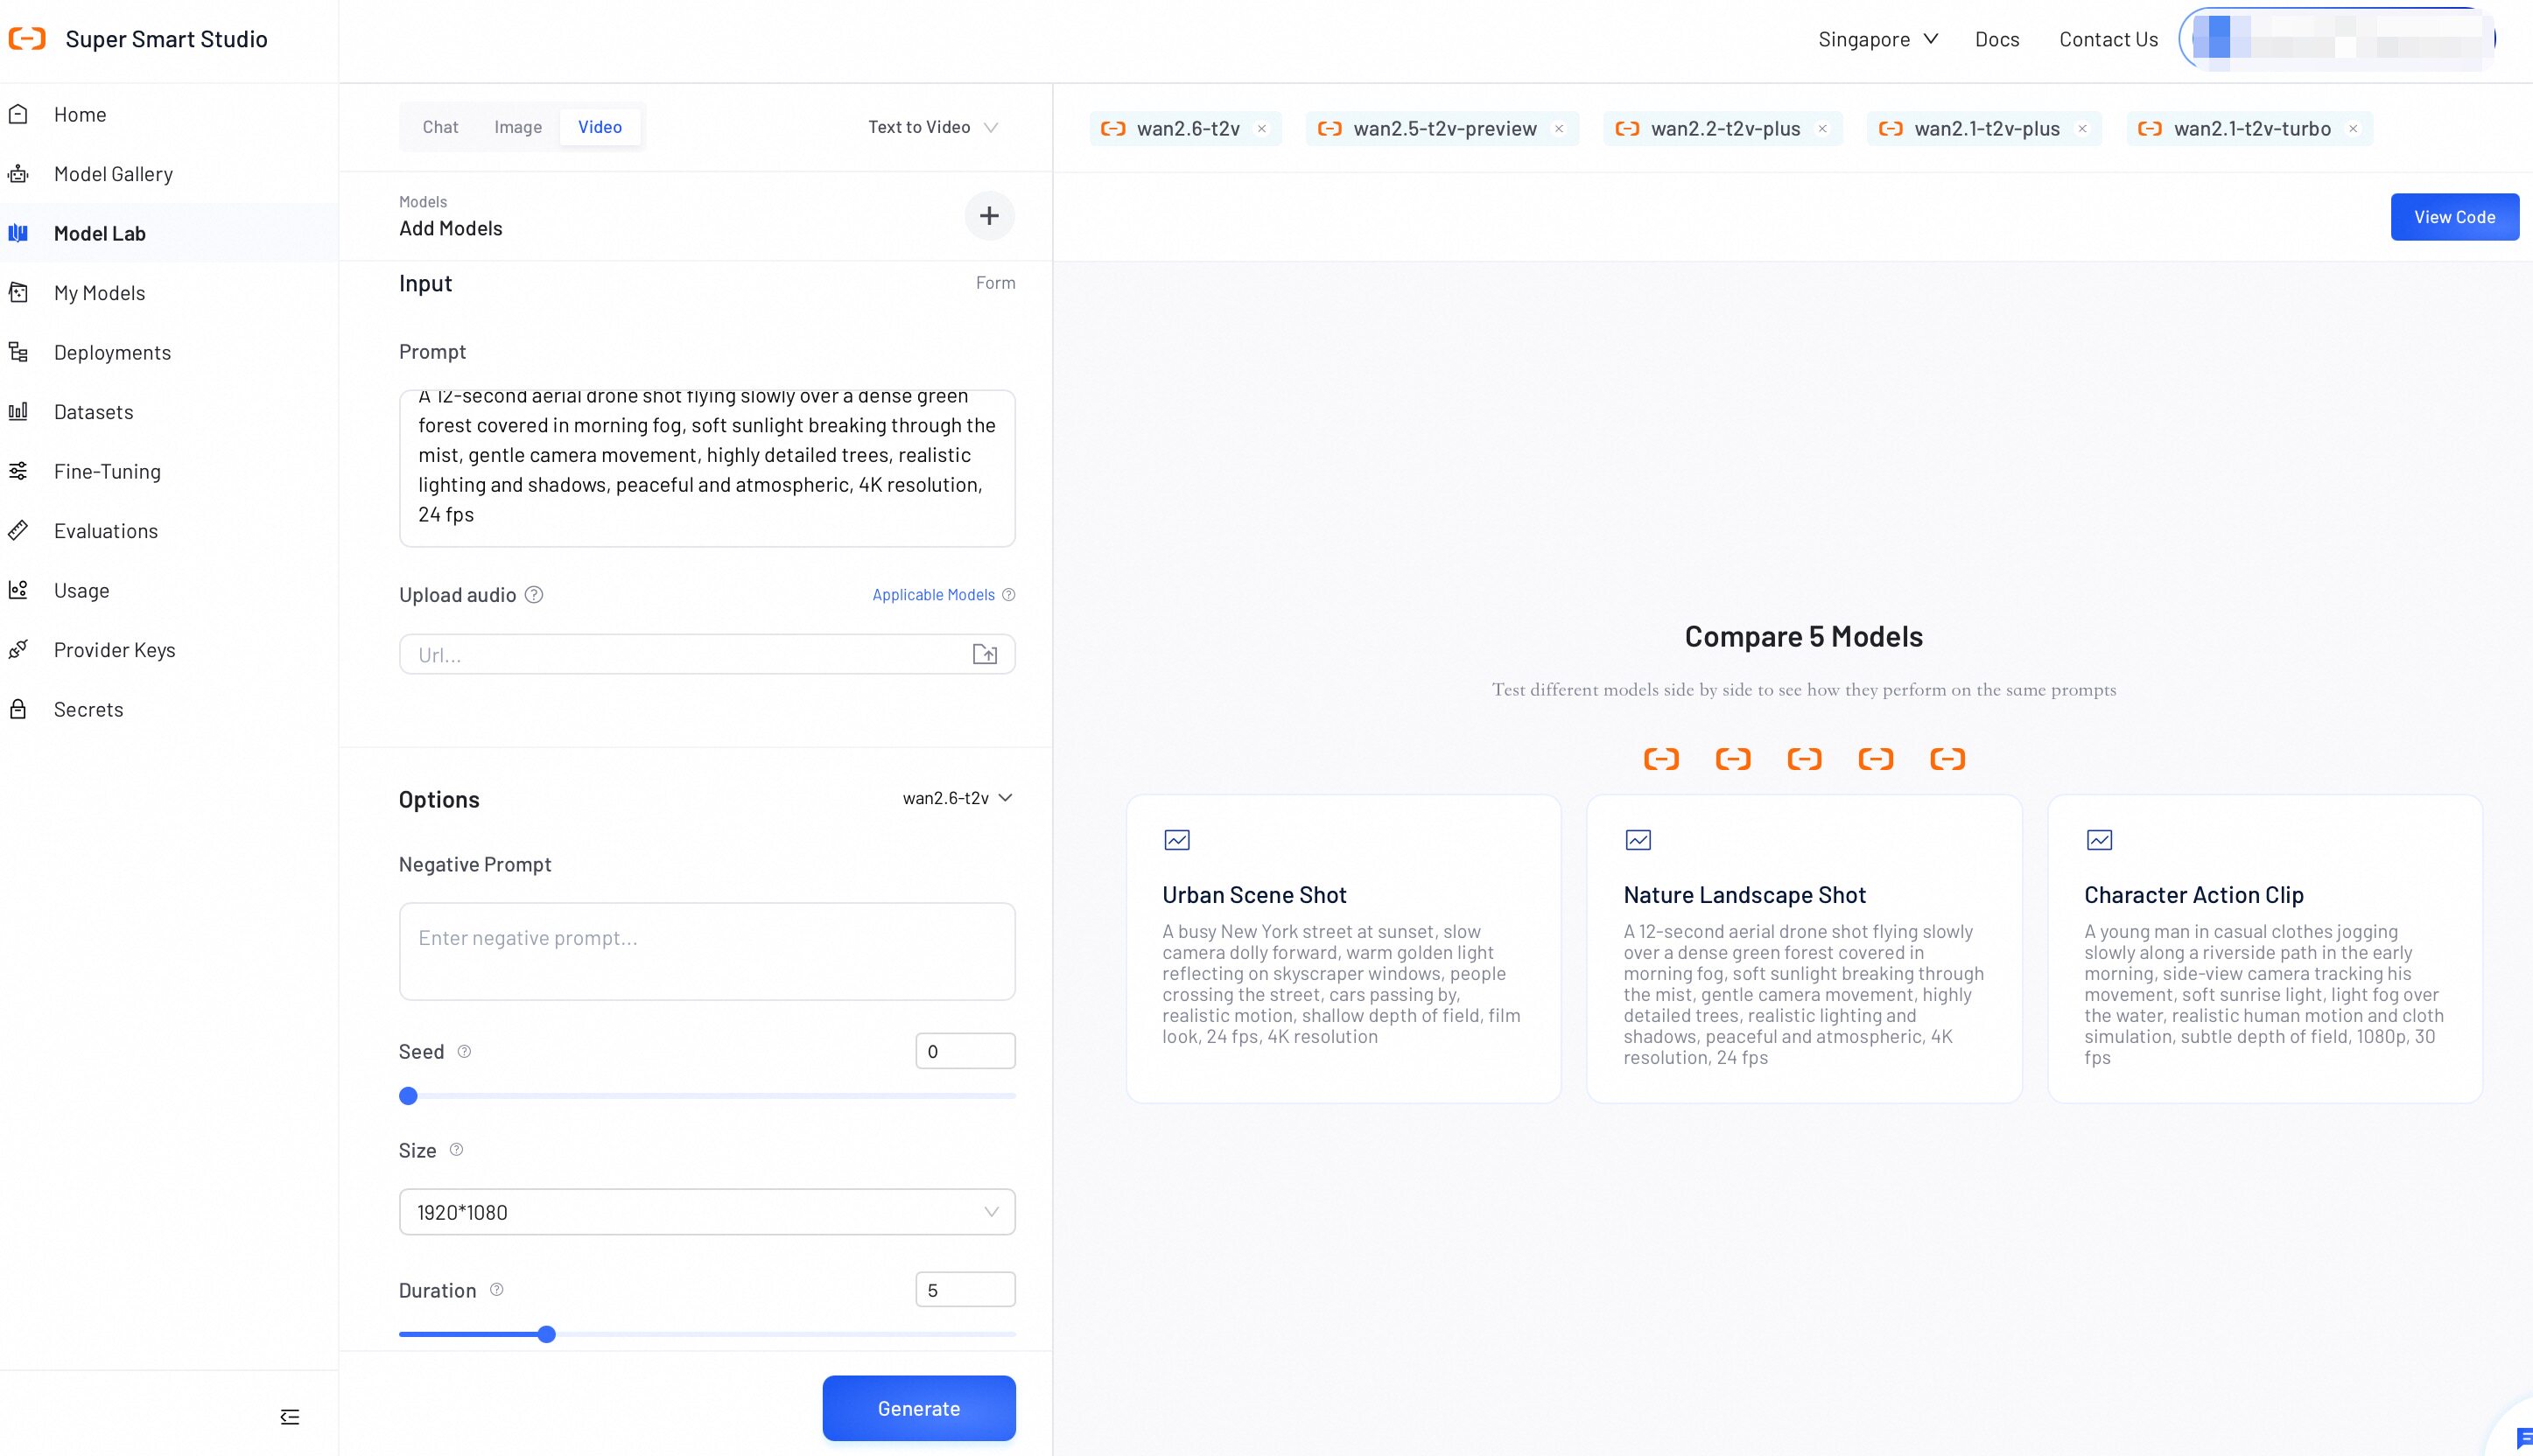
Model Lab's Video Mode lets you explore and compare video generation models in one place. Switch between Text-to-Video and Image-to-Video, and adjust parameters for each model to find the best fit for your use case.
Test Video Models
Follow these steps to generate videos and compare outputs:
- Select a mode: Select Text-to-Video or Image-to-Video to get started.
- Select models: Click Add Models to choose one or more models.
Available categories include:
- Model Studio models: Requires API key configuration. See Configure API Keys.
- Your deployed models: All models you have deployed on Smart Studio.
💡 Tip: Which model should I choose?
- Wan models (e.g., Wan2.6): Best for realistic video generation, supporting multiple generation modes (T2V, I2V, S2V, R2V) and multi-shot narrative video creation. To learn about other models, see How to choose models
- Configure generation: Enter your text prompt. In Image-to-Video mode, upload an image to use as the first frame. Certain models support additional media inputs such as audio and video. Optionally, select a model in the left panel to adjust its settings. Available options vary by mode. See Example Parameters for details.
Additional Media Inputs
Depending on the selected model, Video Mode supports multiple media input types beyond the basic text prompt:
| Input Type | Description | Use Case |
|---|---|---|
| Upload Image | Provide a seed image as the starting frame for video generation. | Image-to-Video (I2V) generation. |
| Upload Audio | Provide an audio file to keep audio-visual synchronization or as background music. | Audio-enhanced video generation. |
| Upload Video | Provide a reference video for style or motion transfer. | Reference-to-Video (R2V) generation. |
| Upload Frame Images | Provide first and/or last frame images to control the start and end of the video. | Frame-controlled generation with precise visual bookends. |
The available input fields change dynamically based on which models you have selected. Each field indicates which models support it.
-
Generate and compare: Click Generate to start the process. Once complete, review the outputs to compare video quality and style consistency across your selected models.
-
View code (Optional): Click View Code to instantly generate an API request script containing your exact prompts and parameter configurations.
Generation costs vary depending on your selected model, video resolution, and duration. For the same model, higher resolutions incur greater costs (1080P > 720P > 480P). Review Model pricing before running large-scale tests.
- Cost = Unit price (based on resolution) × Duration (seconds).
This pricing applies to Alibaba Cloud Model Studio models only. Self-deployed models are not included.
Example Parameters
Adjust these settings to generate new videos from text prompts.
| Parameter | Description |
|---|---|
| Negative Prompt | Defines specific elements, styles, or subjects to exclude from the generated image. Supports up to 500 characters in English and Chinese (excess characters are truncated). Example: low resolution, low quality, deformed limbs, chaotic composition. |
| Duration | The length of the generated video in seconds. Supported values vary by model. Some models offer fixed durations; others allow a custom value from 2 to 15 seconds. |
| Size | The output resolution (width × height). Supported values vary by model. |
| Shot Type | The narrative structure of the generated video. Select Multi to enable multi-shot narrative mode, generating videos across multiple connected scenes. |
| Seed | Sets the random seed for image generation (0 to 2147483647). Leave blank to use a random seed. |
| Watermark | Adds a visible watermark to the bottom-right corner of the generated video. |
| Prompt Extend | Automatically refines and expands your positive prompt to improve generation quality. This feature does not affect the negative prompt. |
| Resolution | Preset resolution options for output quality. Options: 1080p, 720p, 480p. Higher resolutions incur greater costs. |
The parameters listed here are examples for reference only. Available parameters vary by model. For the full parameter list, refer to the API documentation for your specific model. For example, see the Model Studio API Reference.