Configure Single Sign-On (SSO)
This guide explains how to configure Single Sign-On (SSO) for your organization using OIDC or SAML.
With SSO enabled, members of your organization authenticate through your corporate Identity Provider (IdP) instead of managing separate login credentials on the platform.
Which protocol should I choose?
| Protocol | When to use |
|---|---|
| OIDC | Your IdP exposes OIDC / OAuth 2.0 endpoints; you want one-click setup via an Issuer URL; you prefer a lighter JSON-based integration. |
| SAML | Your IdP only supports SAML; you need IdP-initiated SSO; you already run a SAML-based authentication stack. |
Configuration process
Go to Platform Settings > SSO, then complete the three steps below.
Step 1: Select protocol and fill in configuration
- Go to Platform Settings > SSO and choose OIDC or SAML depending on your IdP.
- Fill in the protocol-specific information below. Provide these details to your IdP.
- OIDC
- SAML
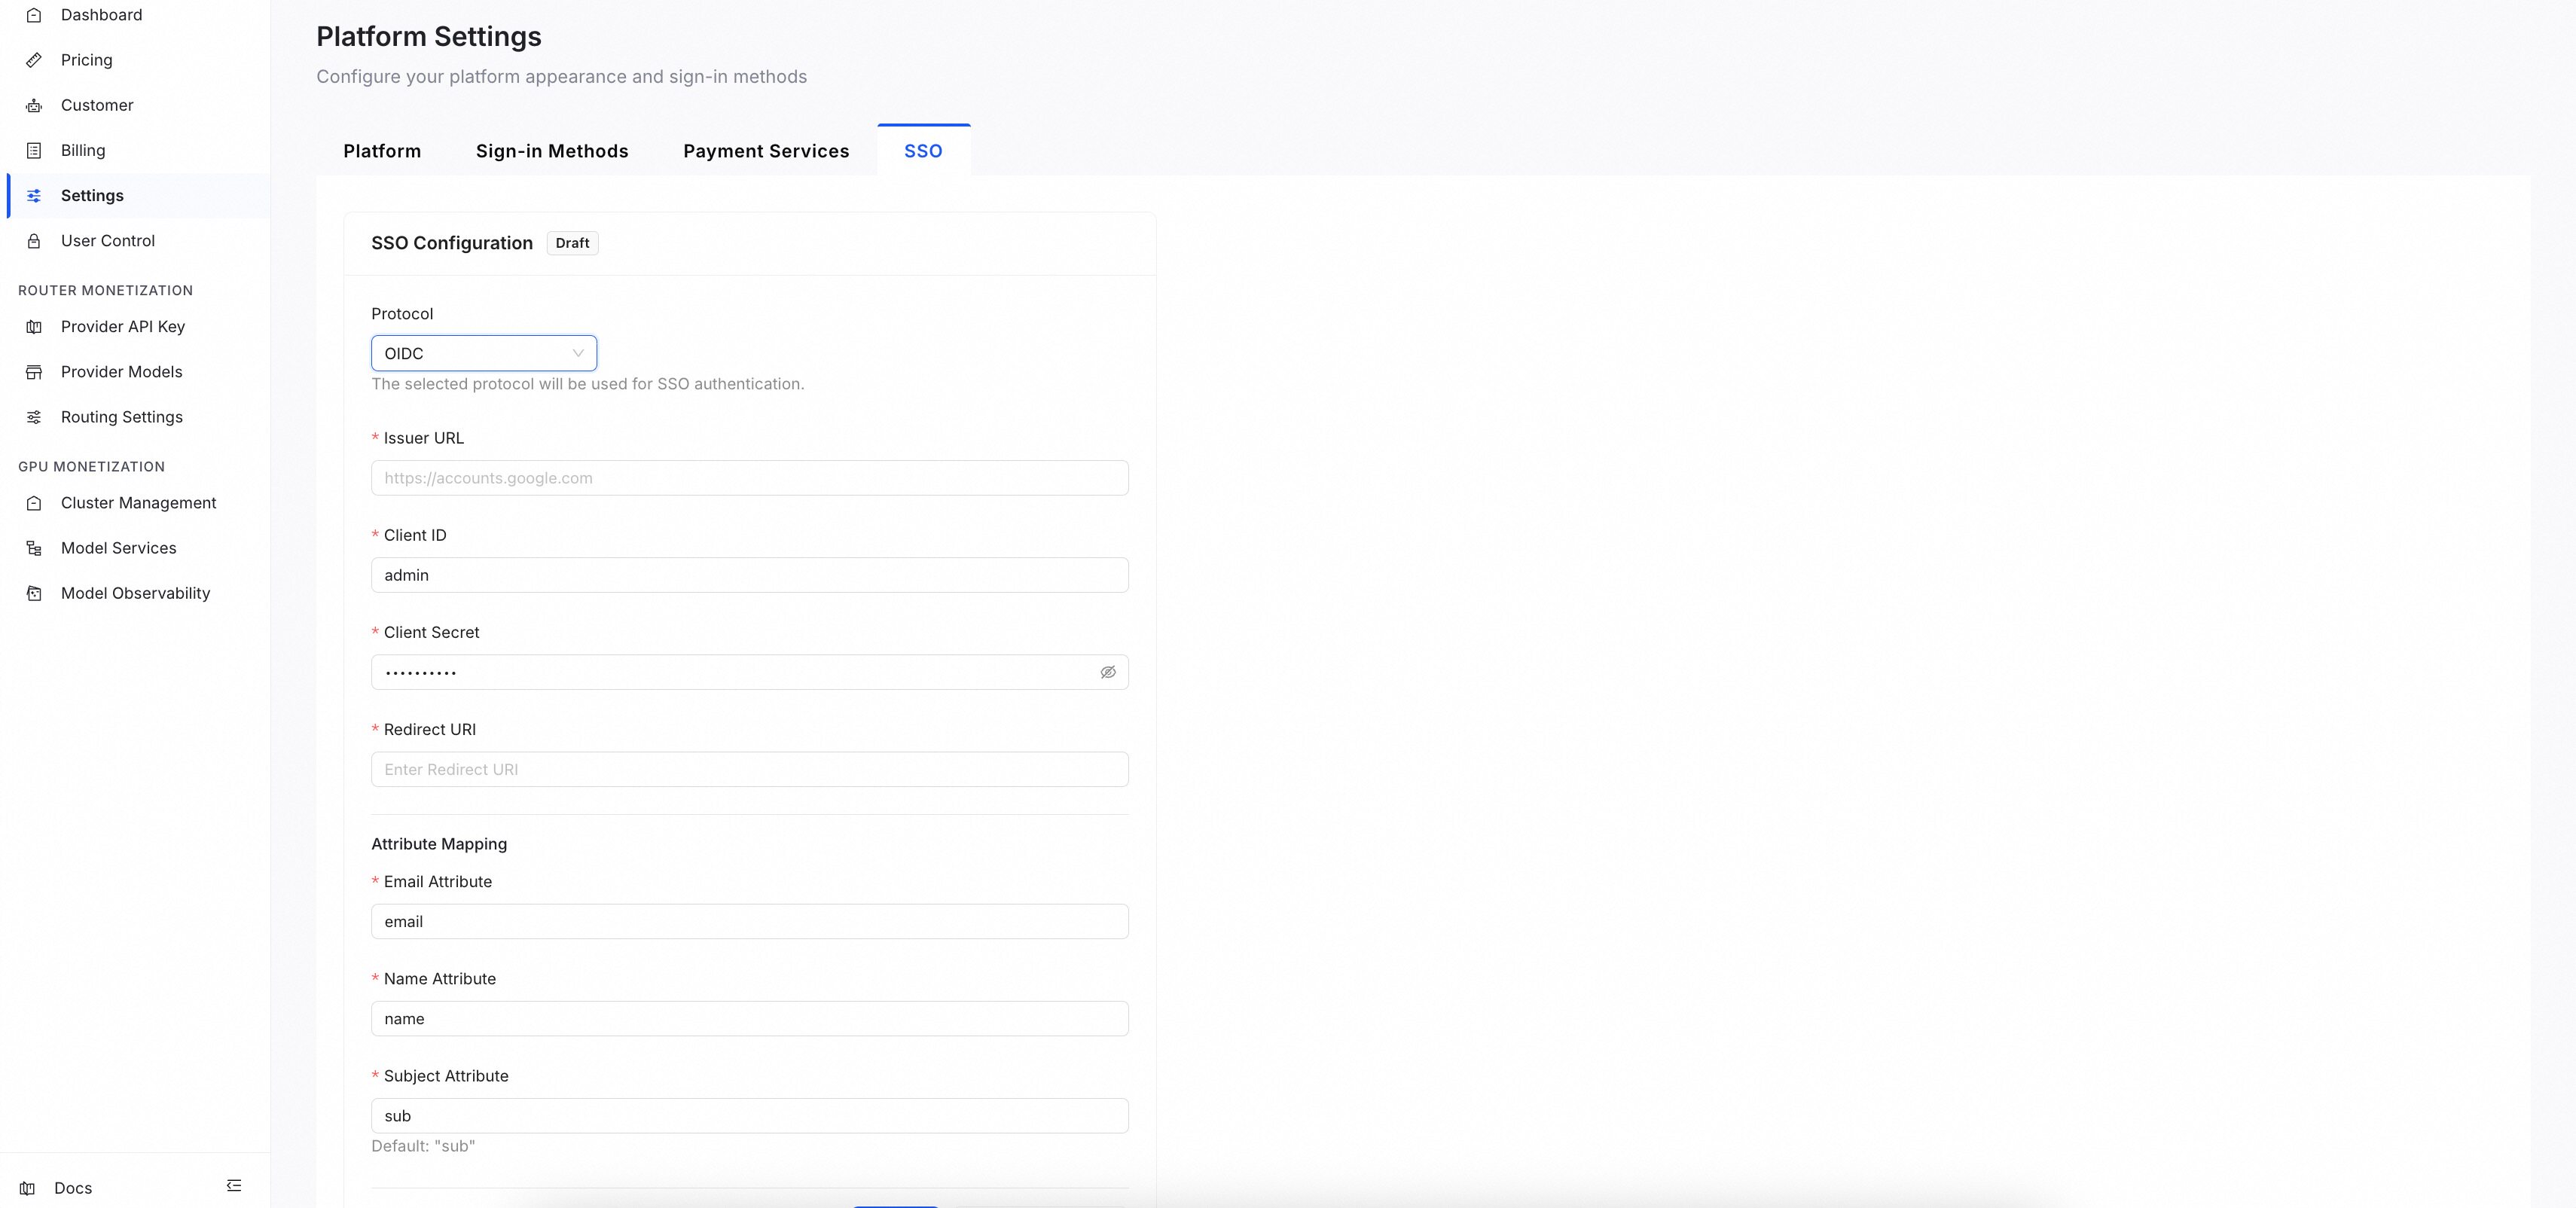
| Field | Description |
|---|---|
| Protocol | Select OIDC. |
| Issuer URL | The IdP's issuer URL, used for endpoint auto-discovery. |
| Client ID | The client ID issued by your IdP. |
| Client Secret | The client secret issued by your IdP (masked). |
| Redirect URI | Generated by the platform; add it to your IdP's allowed redirect URIs. |
On the IdP side, register an OAuth 2.0 / OIDC application and add the generated Redirect URI to its allowed redirect URIs. Copy the issued Client ID and Client Secret back into the platform.
| Field | Description |
|---|---|
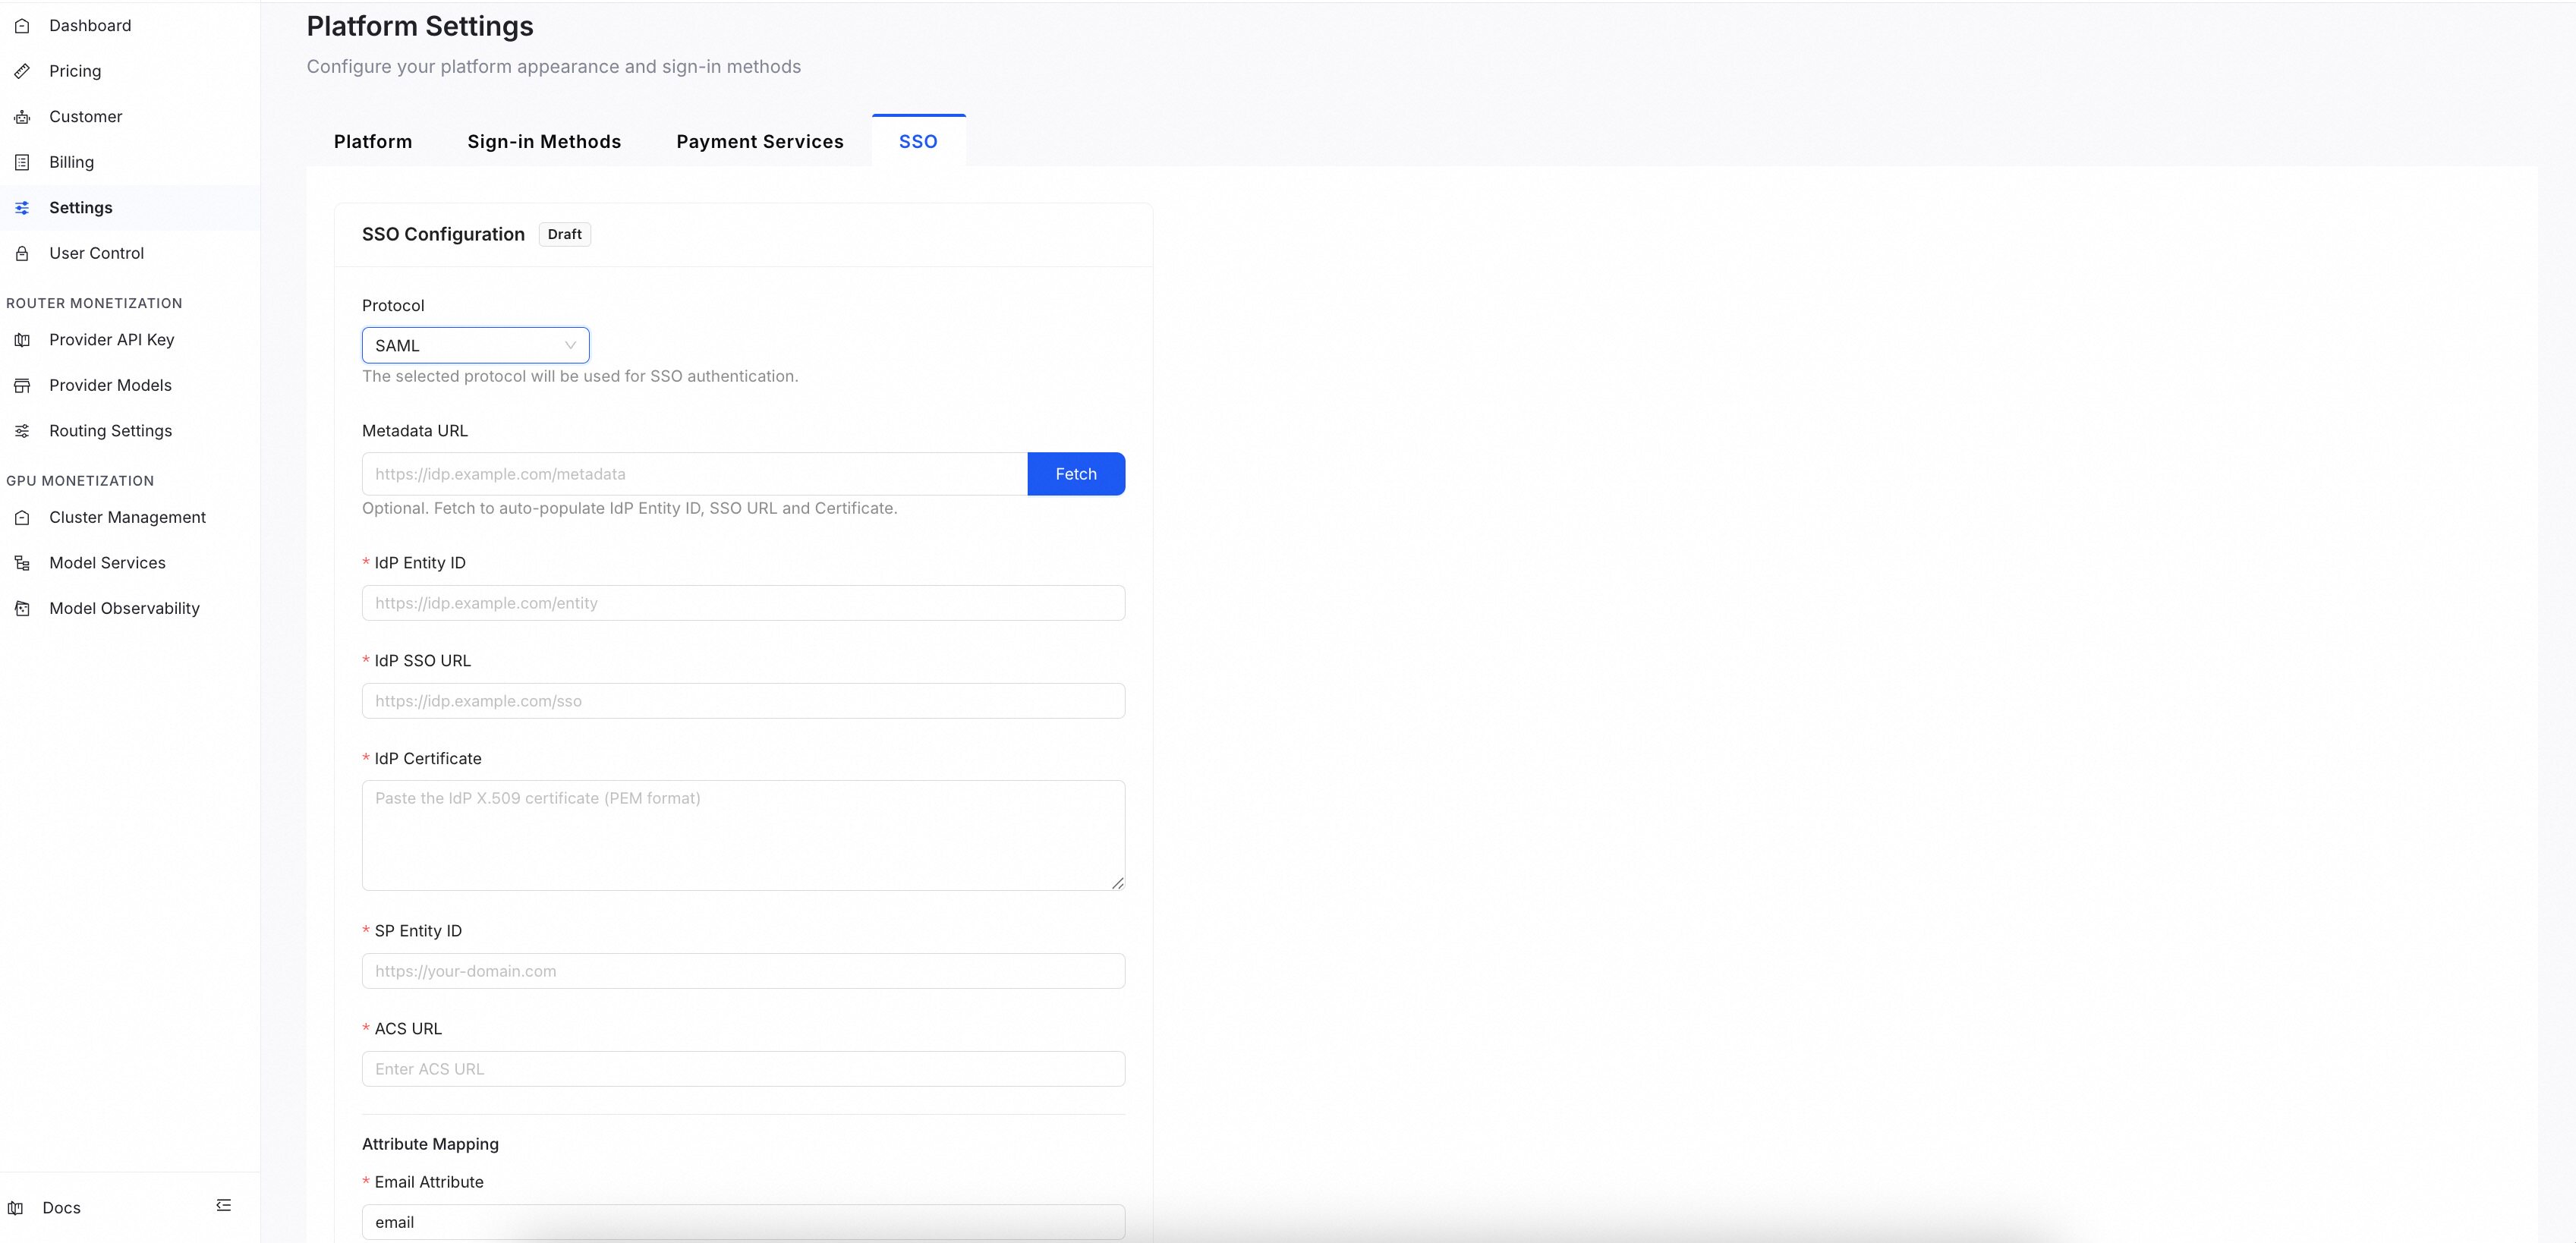
| Protocol | Select SAML. |
| Metadata URL | Fetch to auto-populate the IdP Entity ID, SSO URL, and Certificate. (e.g., https://idp.example.com/metadata) |
| IdP Entity ID | The entity ID of your IdP. (e.g., https://idp.example.com/entity) |
| IdP SSO URL | The single sign-on URL of your IdP. (e.g., https://idp.example.com/sso) |
| IdP Certificate | The signing certificate of your IdP. |
| SP Entity ID | Generated by the platform; provide it to your IdP. (e.g., https://your-domain.com) |
| ACS URL | The Assertion Consumer Service URL generated by the platform; provide it to your IdP. |
On the IdP side, register an application using the generated SP Entity ID and ACS URL, then copy the IdP Entity ID, IdP SSO URL, and IdP Certificate back into the platform.
Step 2: Configure attribute mapping
Attribute Mapping maps the fields in your IdP assertion to the user's email, name, and unique subject.
| Field | Description |
|---|---|
| Email Attribute | The attribute holding the user's email. Default: email. |
| Name Attribute | The attribute holding the user's display name. Default: name. |
| Subject Attribute | The unique, stable identifier for the user. OIDC default: sub; SAML default: NameId. |
Step 3: Test the connection and activate
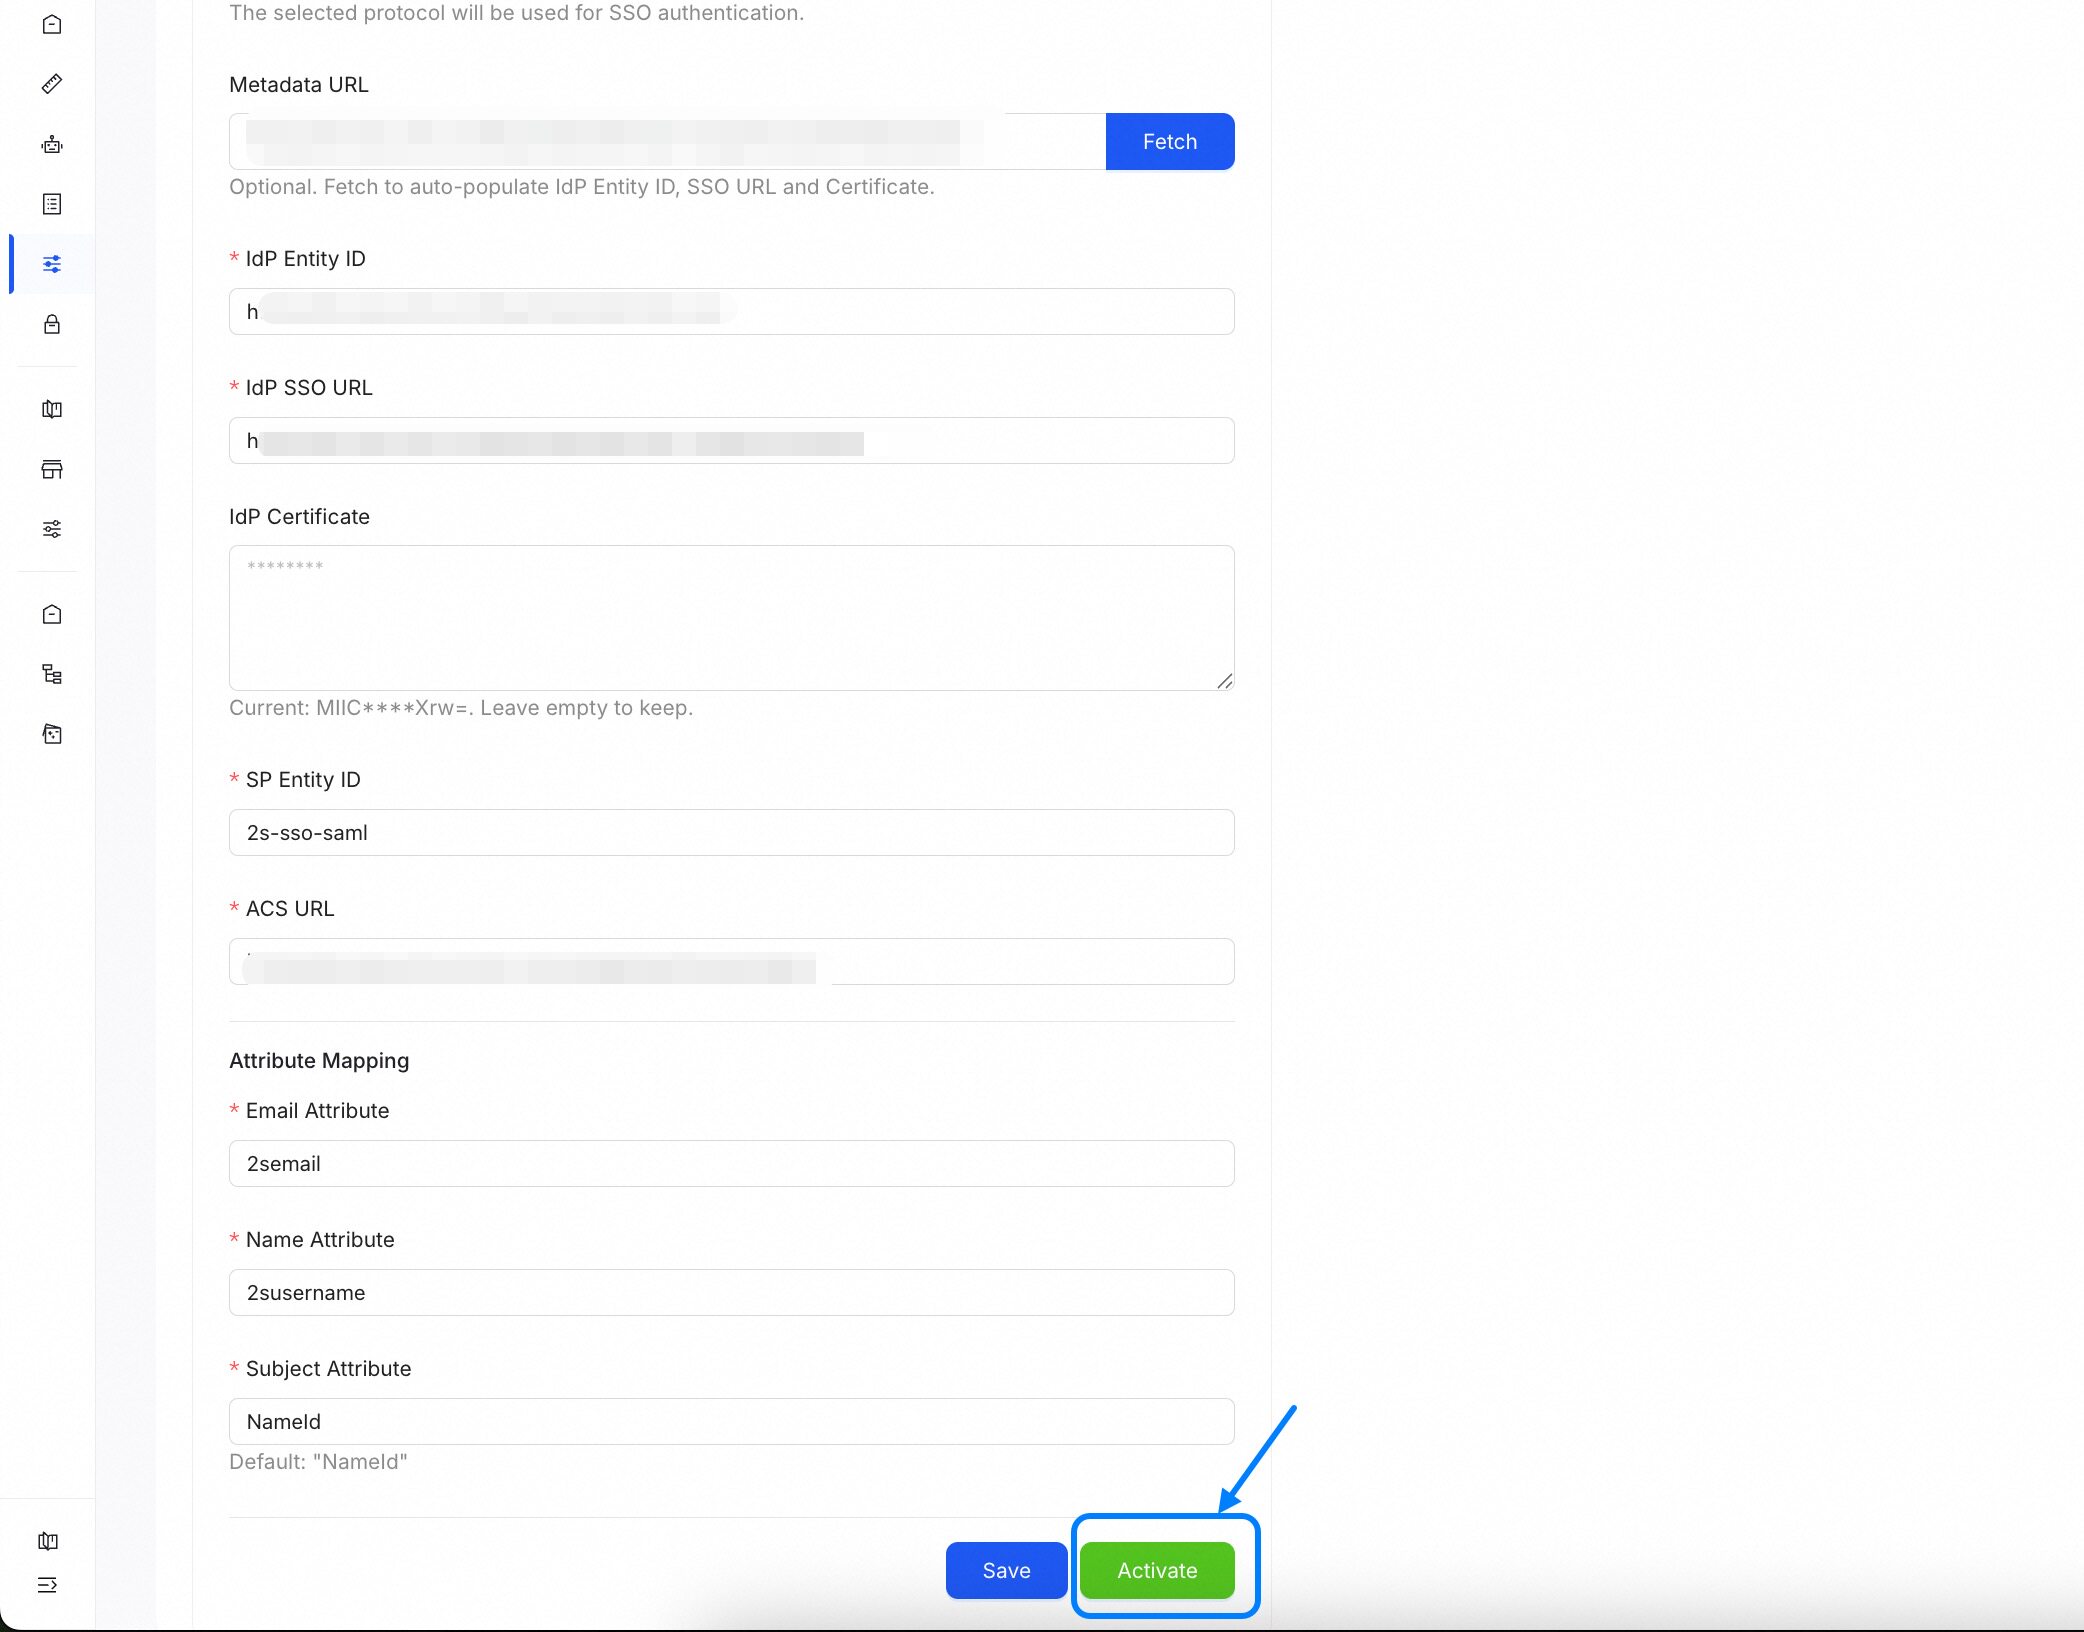
- After you complete the configuration above, click Test Connection to verify the connection to your IdP.
- If the test passes, click Activate to enable SSO for your organization.
- After activation, members can sign in to the User Console through your IdP using SSO.
- To stop using SSO at any time, return to the configuration page and click Deactivate.
User Console login

After activation, members sign in to the User Console through your IdP using SSO.
Before you activate SSO, keep at least one emergency admin account that can sign in without SSO. This account lets you access settings if your IdP loses connectivity.
Next Step
Next, configure User Control for administrator access, or Theme for tenant branding.