Resell a Model API
With the Model API Reselling feature, you can Bring Your Own API keys(BYOK) and offer them as a billable service on our platform.
This guide shows you how to resell your model API from start to finish. You will learn how to perform all necessary configurations, including configuring your keys, defining models and their costs, and establishing your customer-facing pricing plans.
Step 1: Configure a provider API key (BYOK)
Link your Model API KEY to the Platform.
1. Go to the Provider Keys Page
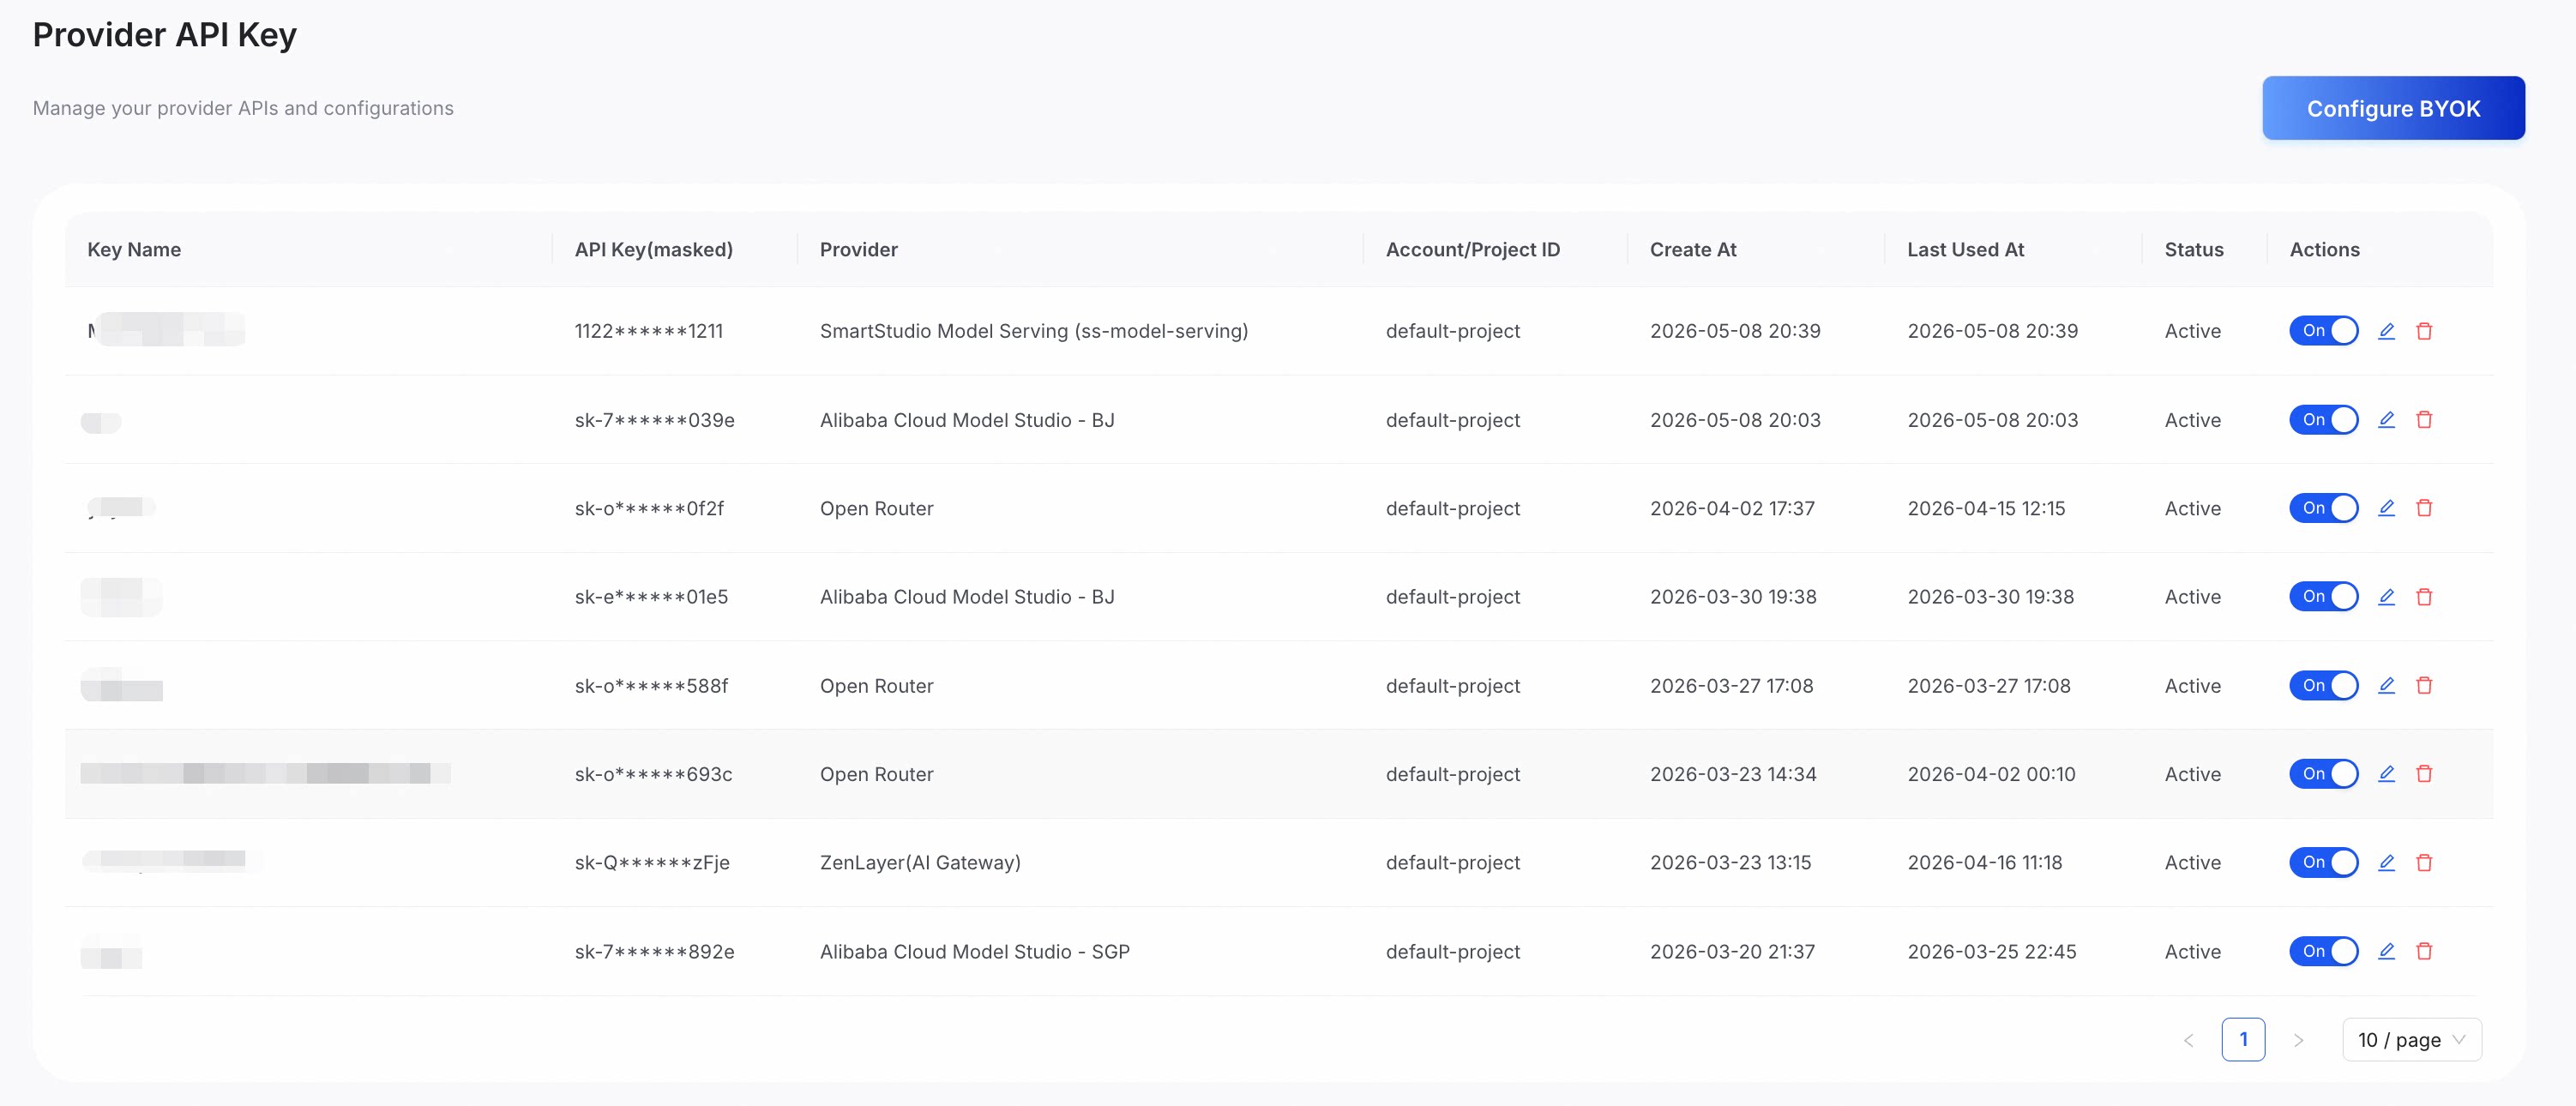
2. Configure BYOK Details
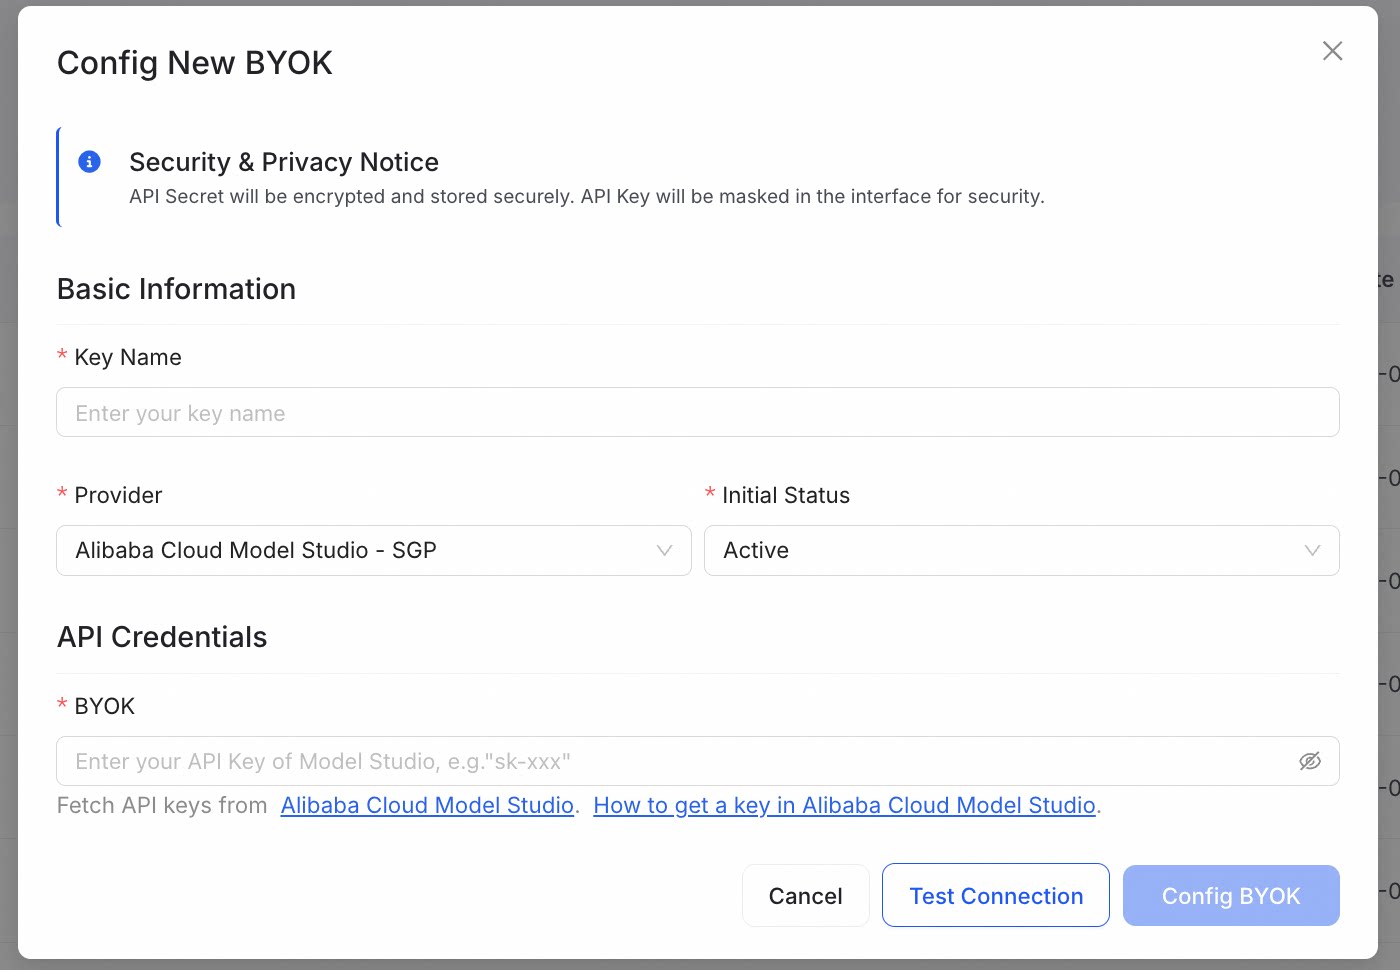
Click the "Config BYOK" button and fill in the required information:
-
Key Name: Enter a recognizable name (e.g., Model_Studio_Production).
-
Provider: Select Your Model API Provider.
-
Initial Status: Choose Active to use immediately or Inactive to save without activating.
-
BYOK: Paste the API-KEY you copied from Model Studio.
- Test and Complete Setup
-
Click "Test Connection" to verify that the key is valid.
-
Click "Config BYOK" to finish the setup.
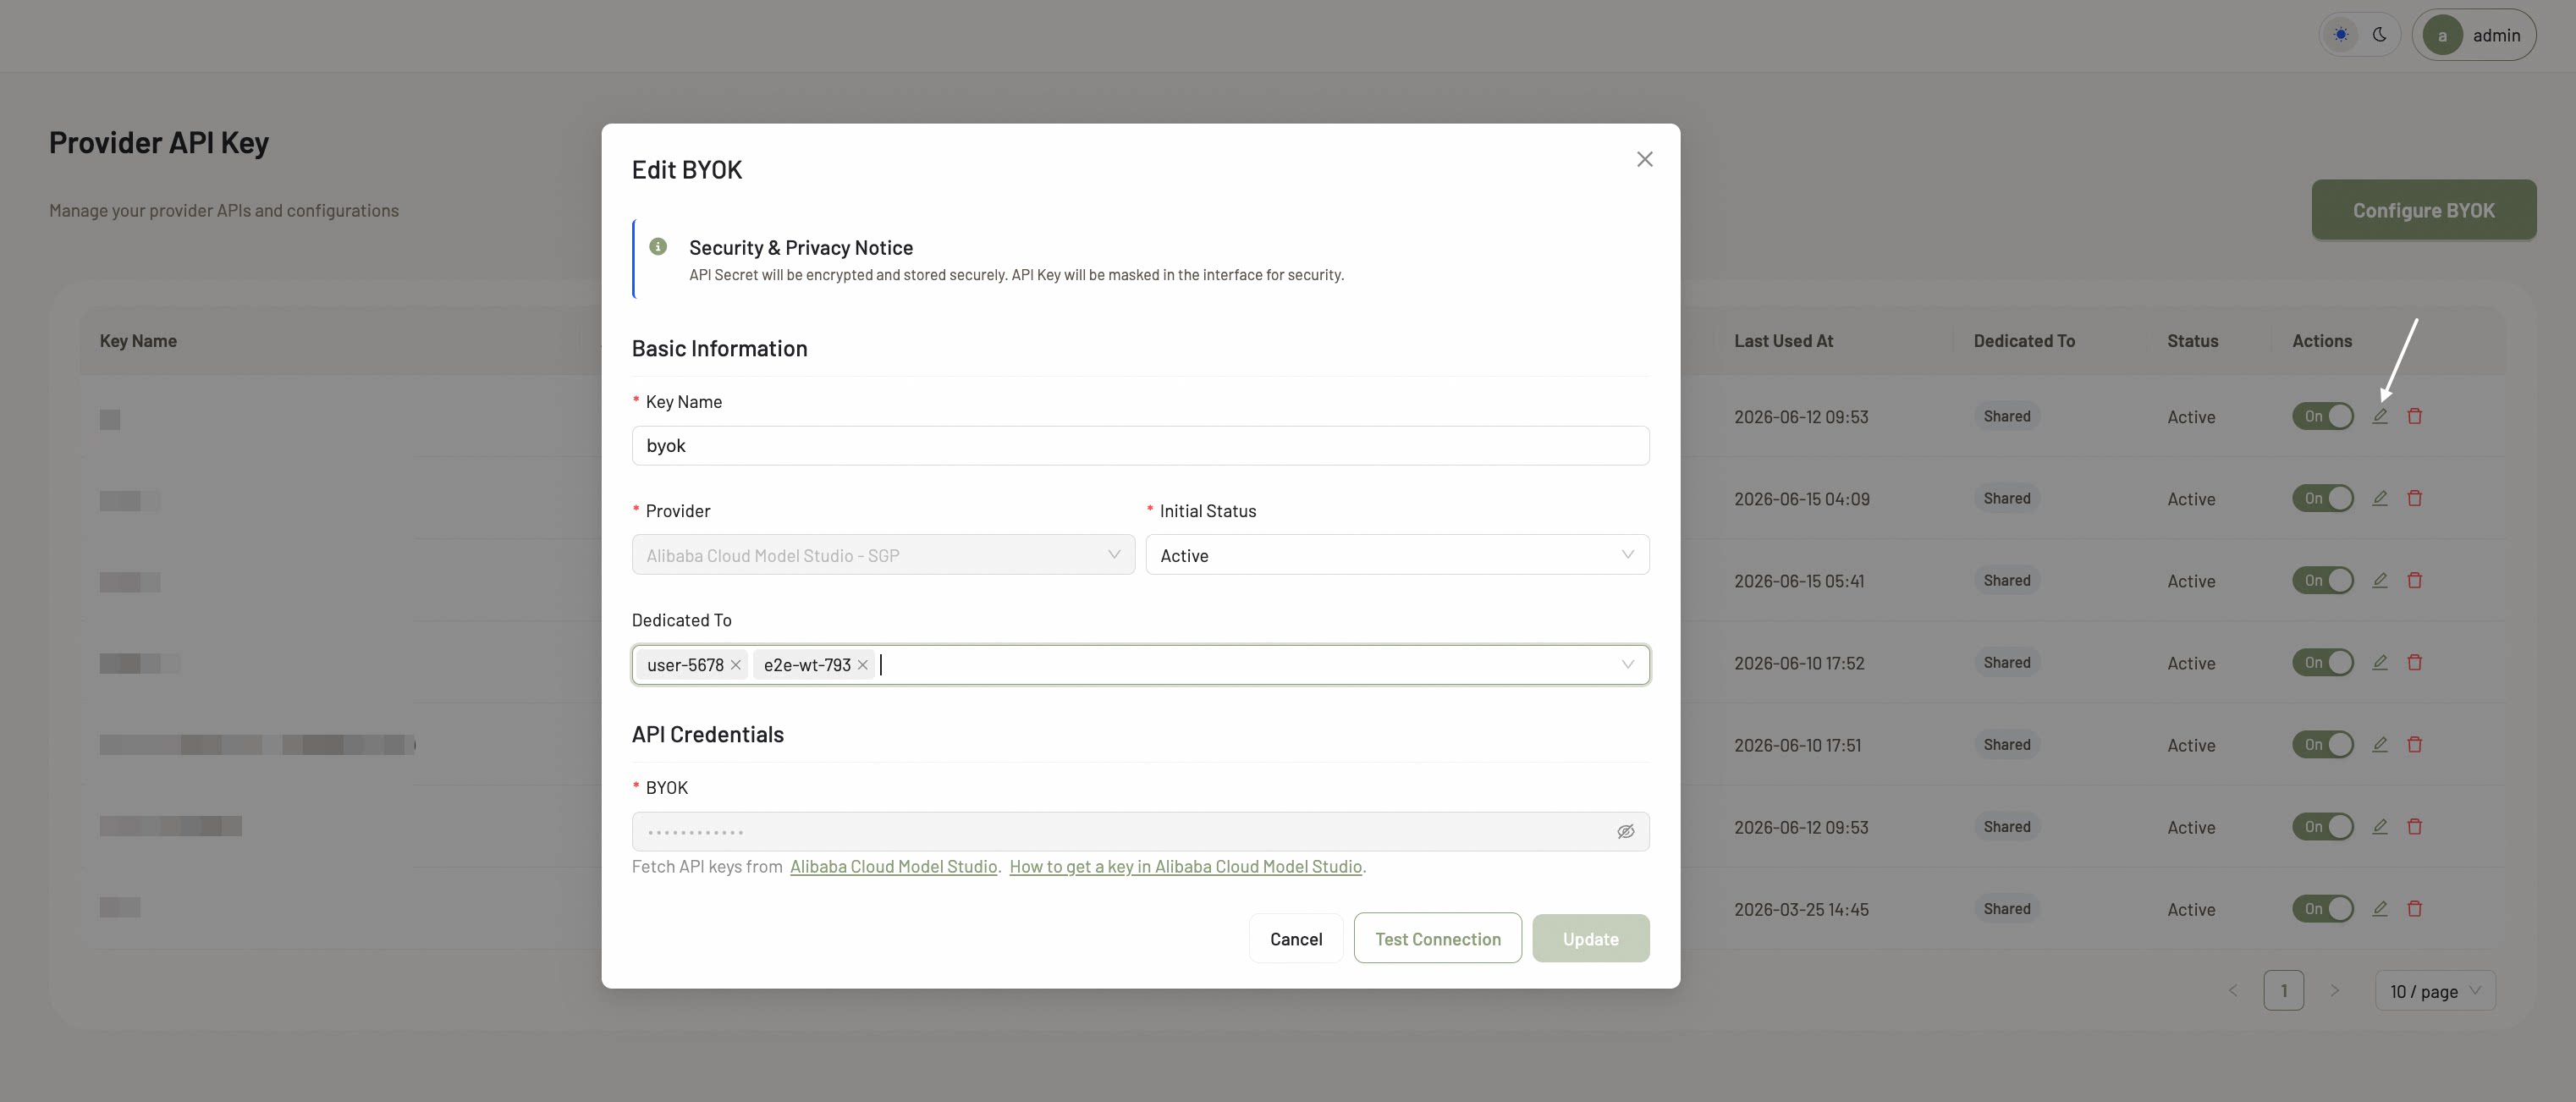
- Edit BYOK (Optional) After creating a BYOK entry, you can edit its configuration at any time from the Provider API Key page.
- Key Name: Update the display name.
- Initial Status: Switch between Active and Inactive to enable or disable the key.
- Dedicated to: Specify which users are allowed to use this key. By default, the key is available to all users on your platform.
Step 2: Configure and list models
Navigate to the Provider Models page
Navigate to the Provider Models.This page is the central dashboard where you can view and manage all the models you want to resell.
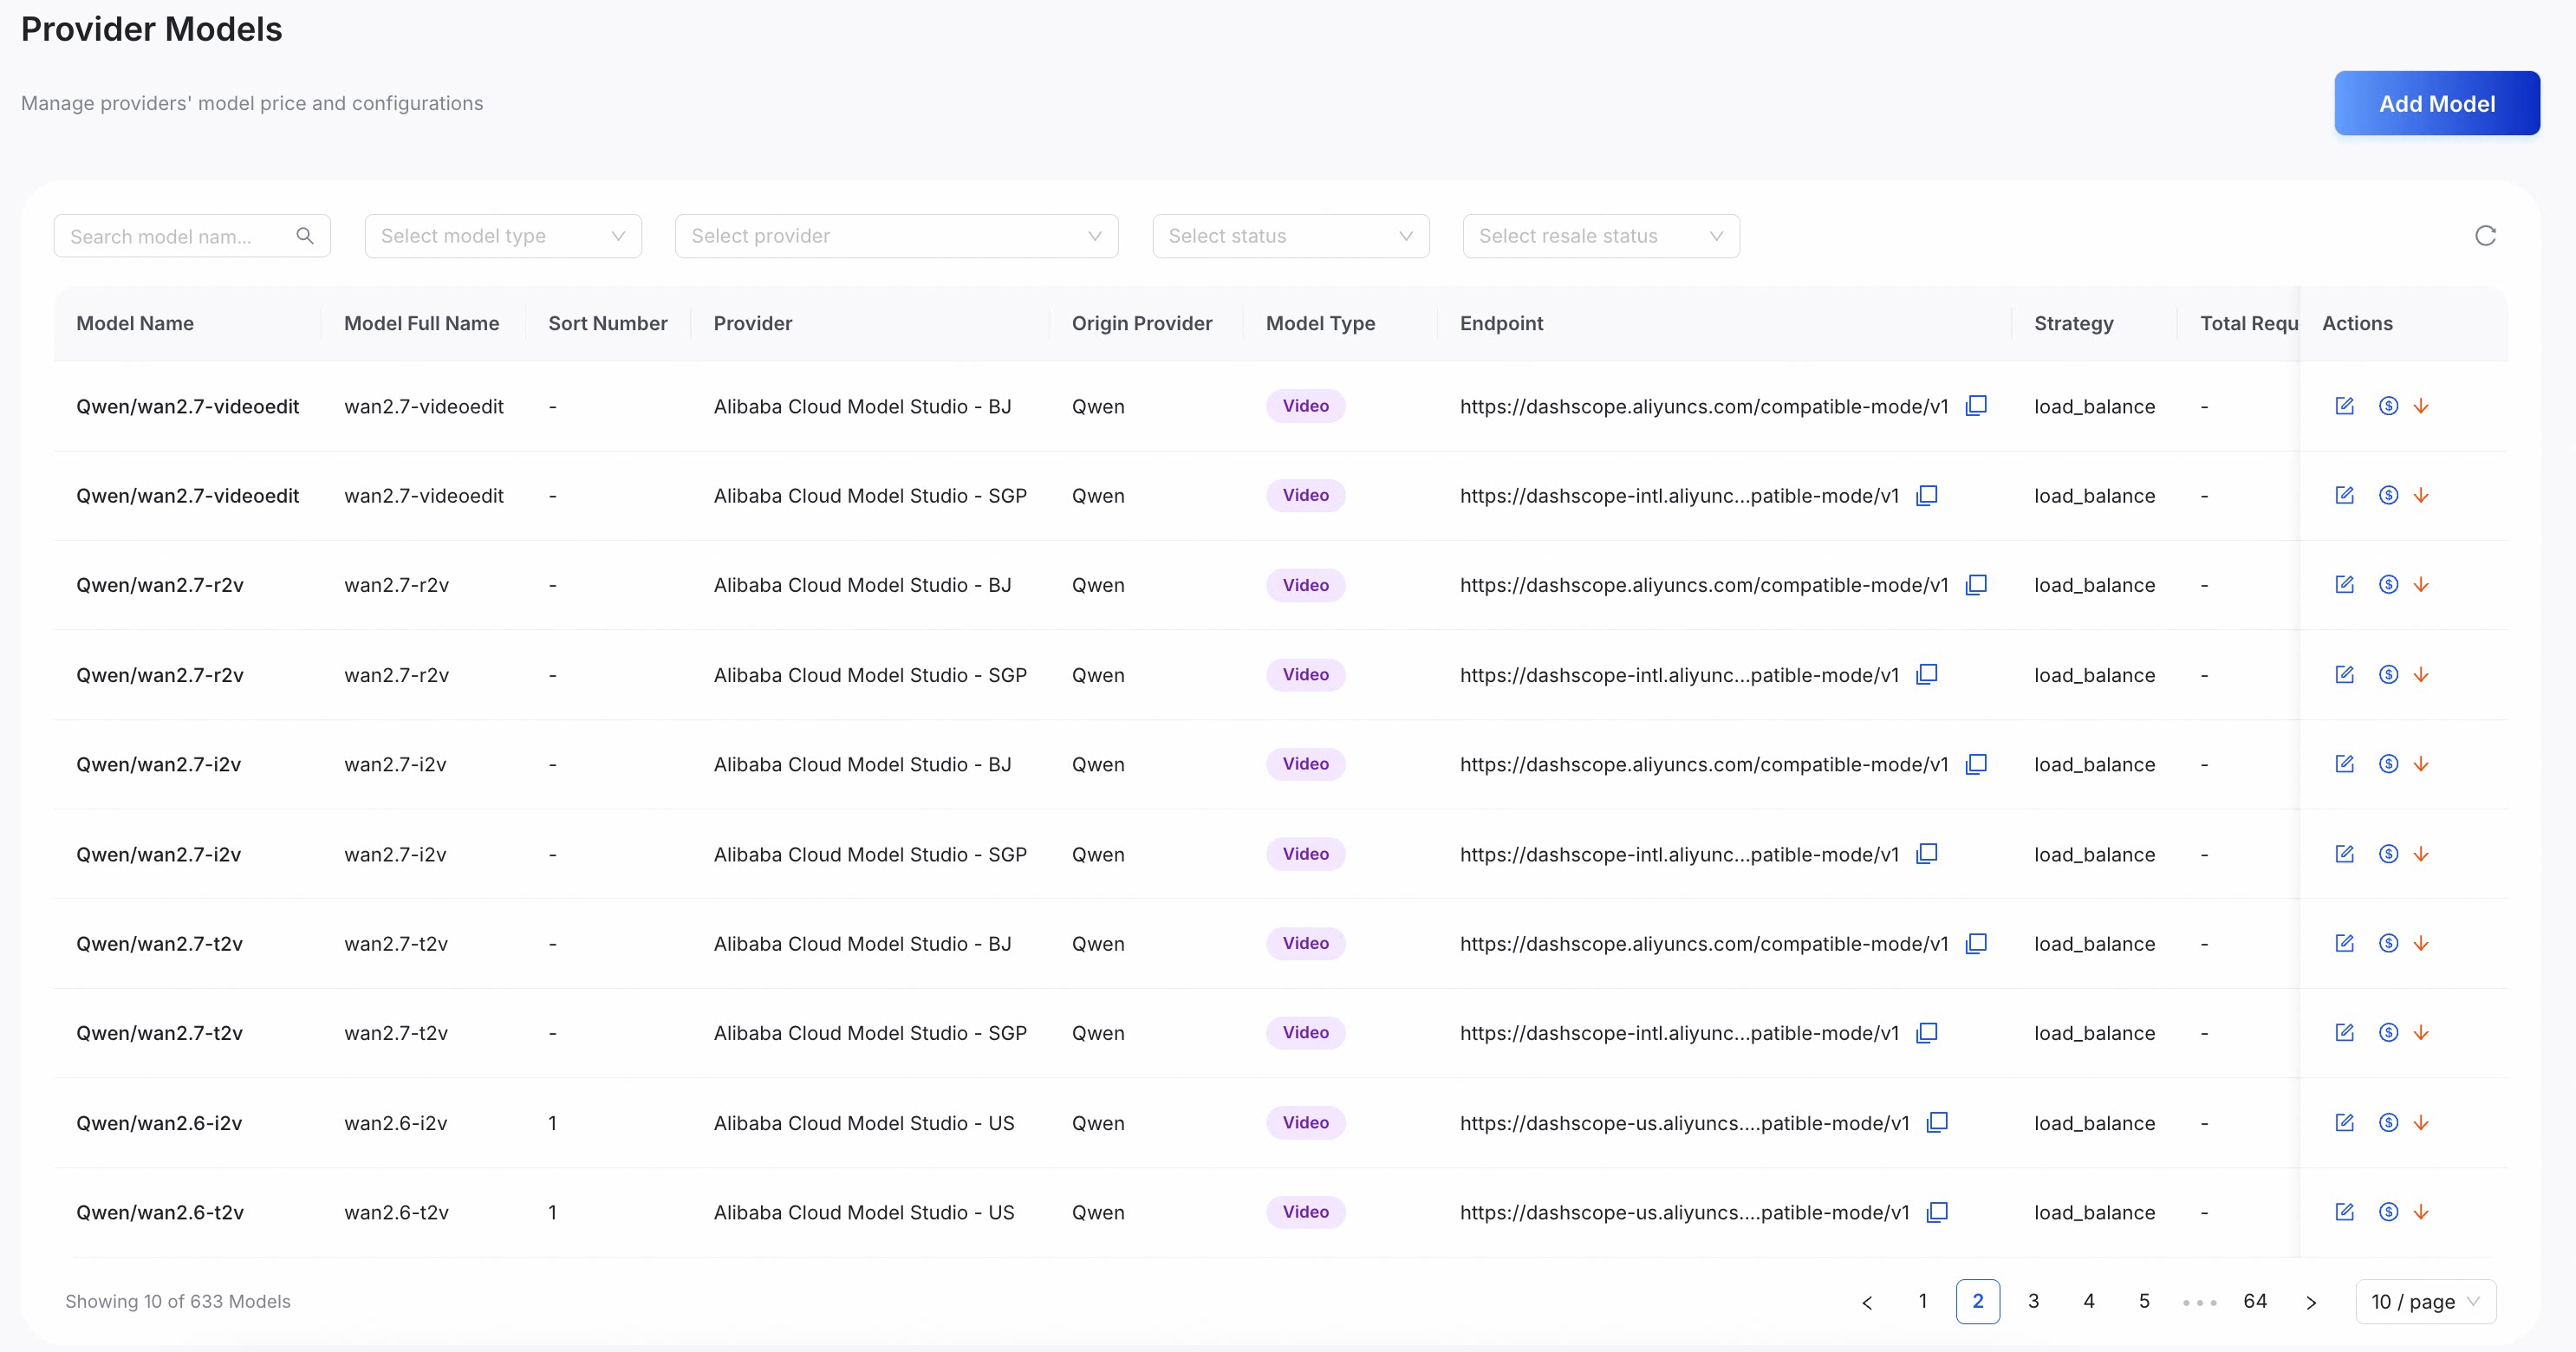
To add a new model, click the Add Model button in the top-right corner.
Add a model
Clicking Add Model opens a form where you define the model's identity and capabilities. Fill in the fields based on the model's specifications from the upstream provider.
| 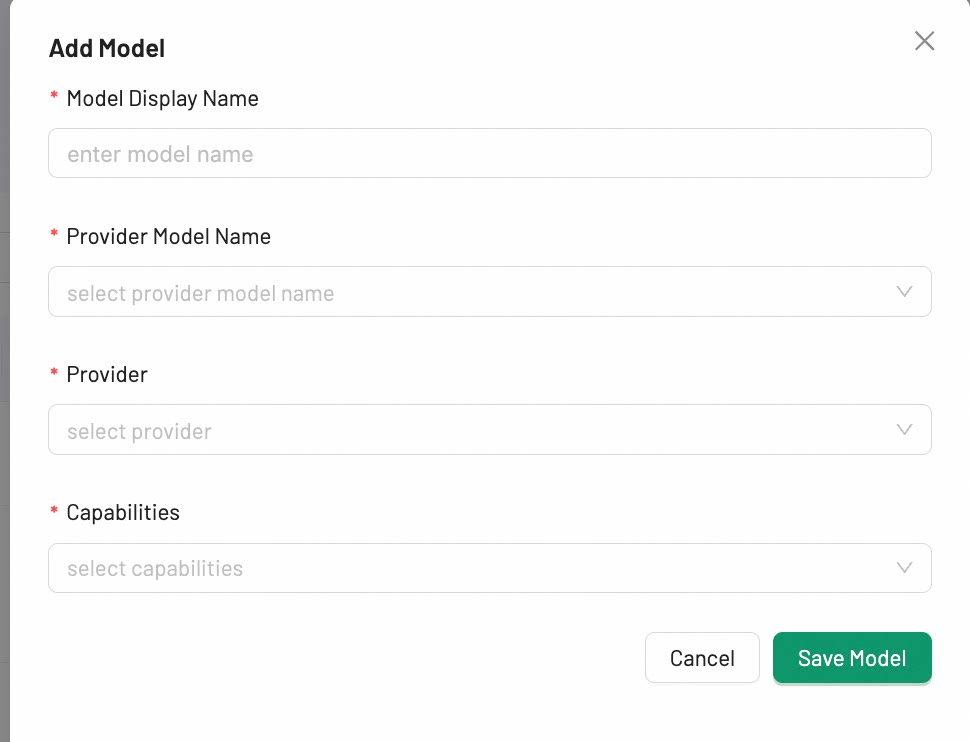 |
After filling in the details, click Save Model. The model will now appear in the Provider Models list.
Define model costs
After adding a model, you must define its cost structure,this represents the price you pay to the upstream provider and is essential for profit tracking.
Pricing Configuration
For most models, a single tier with a Context Range of 0 to ∞ (infinity) is sufficient. To create more complex pricing structures, such as charging different rates for larger contexts, click Add Tier.
Within each tier, you set the specific prices you will charge customers, typically per 1 million tokens (/M tokens). Fill in only the fields relevant to the model's capabilities.
|  |
You can refer to the official model pricing page for the exact cost.
After filling in the relevant cost fields, click Save. To make the model available for setting pricing and visible to customers, click List Button to list the model.
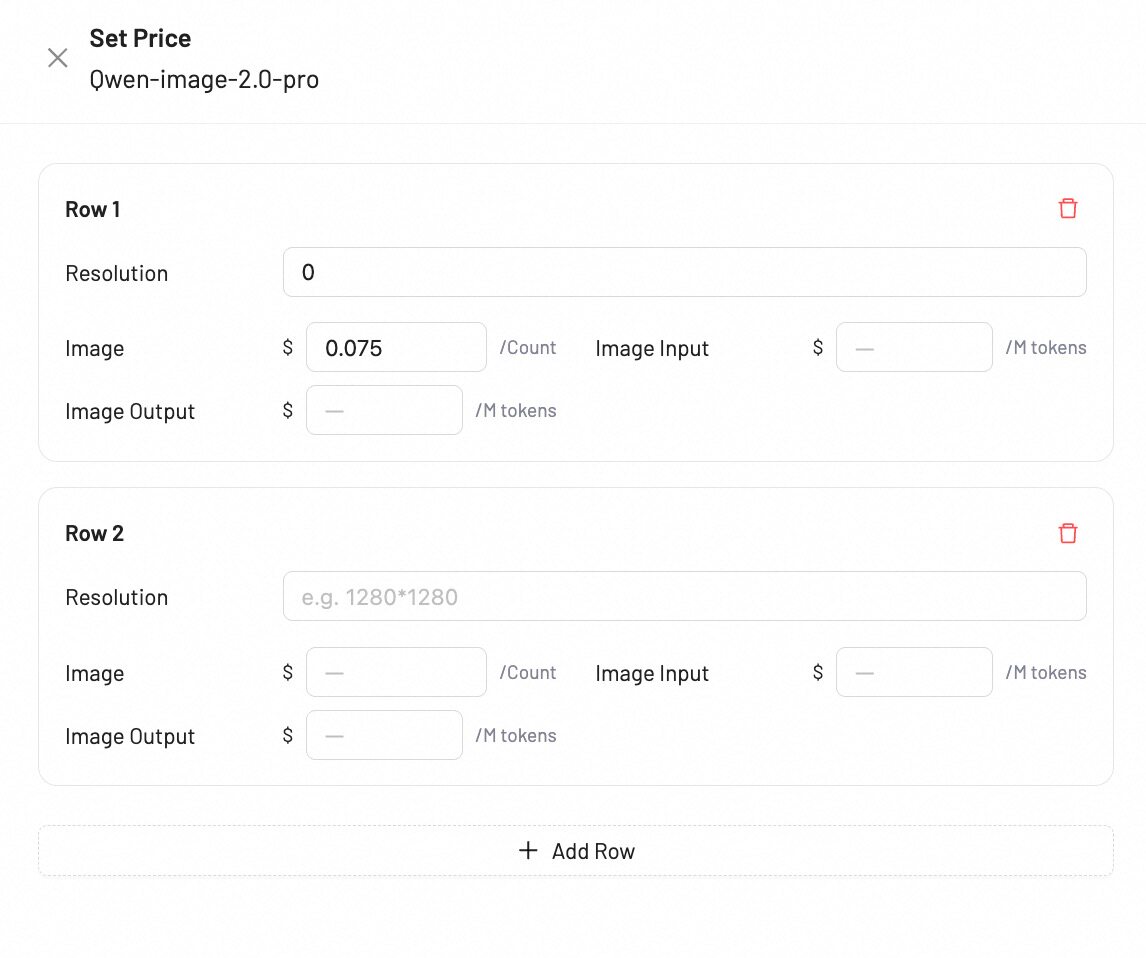
Image model pricing
For image generation models, pricing is configured per resolution tier. Each row represents a resolution level with its associated costs.
|  |
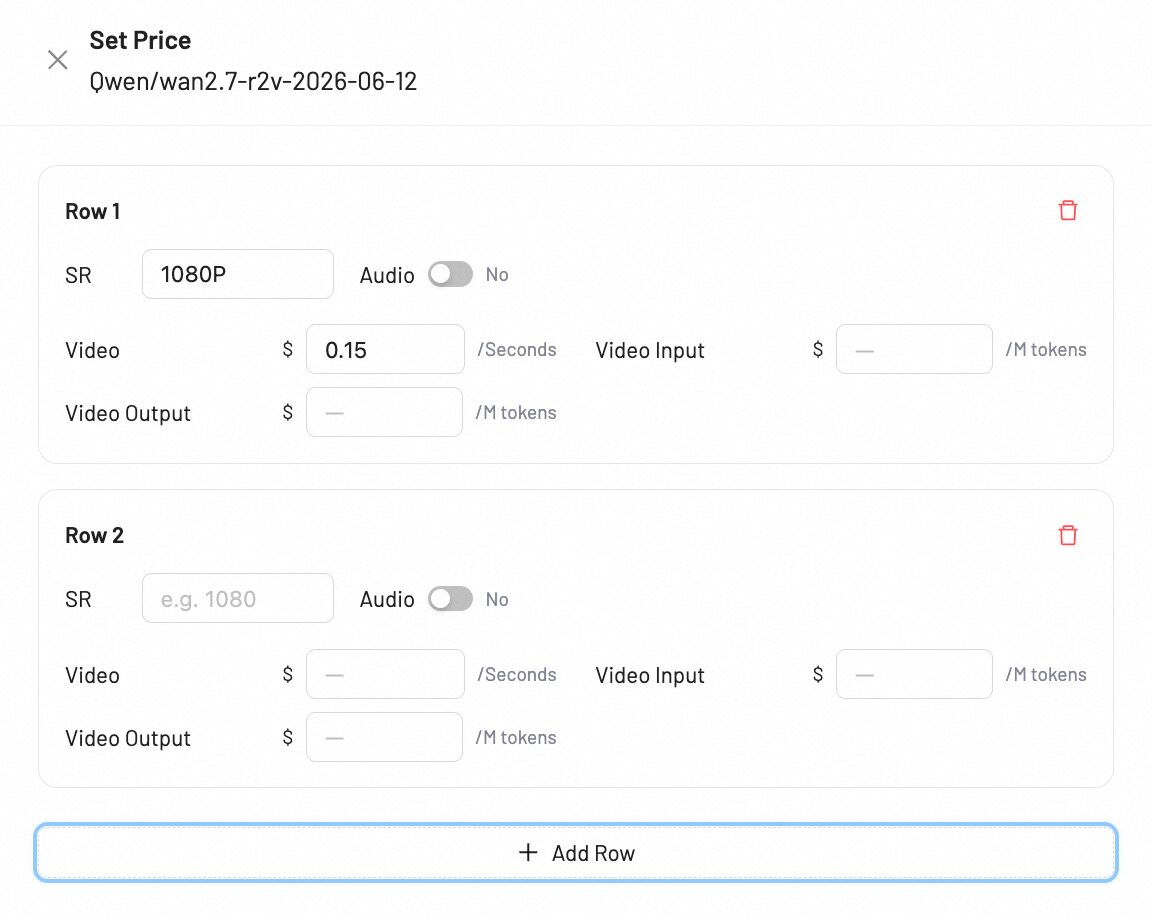
Video model pricing
For video generation models, pricing is configured per resolution tier. Each row represents a resolution level with its associated costs.
|  |
Step 3: Set model selling prices
After configuring a model's costs, the next step is to define its selling price and make it available to your end-users.
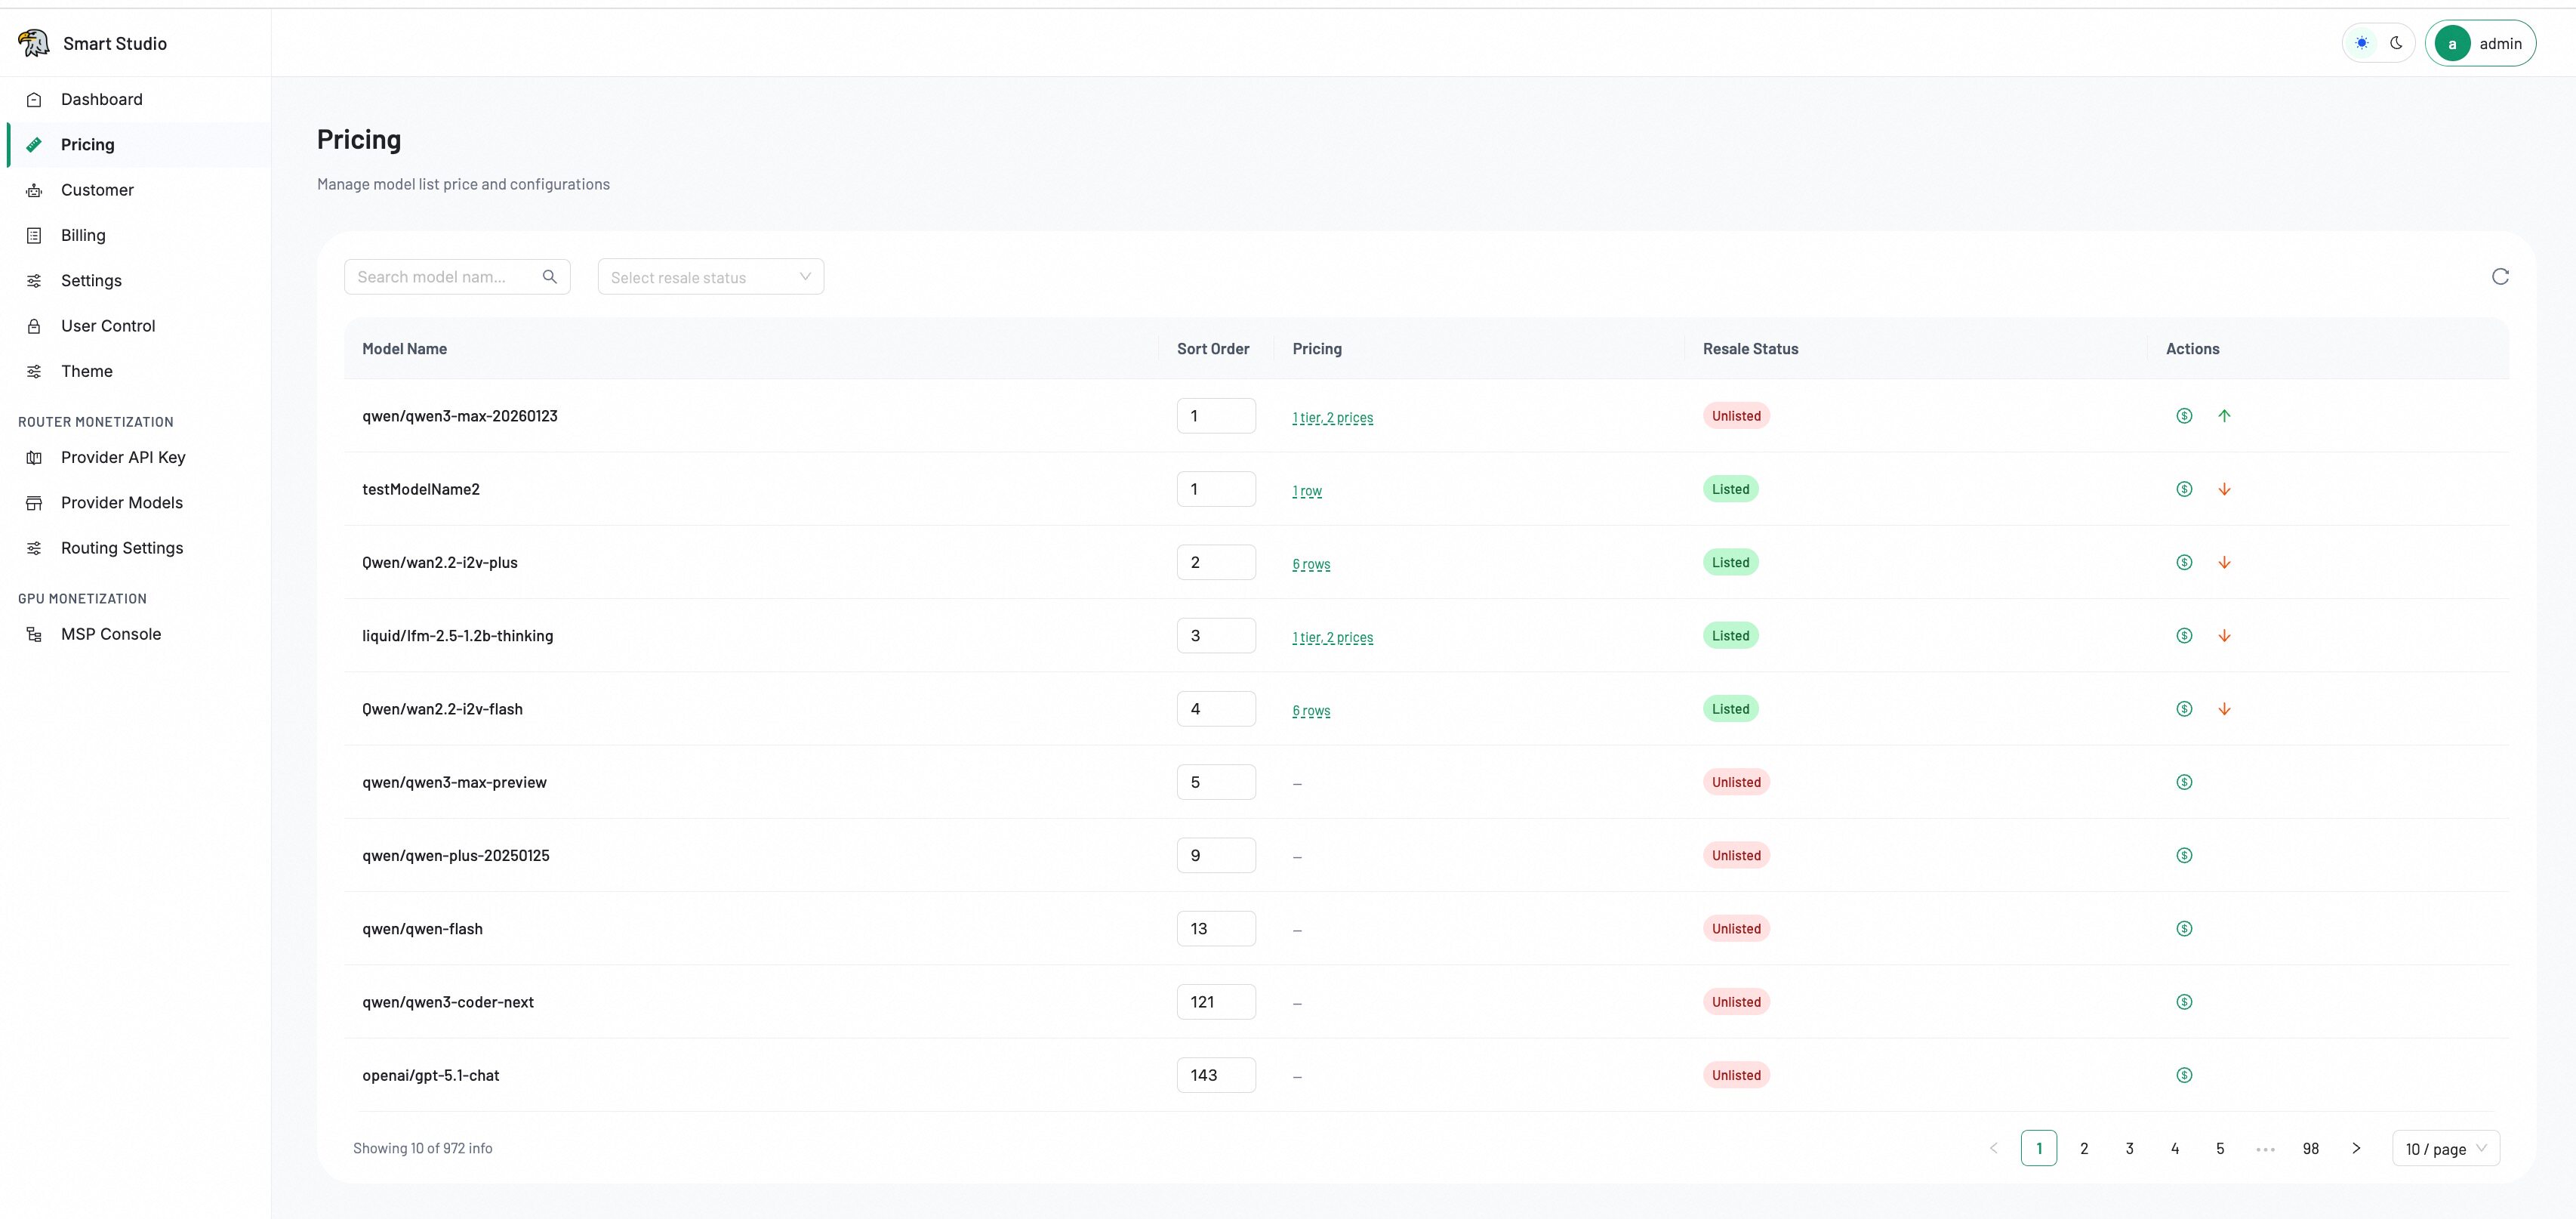
Navigate to the Pricing page. This page lists all models that you have listed for resale in Step 2, showing the cost price for your reference.
-
Set the selling price for each model. The price-setting interface is identical to the one used for defining costs.
-
After entering the model prices and saving, click List button to make models available to the public.
-
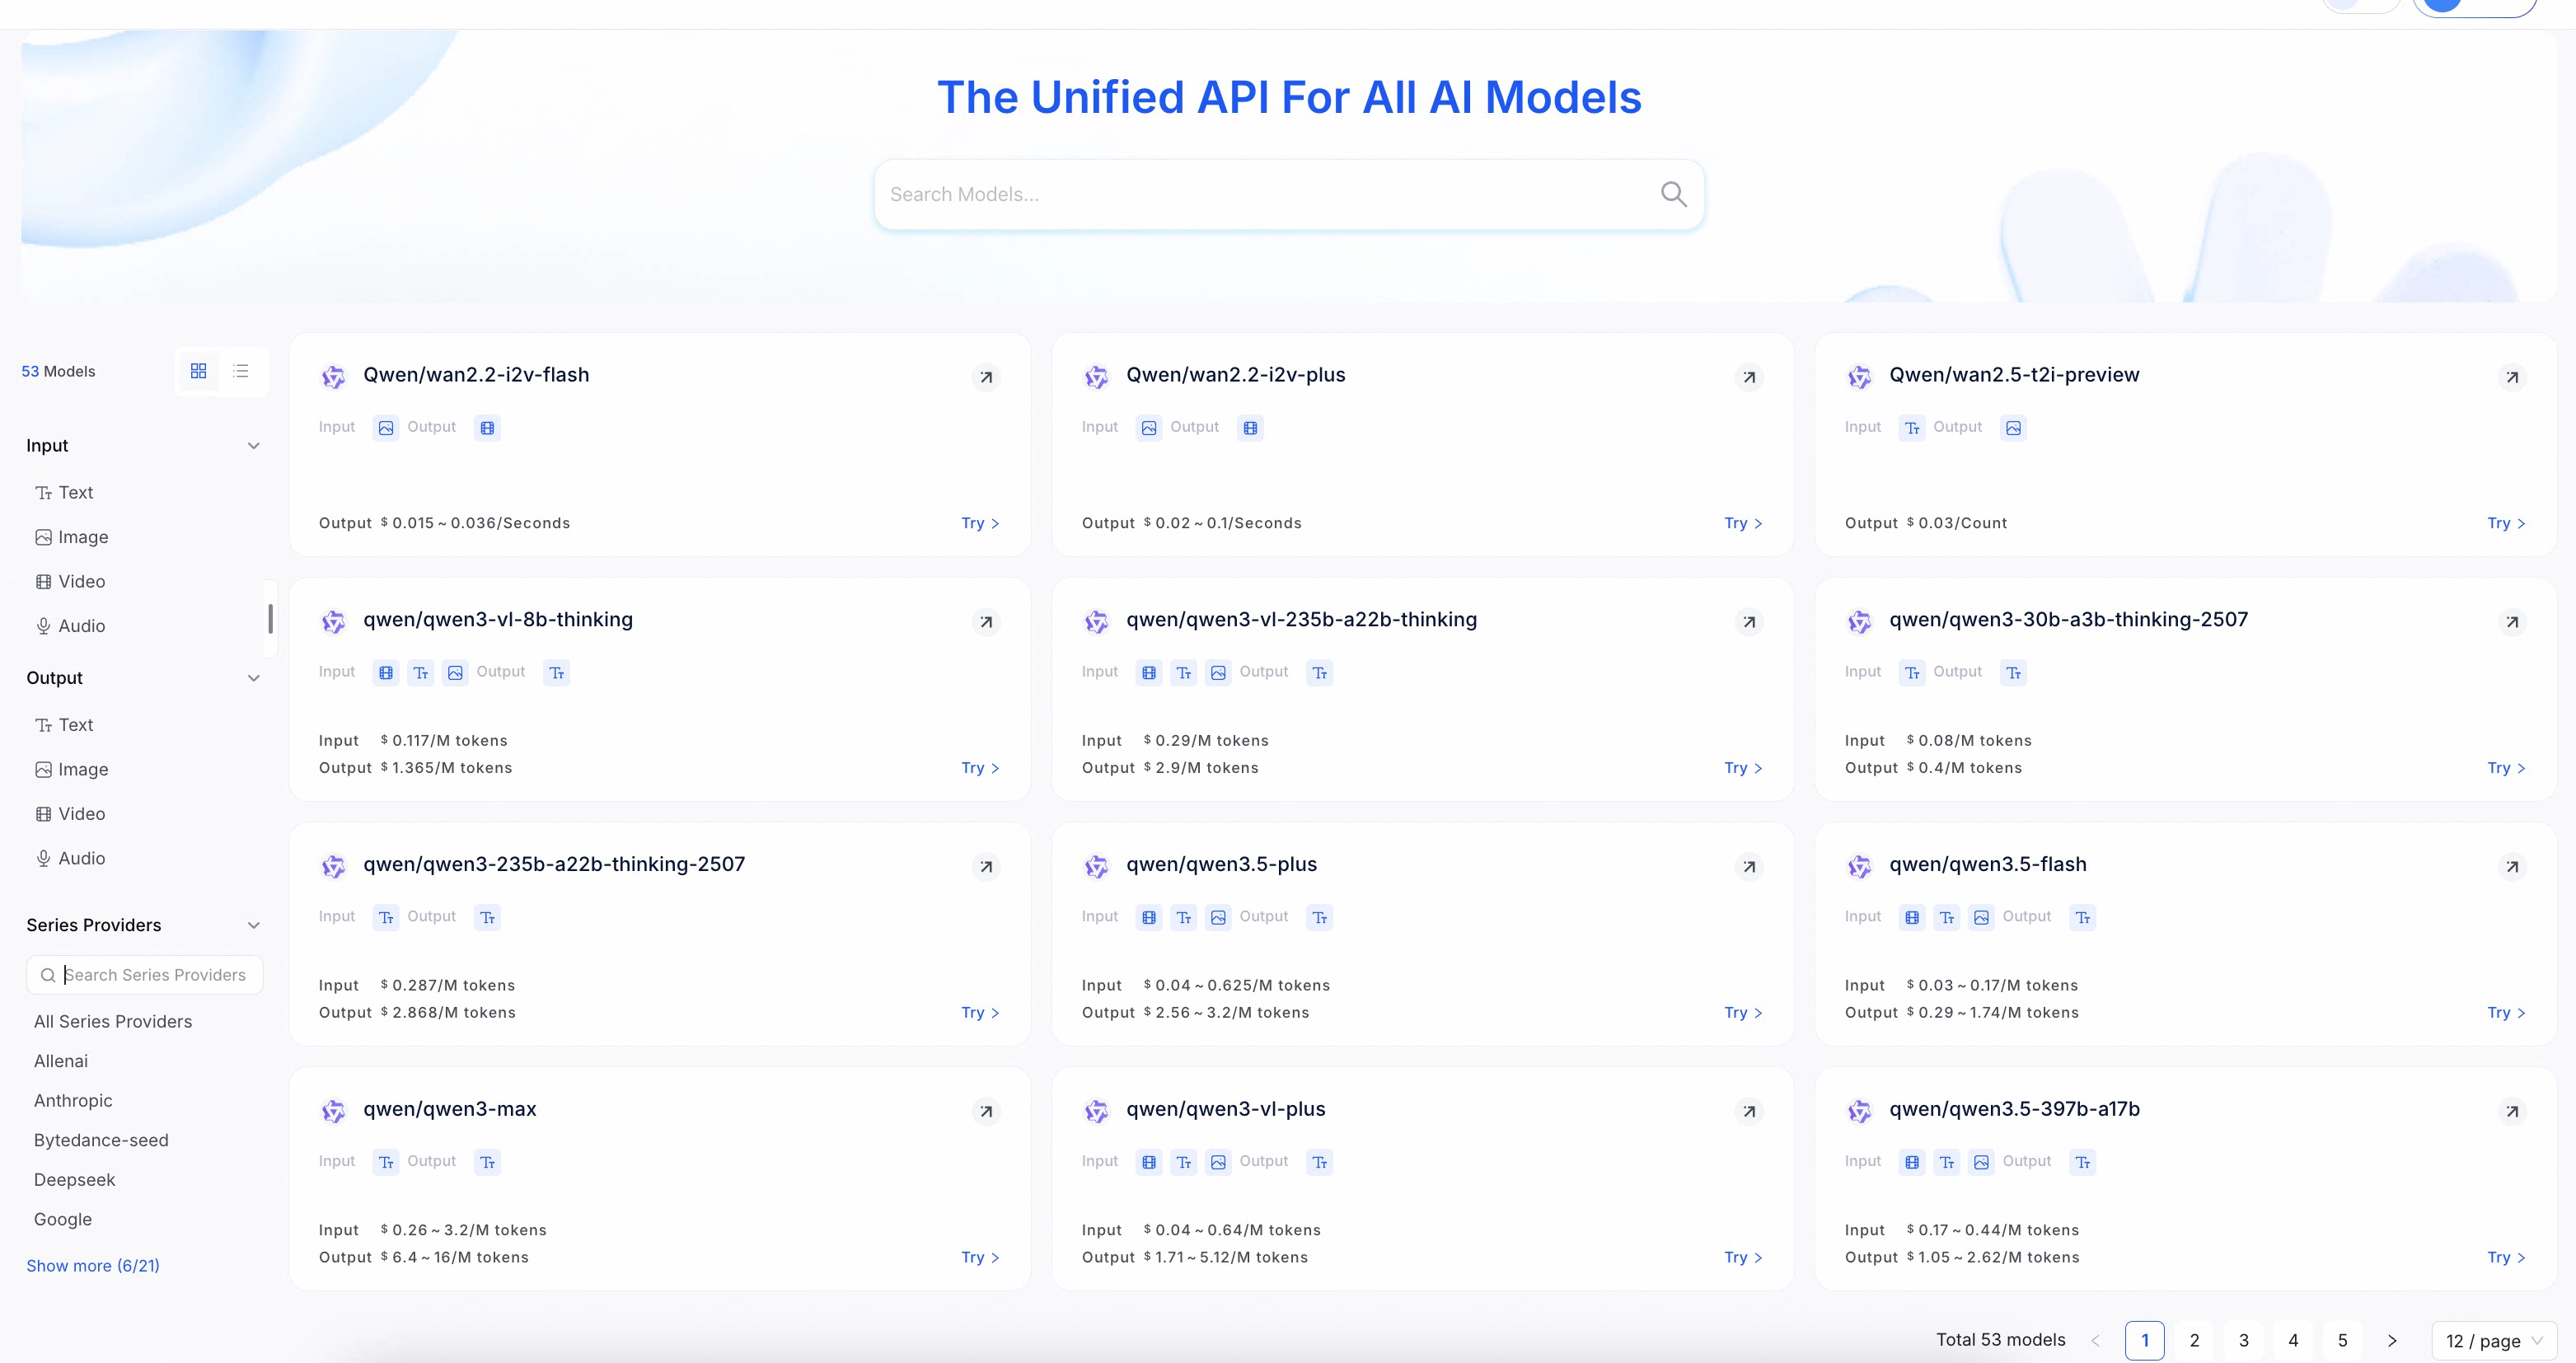
You can enter a number in the Sort Order field to control the display order of listed models in the Model Gallery on the user console. Models with lower numbers appear first.
Once listed, the model becomes visible and accessible to your end-users in user console. Your customers can use and call these models via API.
Set customer-specific pricing
This feature allows you to set custom model prices for individual customers, overriding the standard public pricing.
Manage customers
Navigate to the Customer Management page. This page show all your customers, admin can add new users, set customer-specific pricing, offer free credits, reset passwords, and delete accounts.
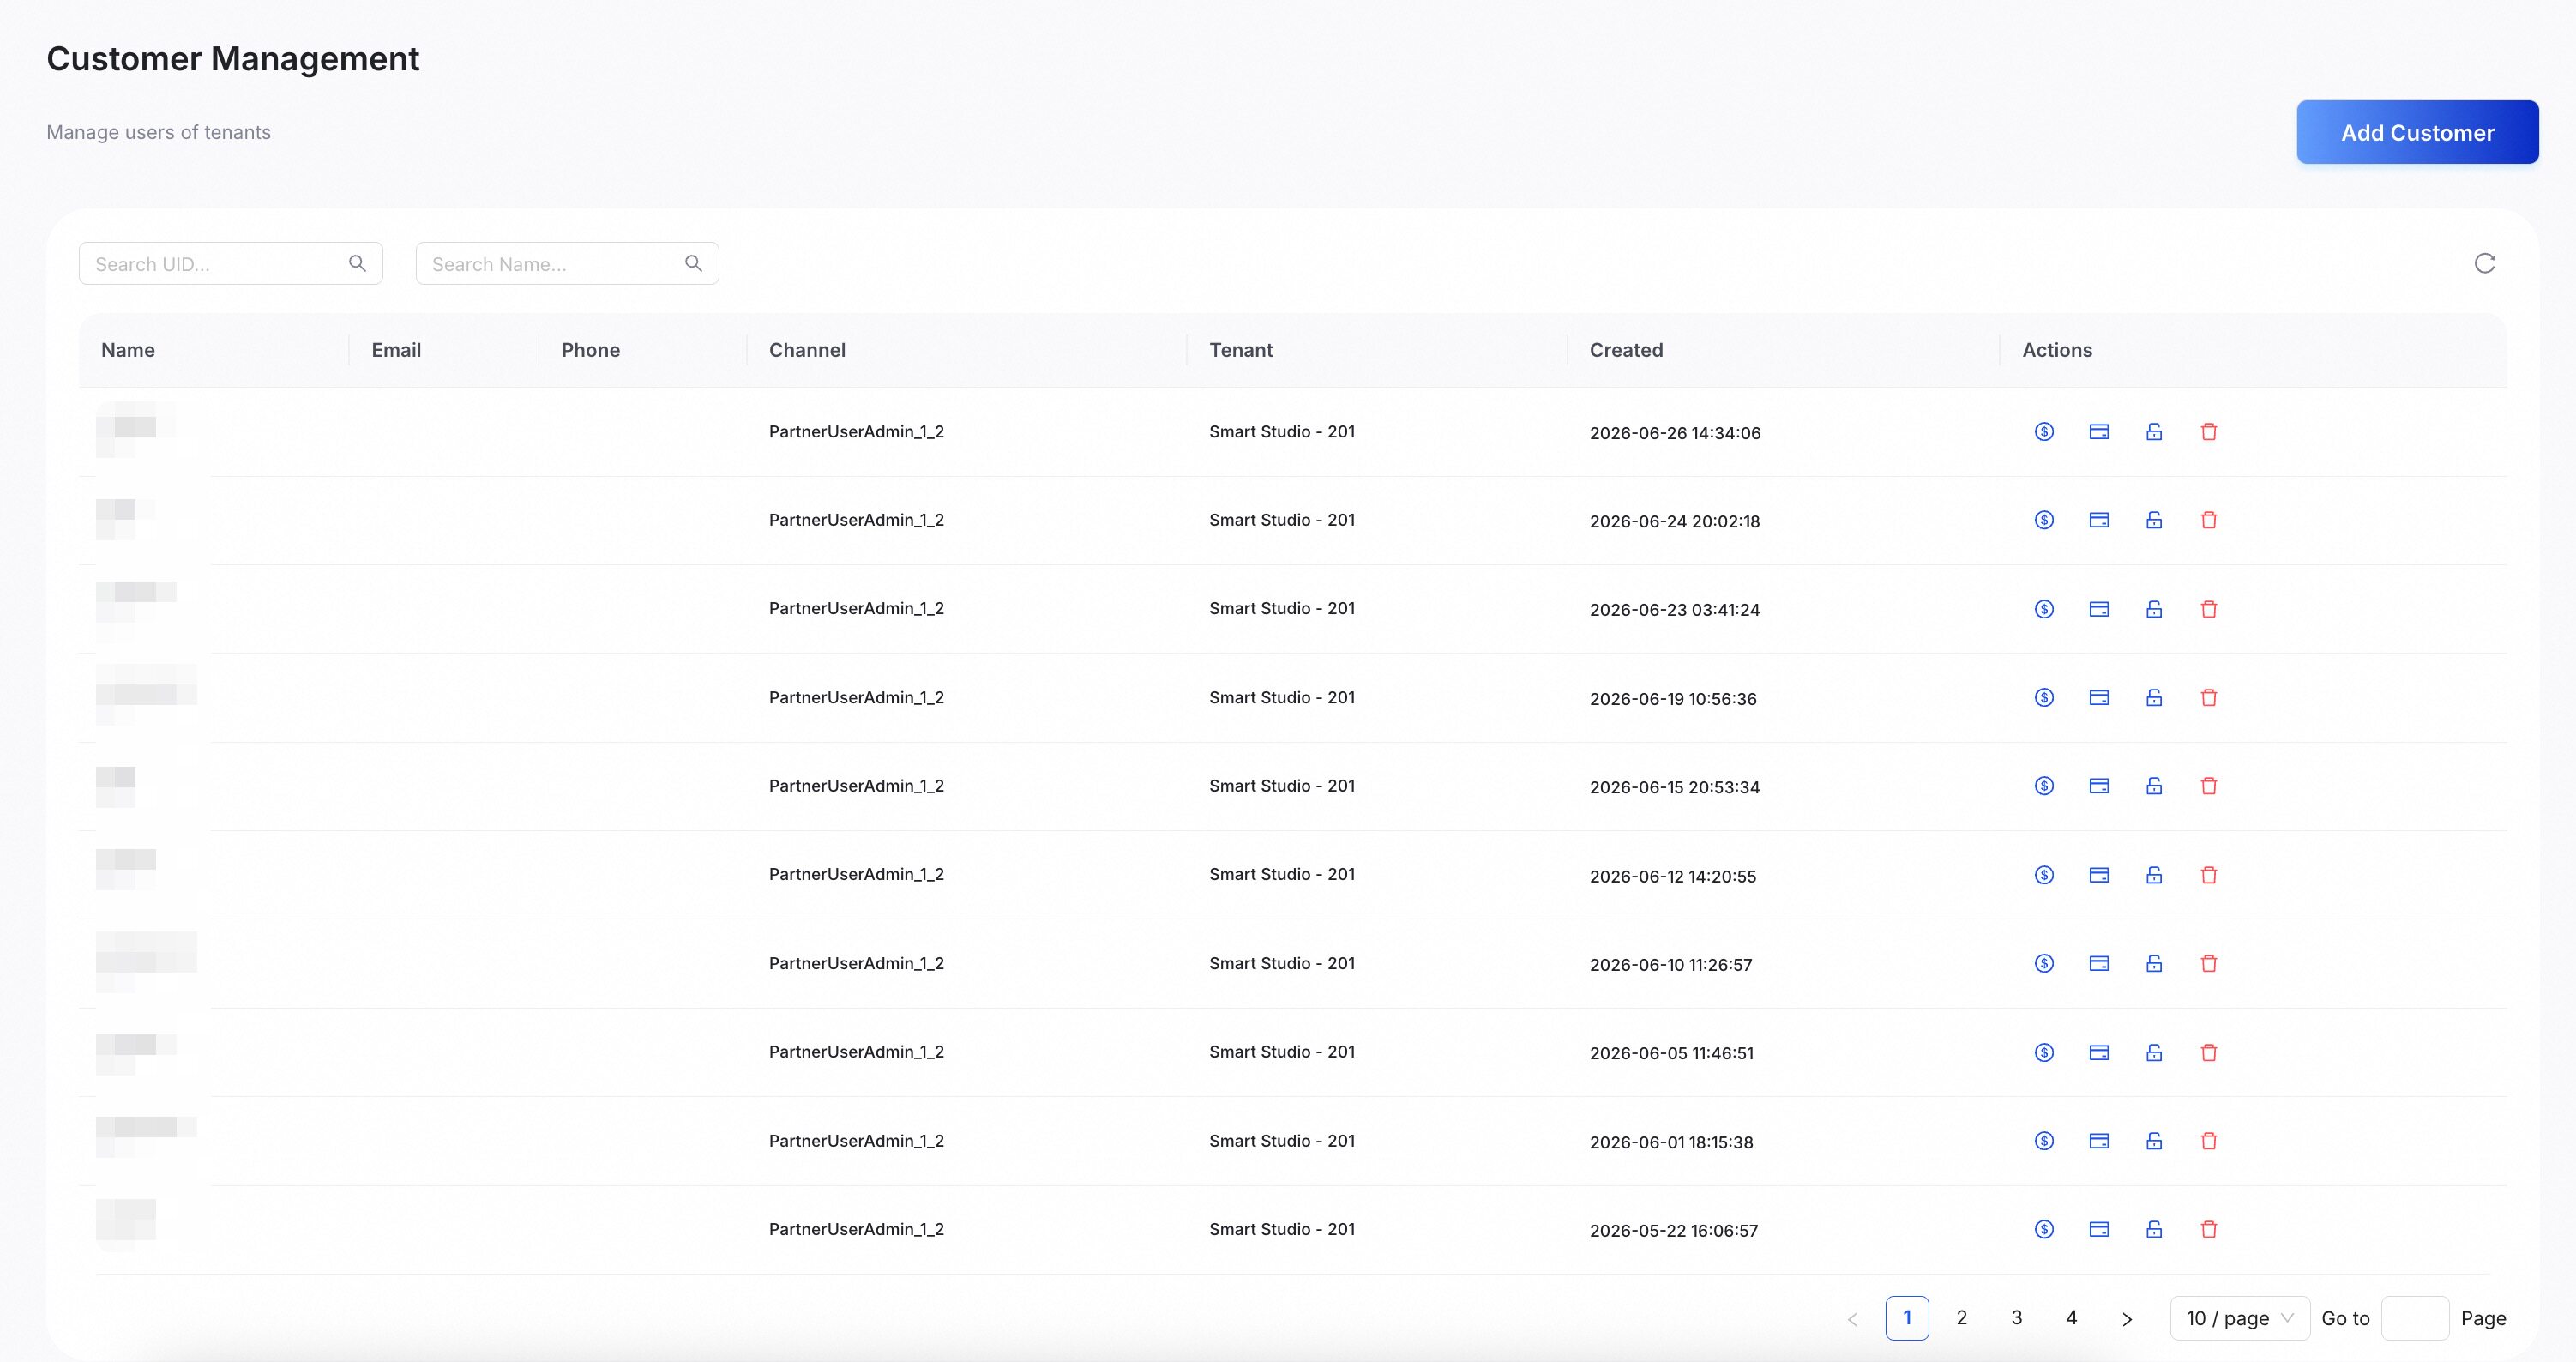
To set a custom price for a user, select the user and click the Pricing Settings icon.
Configure custom pricing
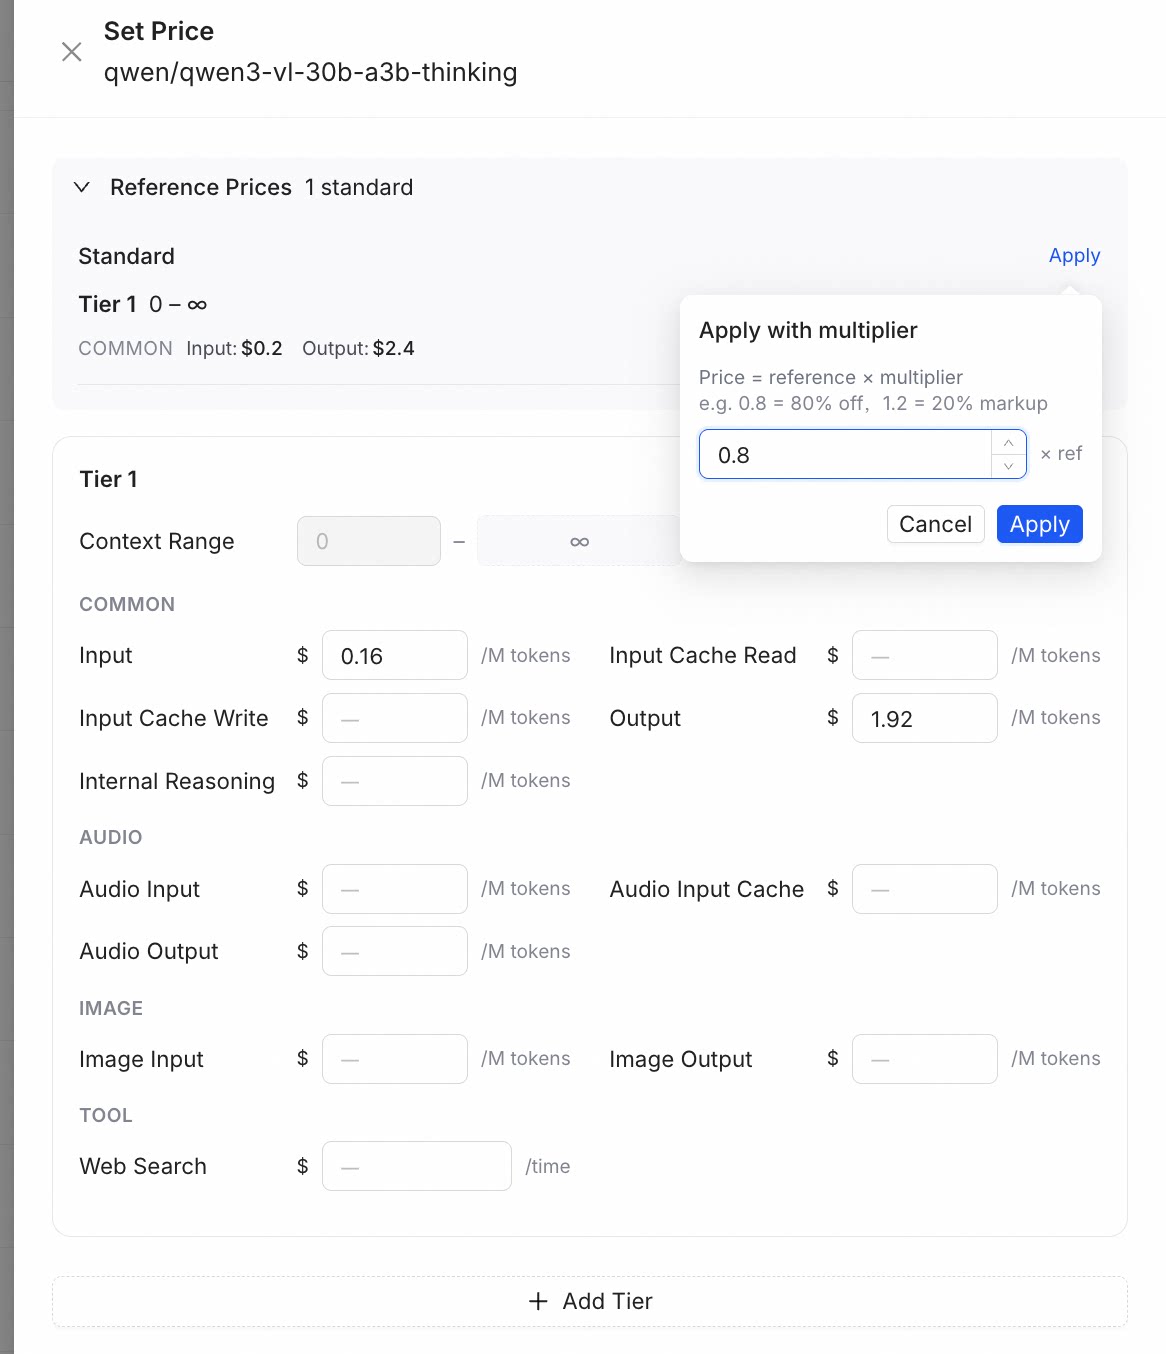
Clicking the Pricing Settings icon opens the model pricing page for that customer. Here, you set the custom price for each model.
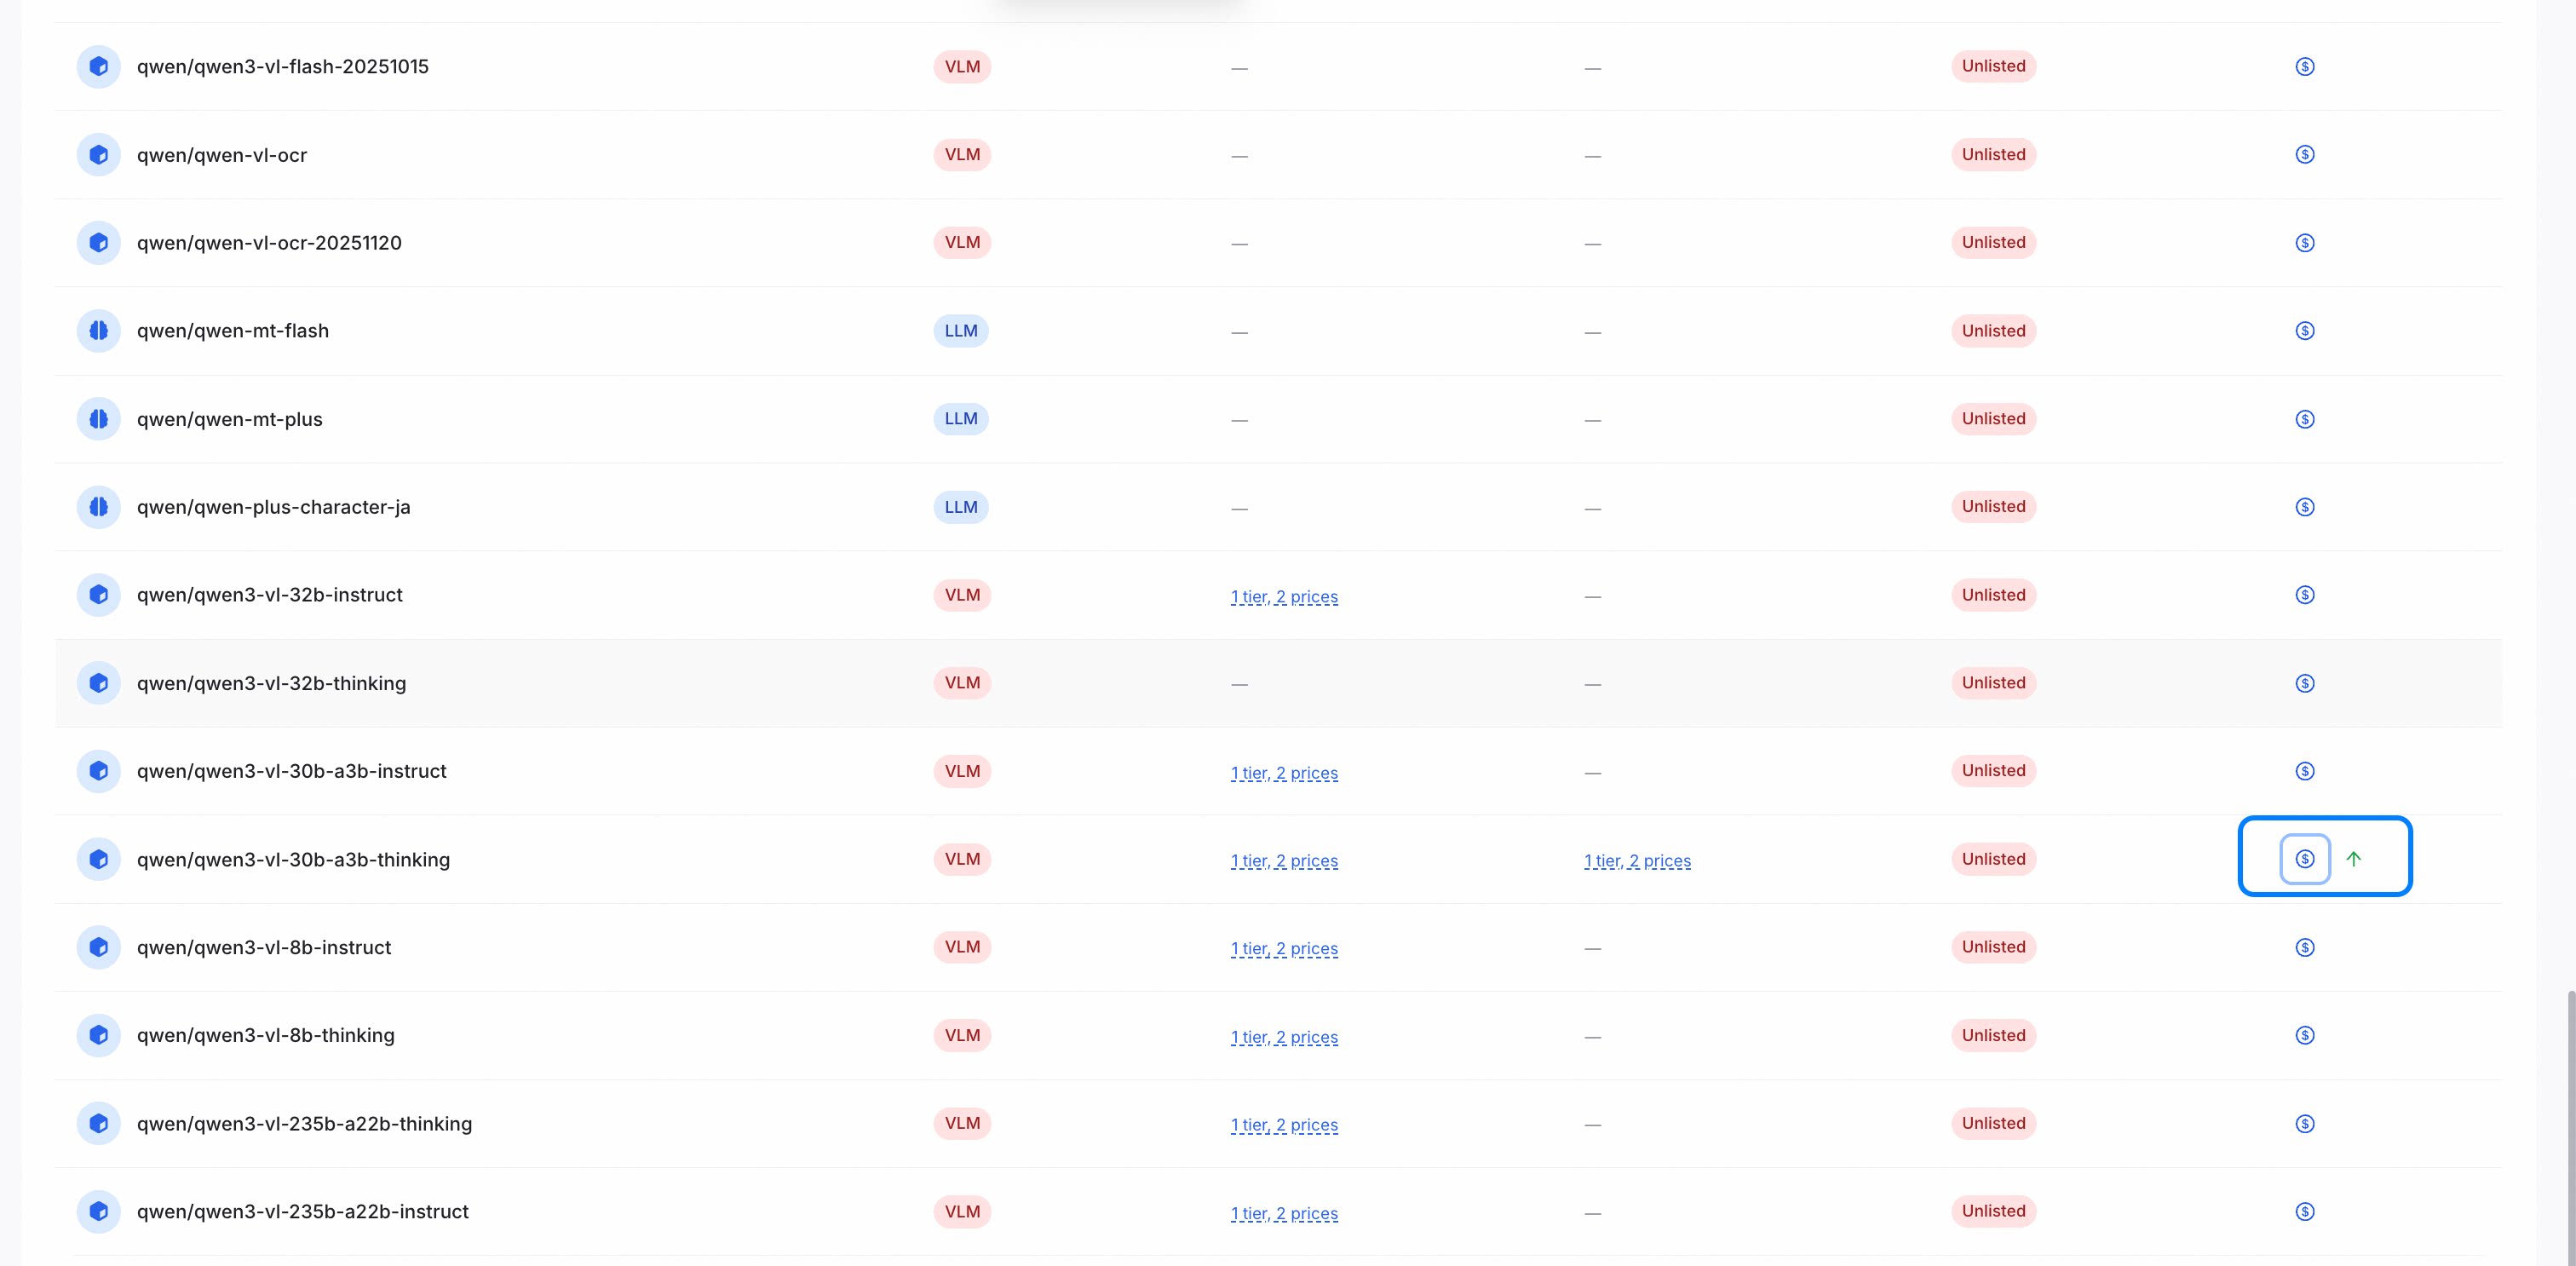
There are two methods for setting the price:
-
Apply a Multiplier: Click Apply next to the Reference Prices. Enter a multiplier in the dialog. For example, 0.8 is a 20% discount. The system then calculates and populates the price fields.
-
Manual Entry: Enter your prices directly into the Input and Output fields. This method offers maximum flexibility.
After saving your price, click the List button to make sure the custom discount is active for this customer.
Apply batch discounts
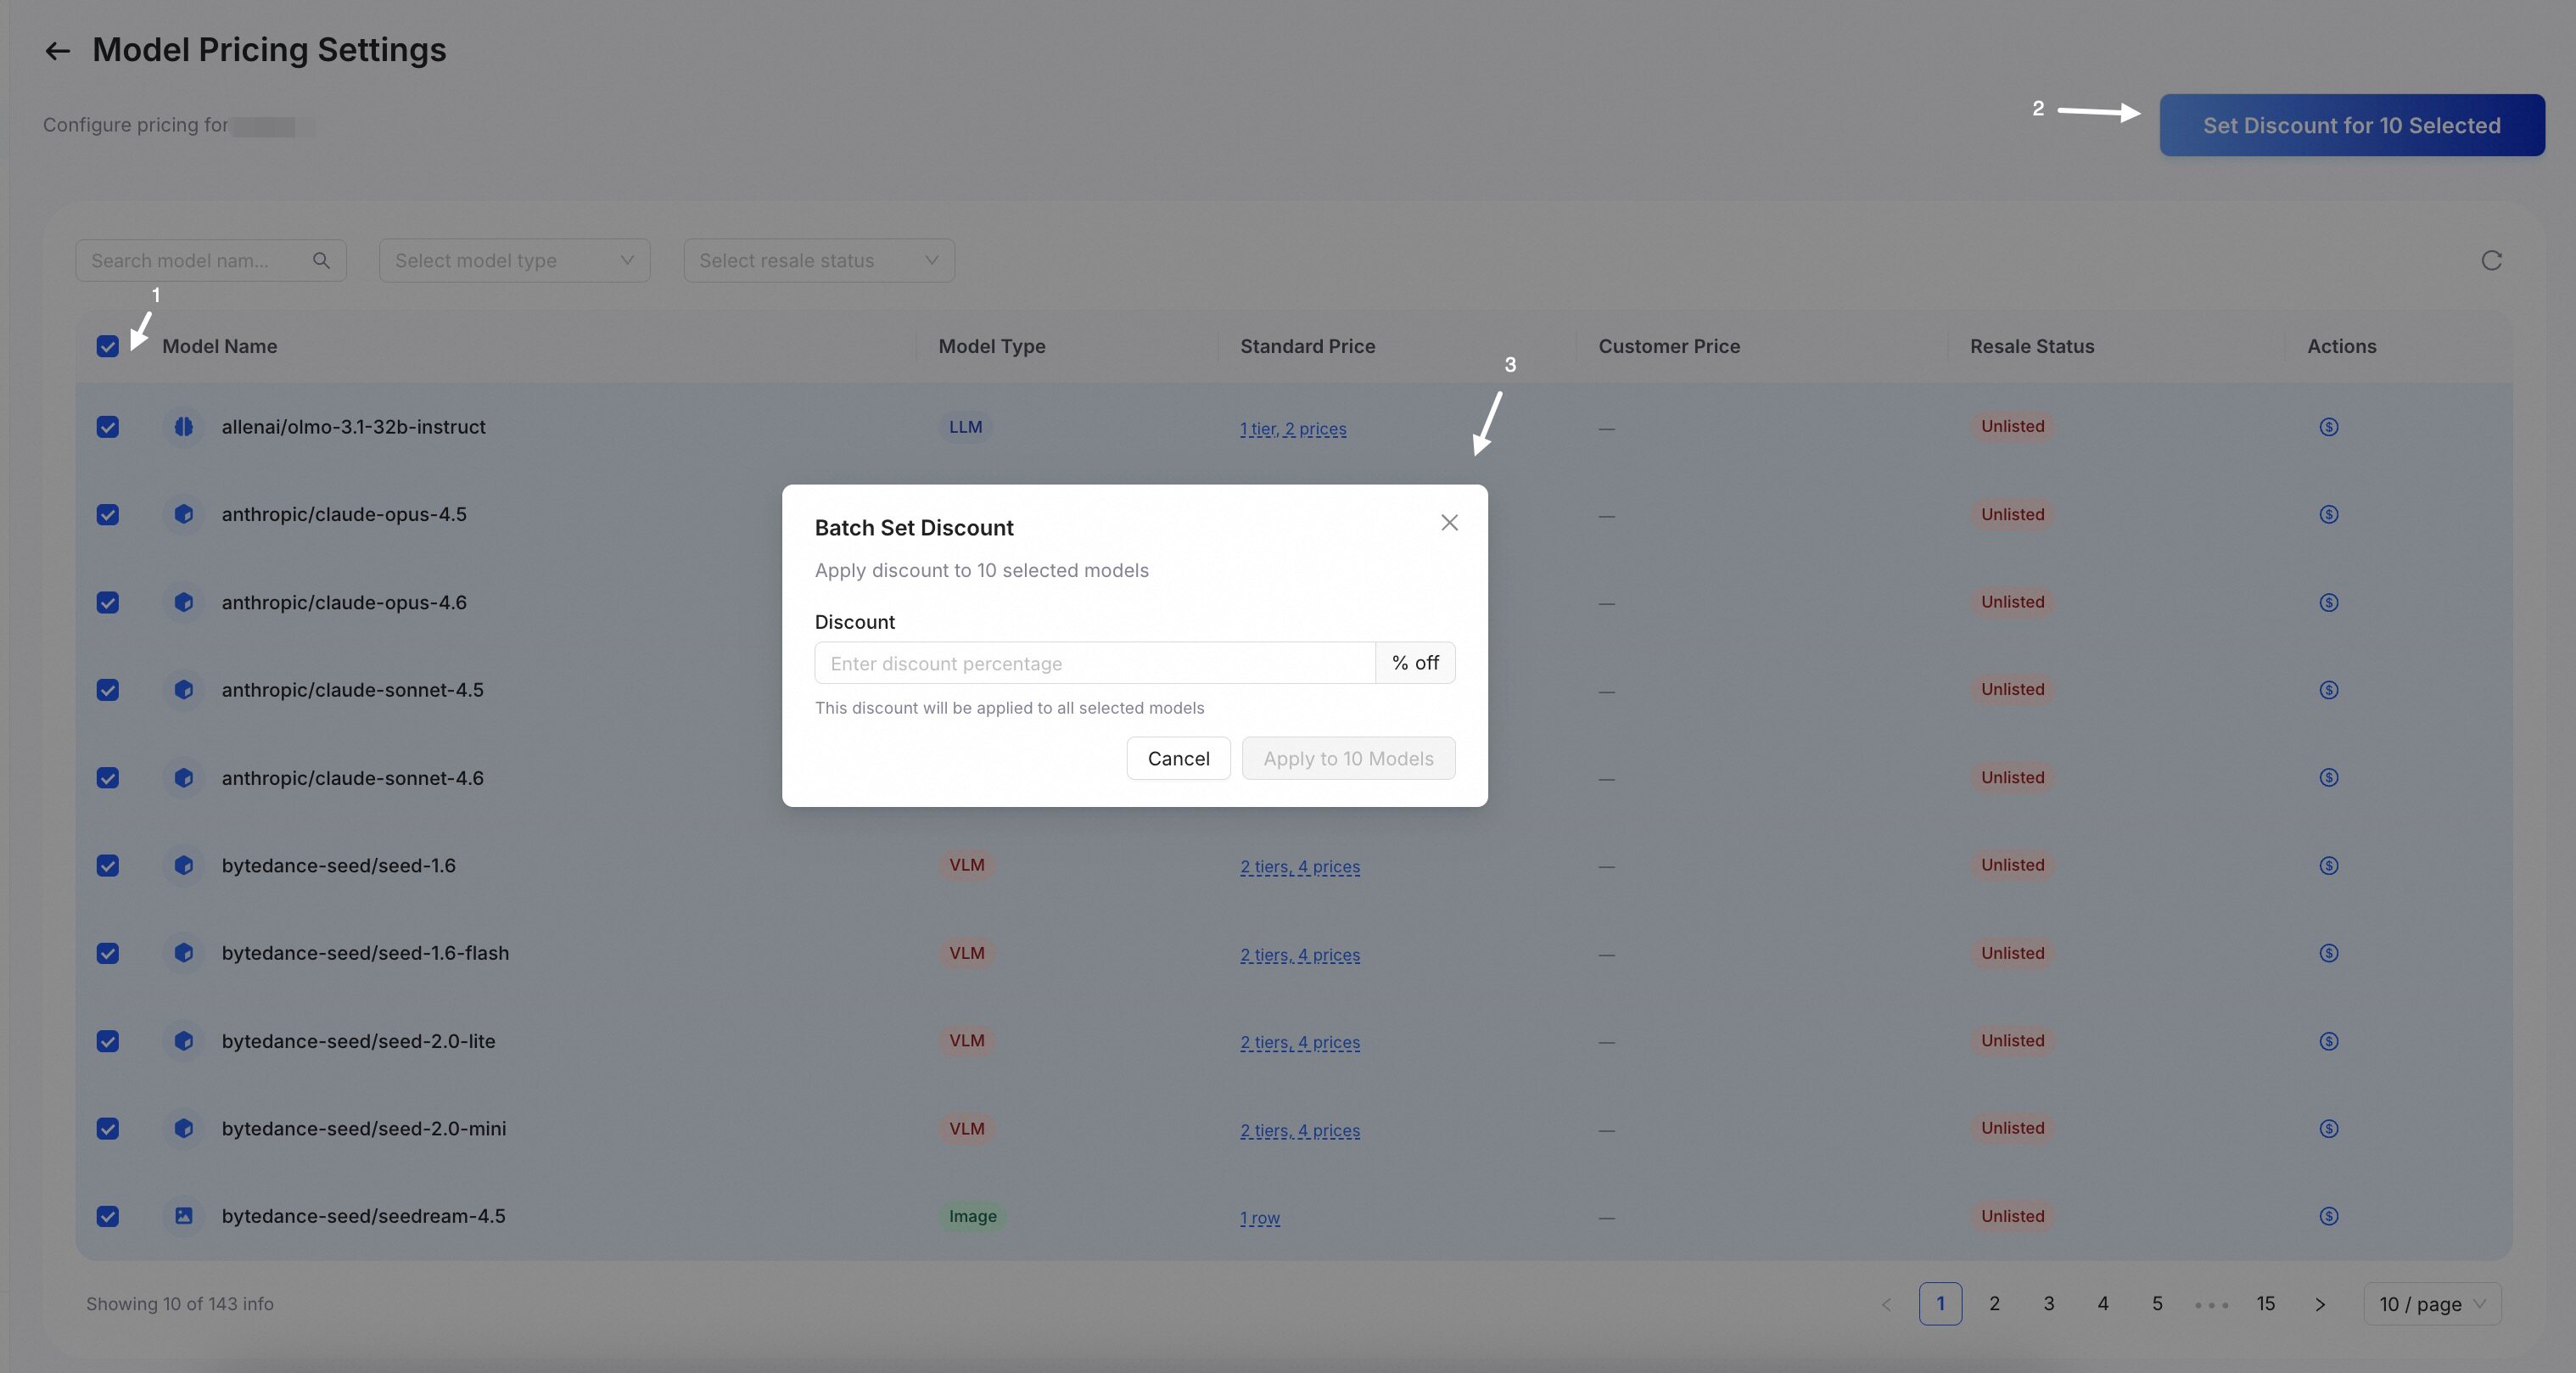
If you want to apply the same discount to many models at once, select the models in the list, enter the discount percentage (e.g., 20 for 20% off), and the system will updates all selected models' prices in one step.
Grant free credits (optional)
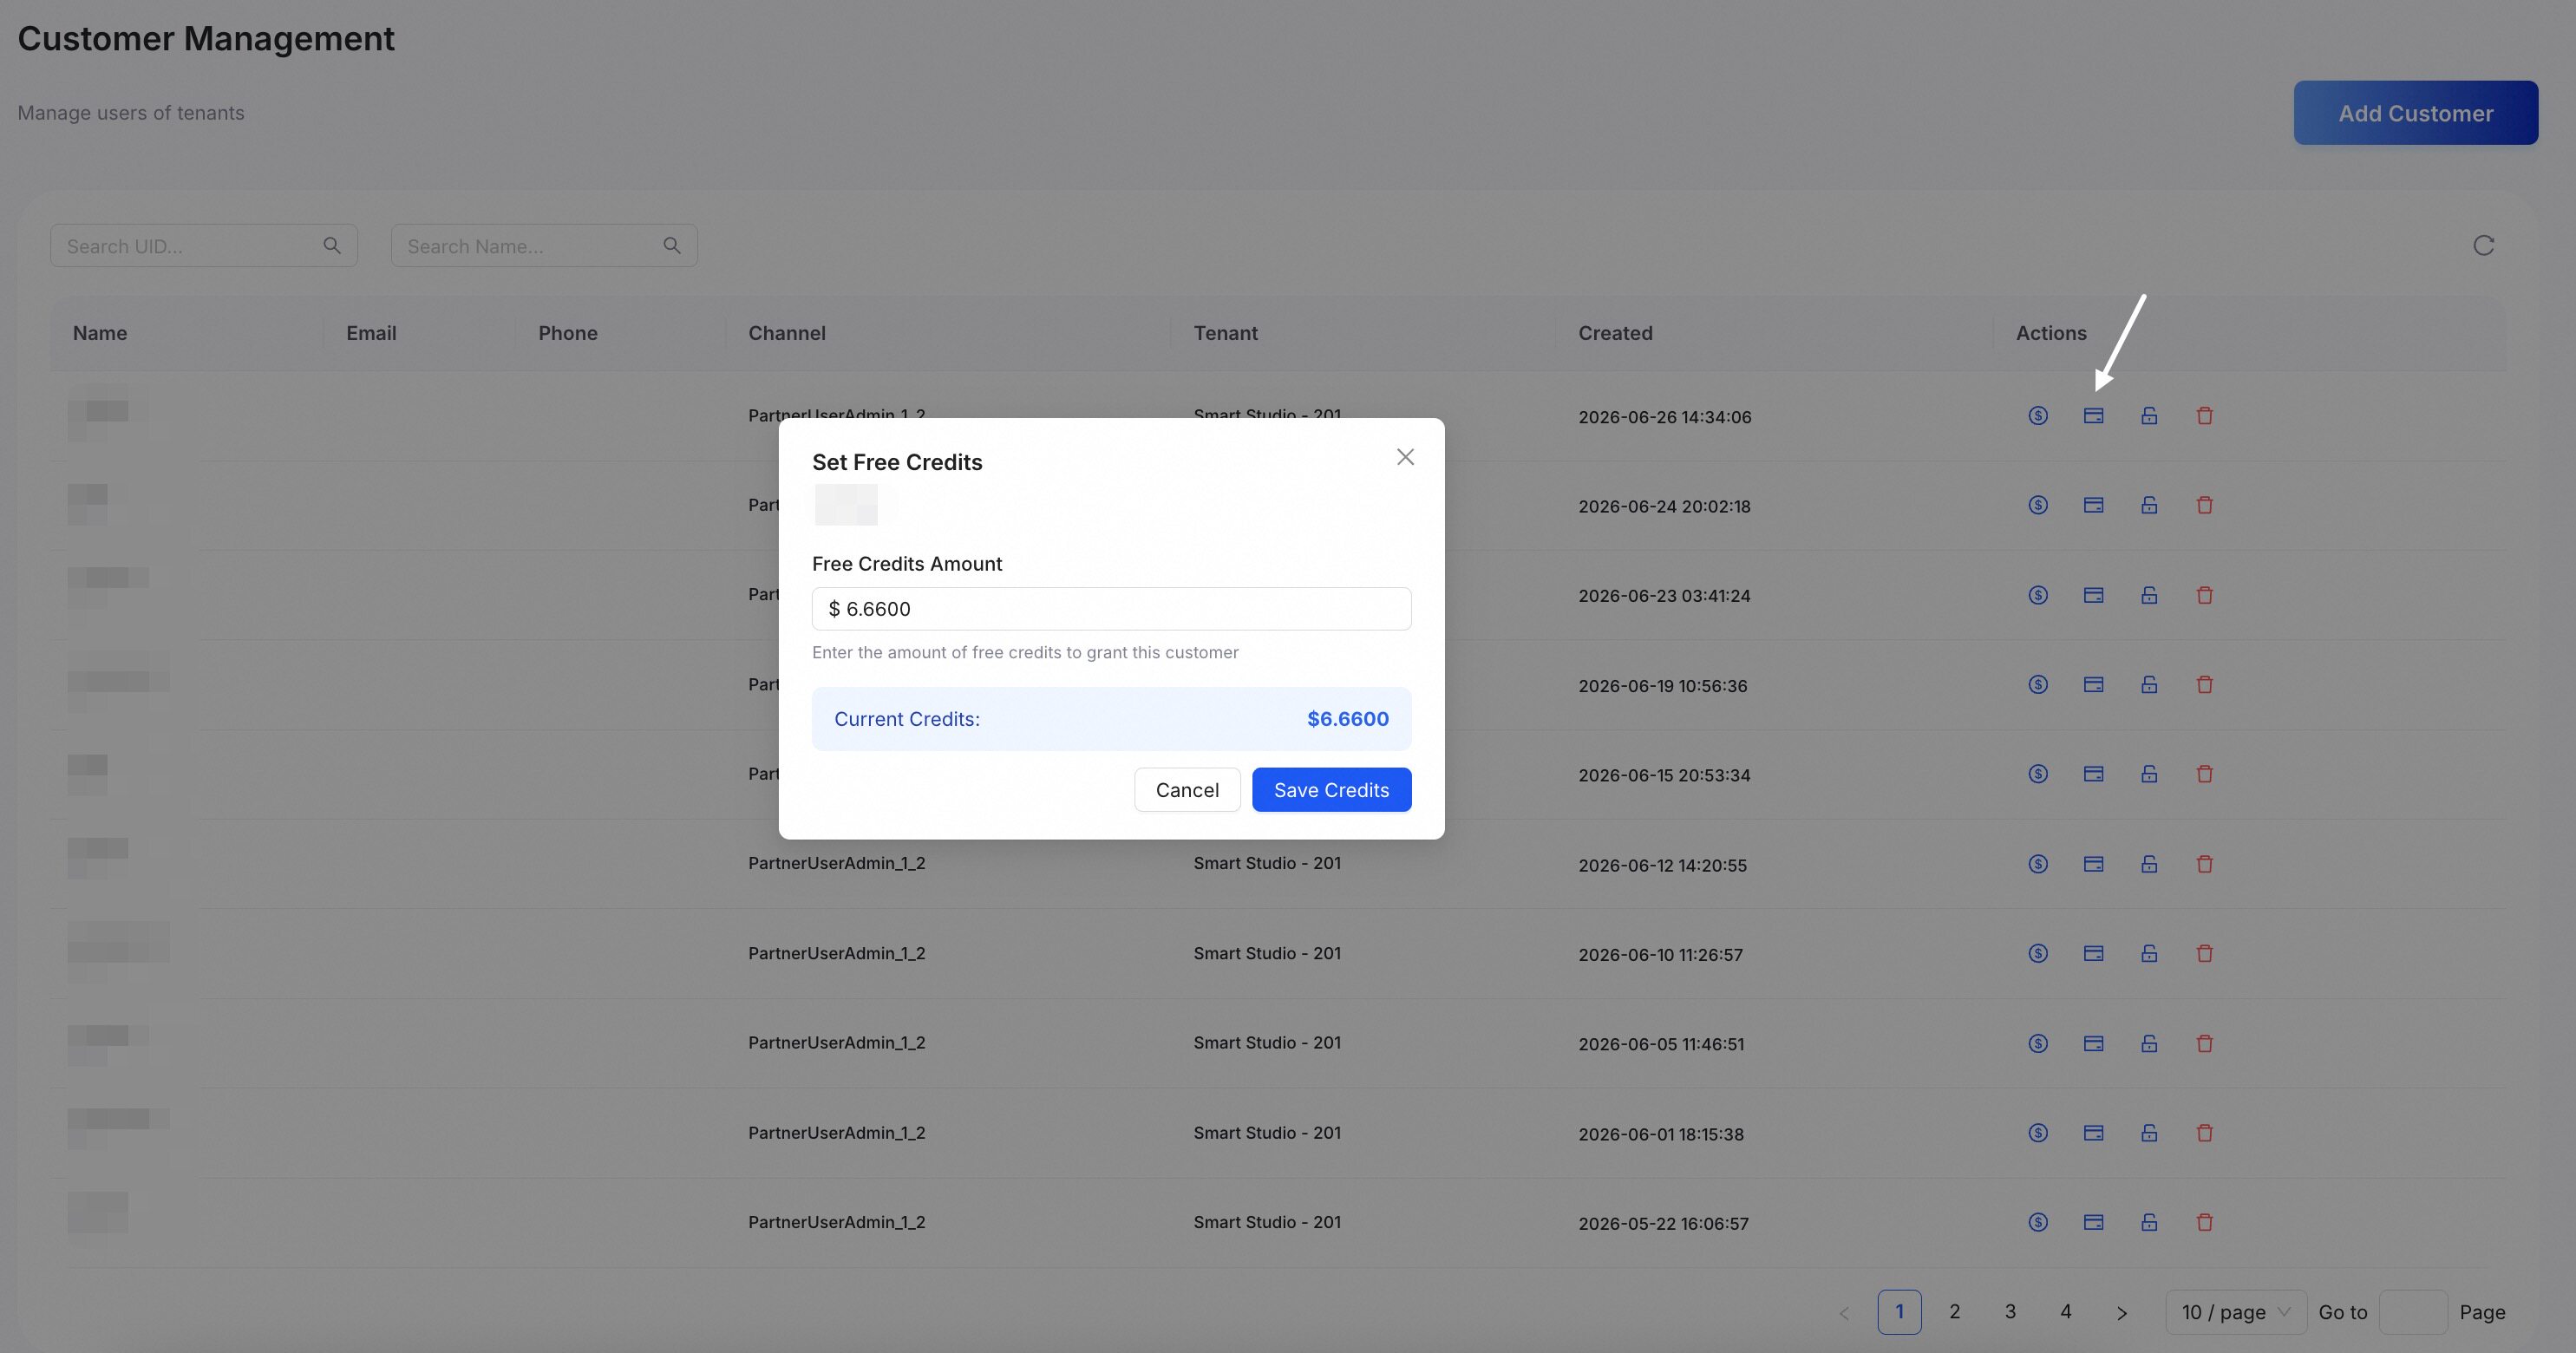
If you want to give an end customer free credits to spend on your platform, you can set them directly from the customer list. Just enter the amount you want to grant and click Save Credits, your customer's credits will take effect immediately.
View billing and analytics
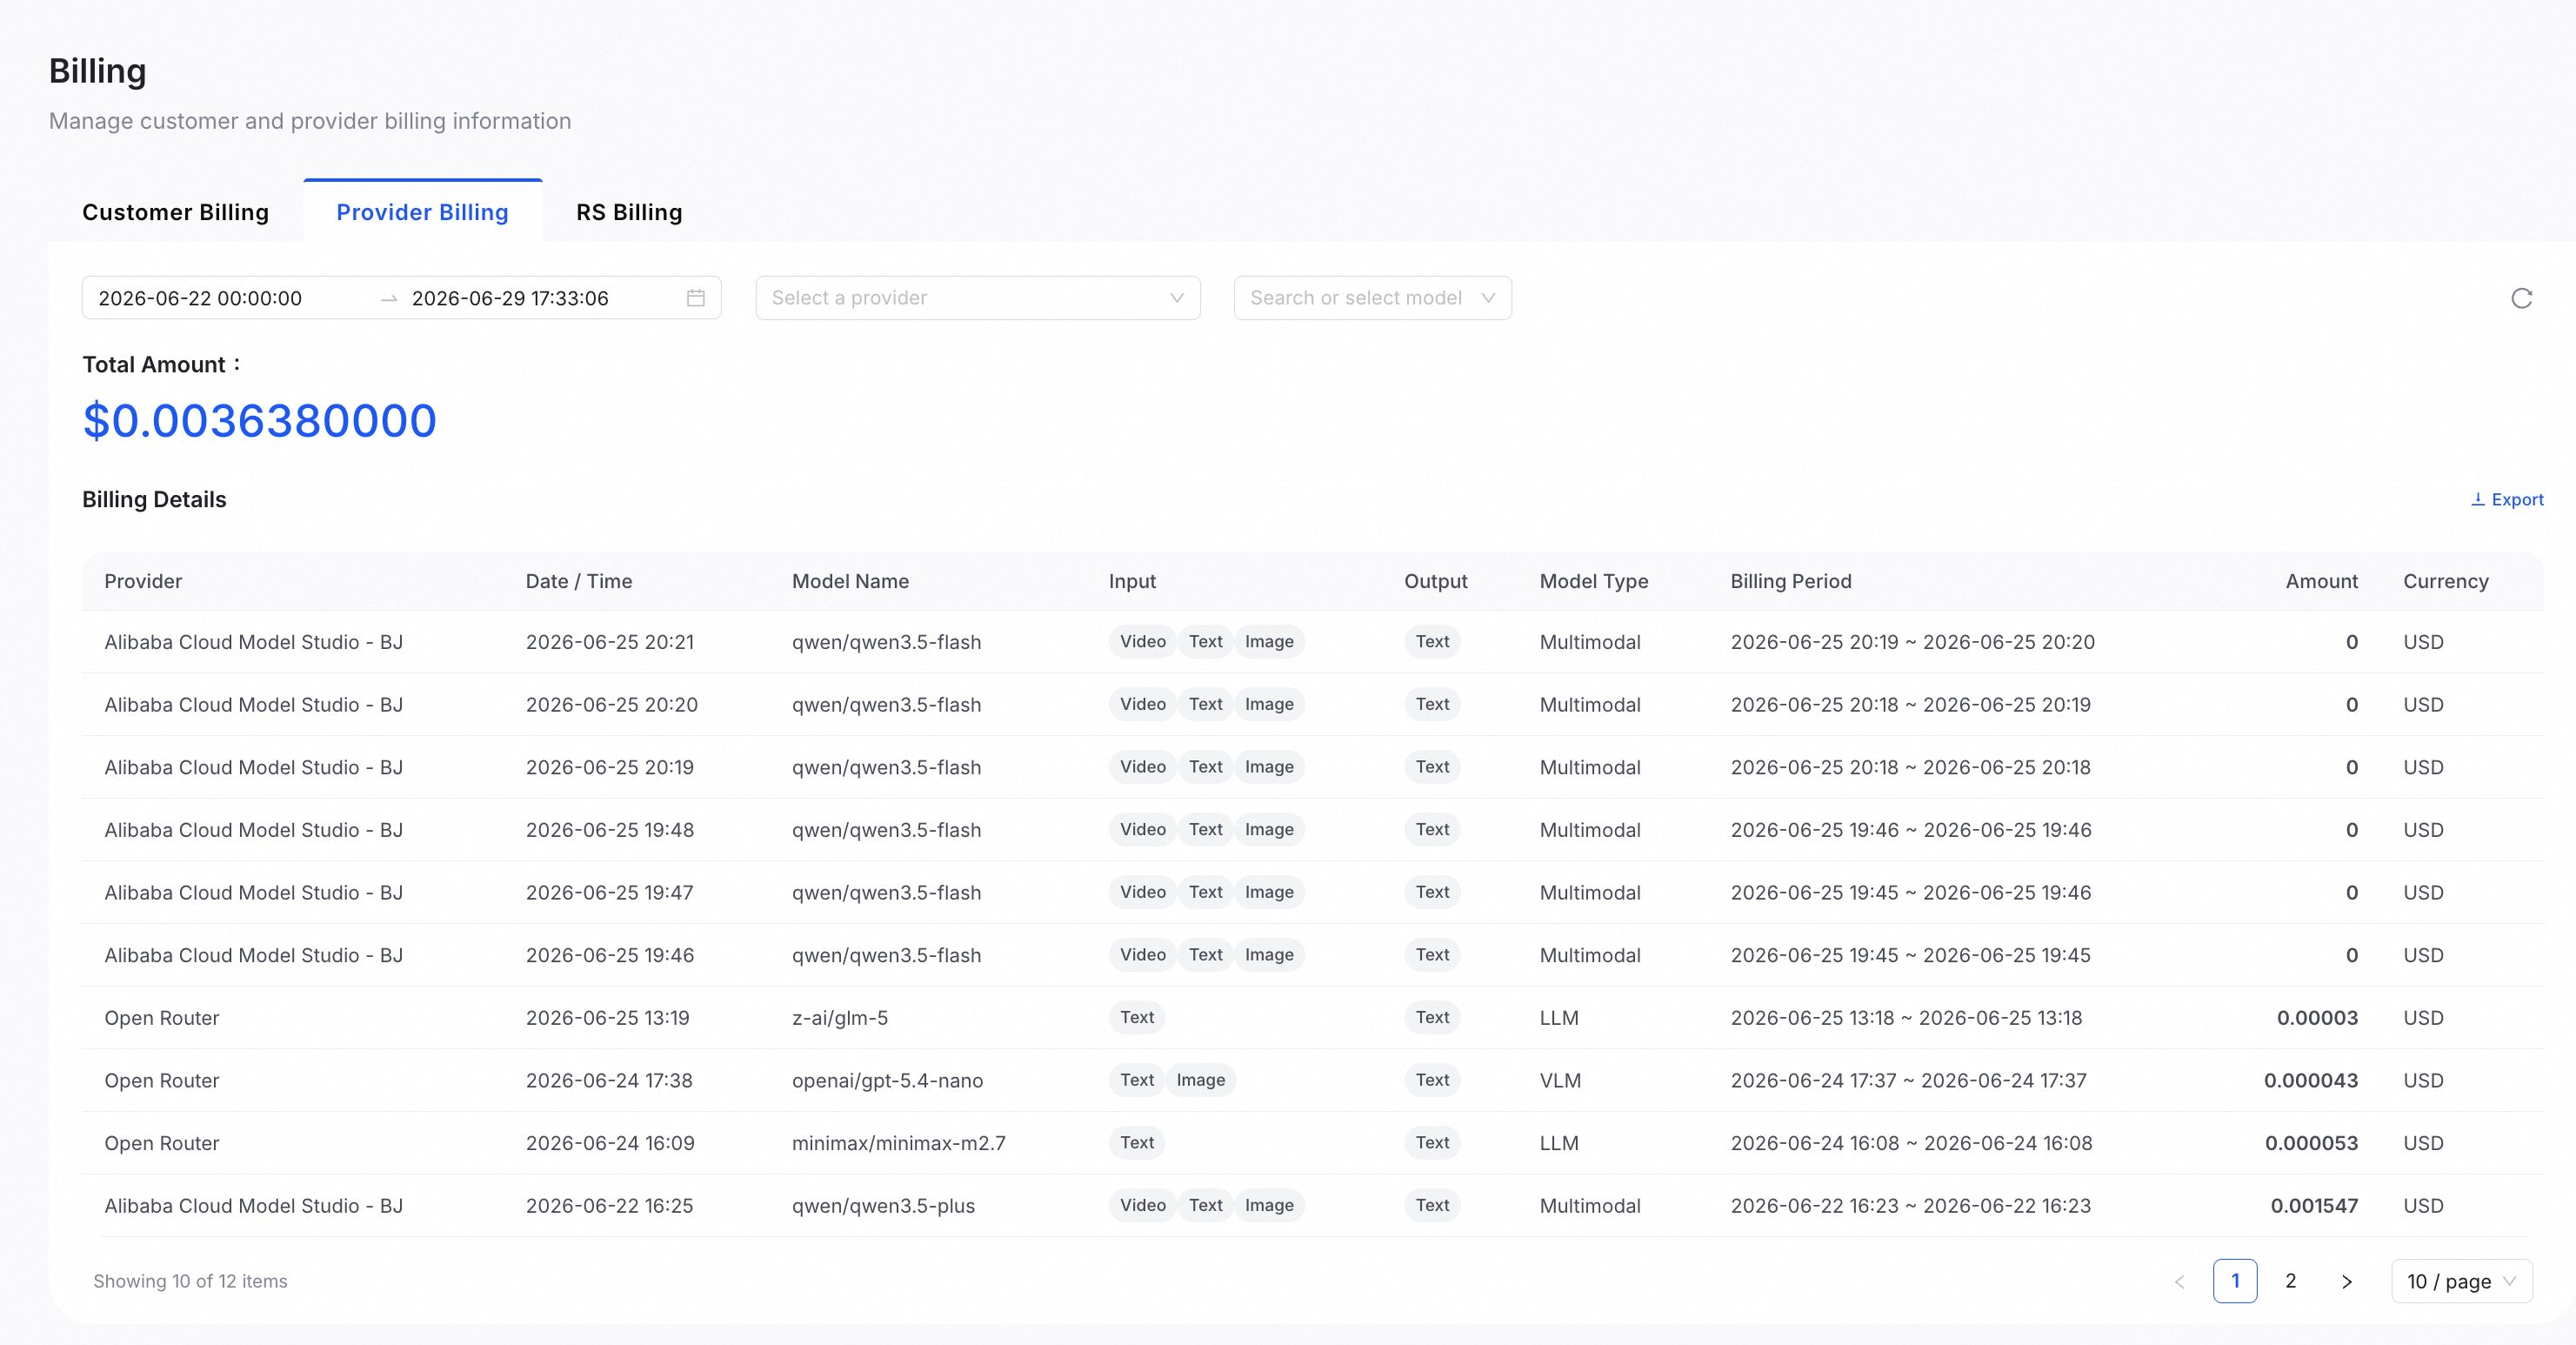
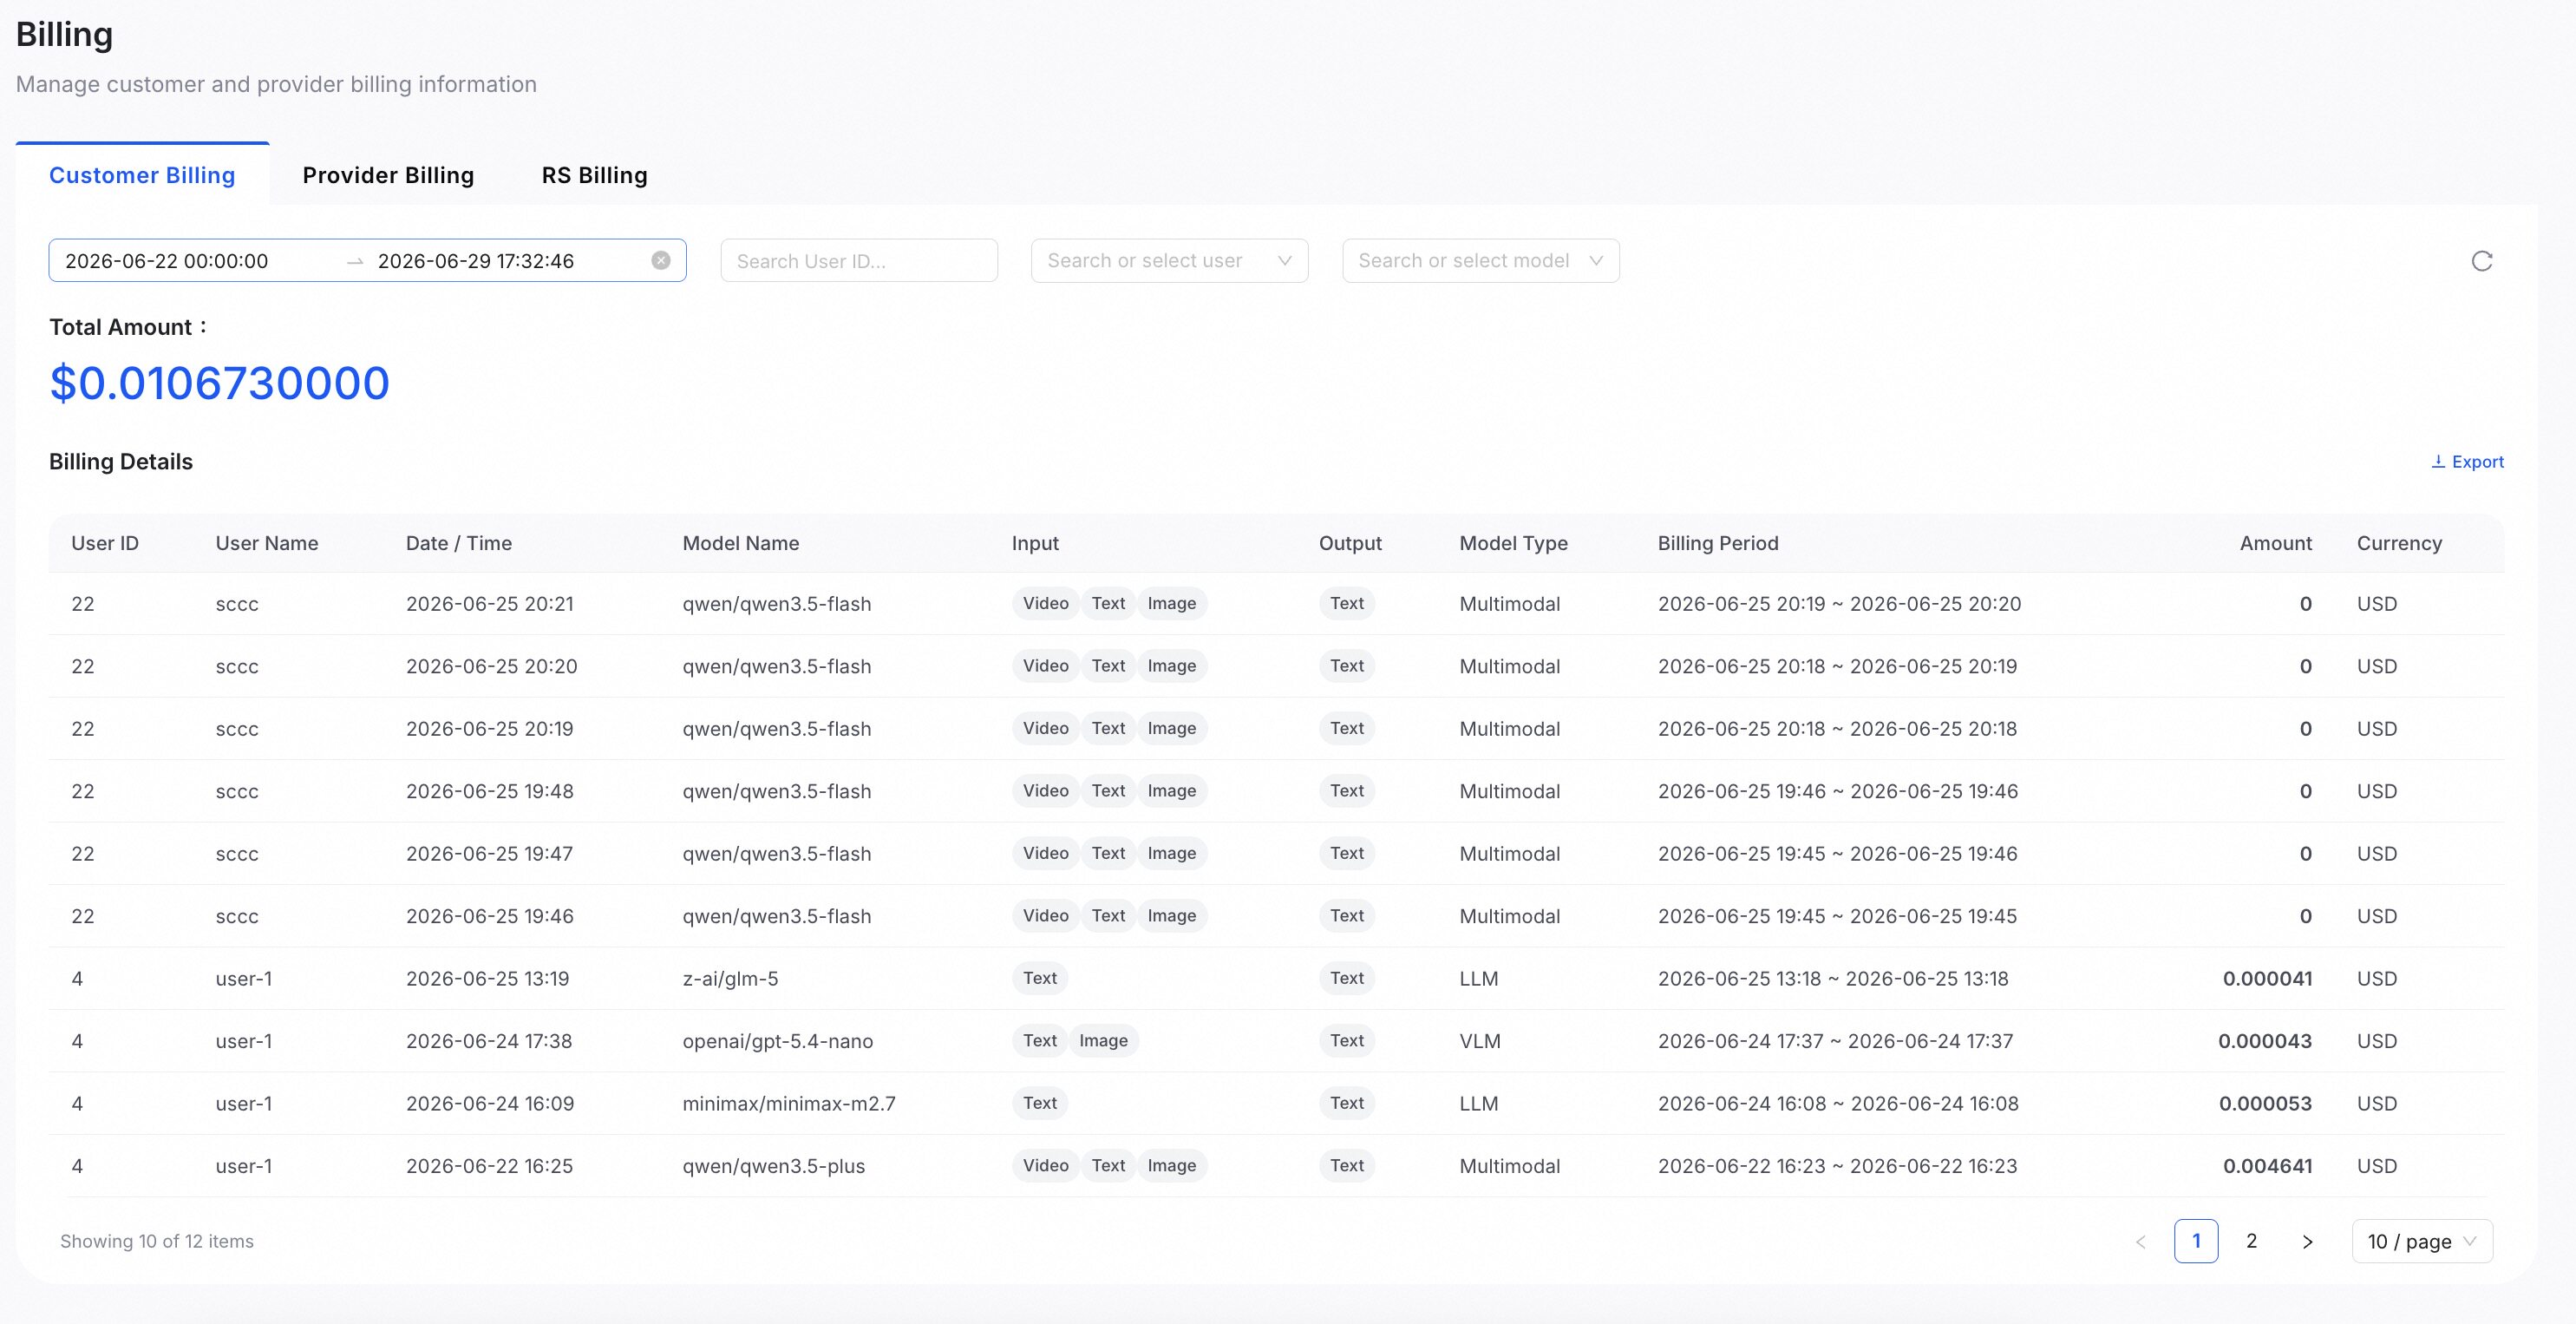
The Billing page provides a view of your customer billing, provider billing and revenue sharing billing.
Customer Billing
Provider Billing