Sign-in Methods
The Sign-in Methods tab controls how end-users authenticate to your platform.
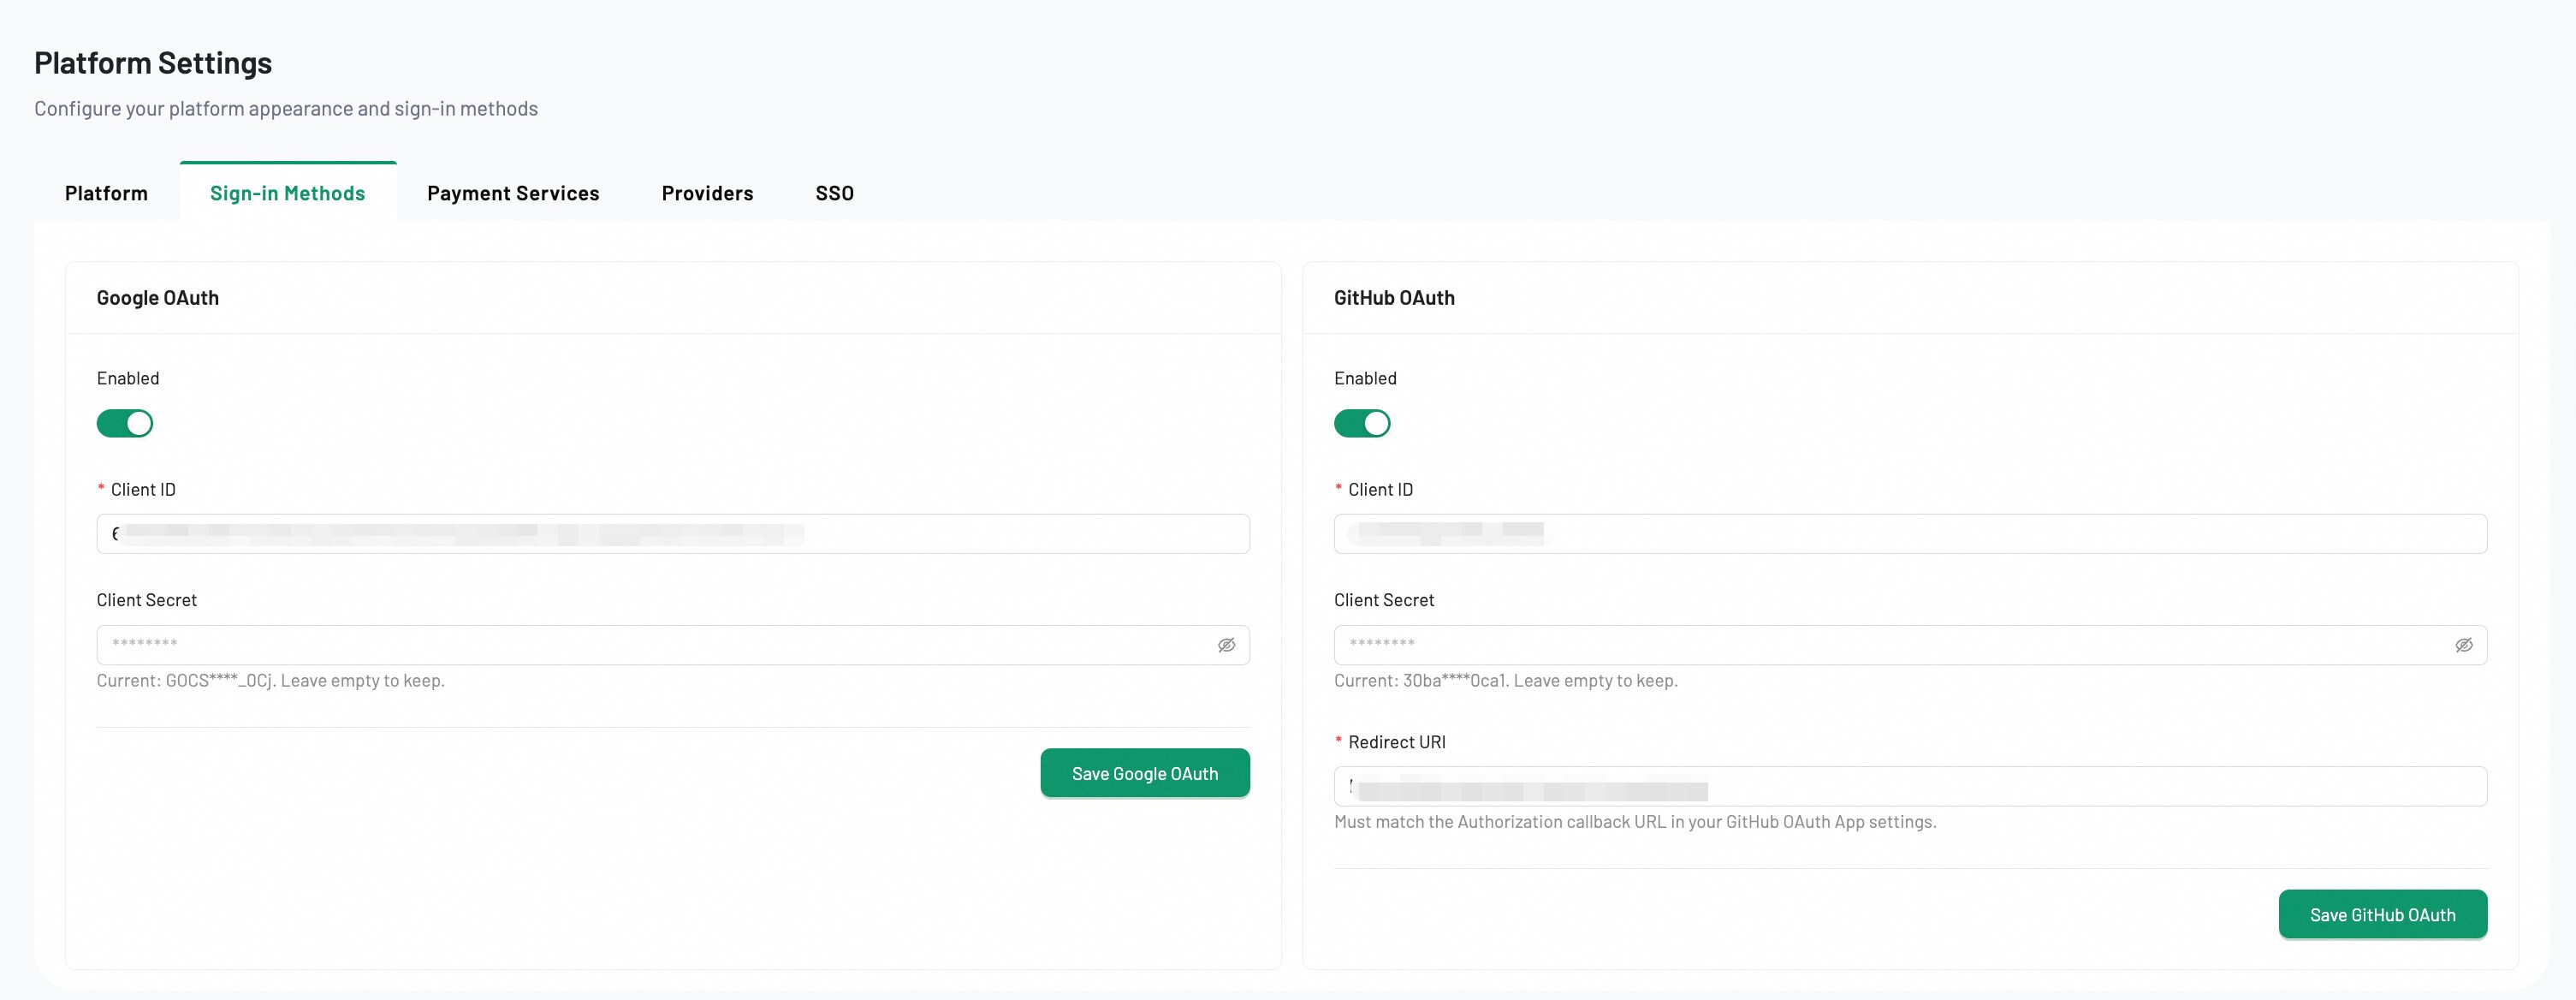
Google OAuth configuration
Prerequisites
-
A Google account with access to Google Cloud Console
-
Permission to create projects and OAuth credentials
-
The Redirect URI of your application, e.g.
https://your-domain.com/auth/google/callback\
Configuration Steps
Step 1: Access the Google Cloud Console
-
Sign in with your Google account.
-
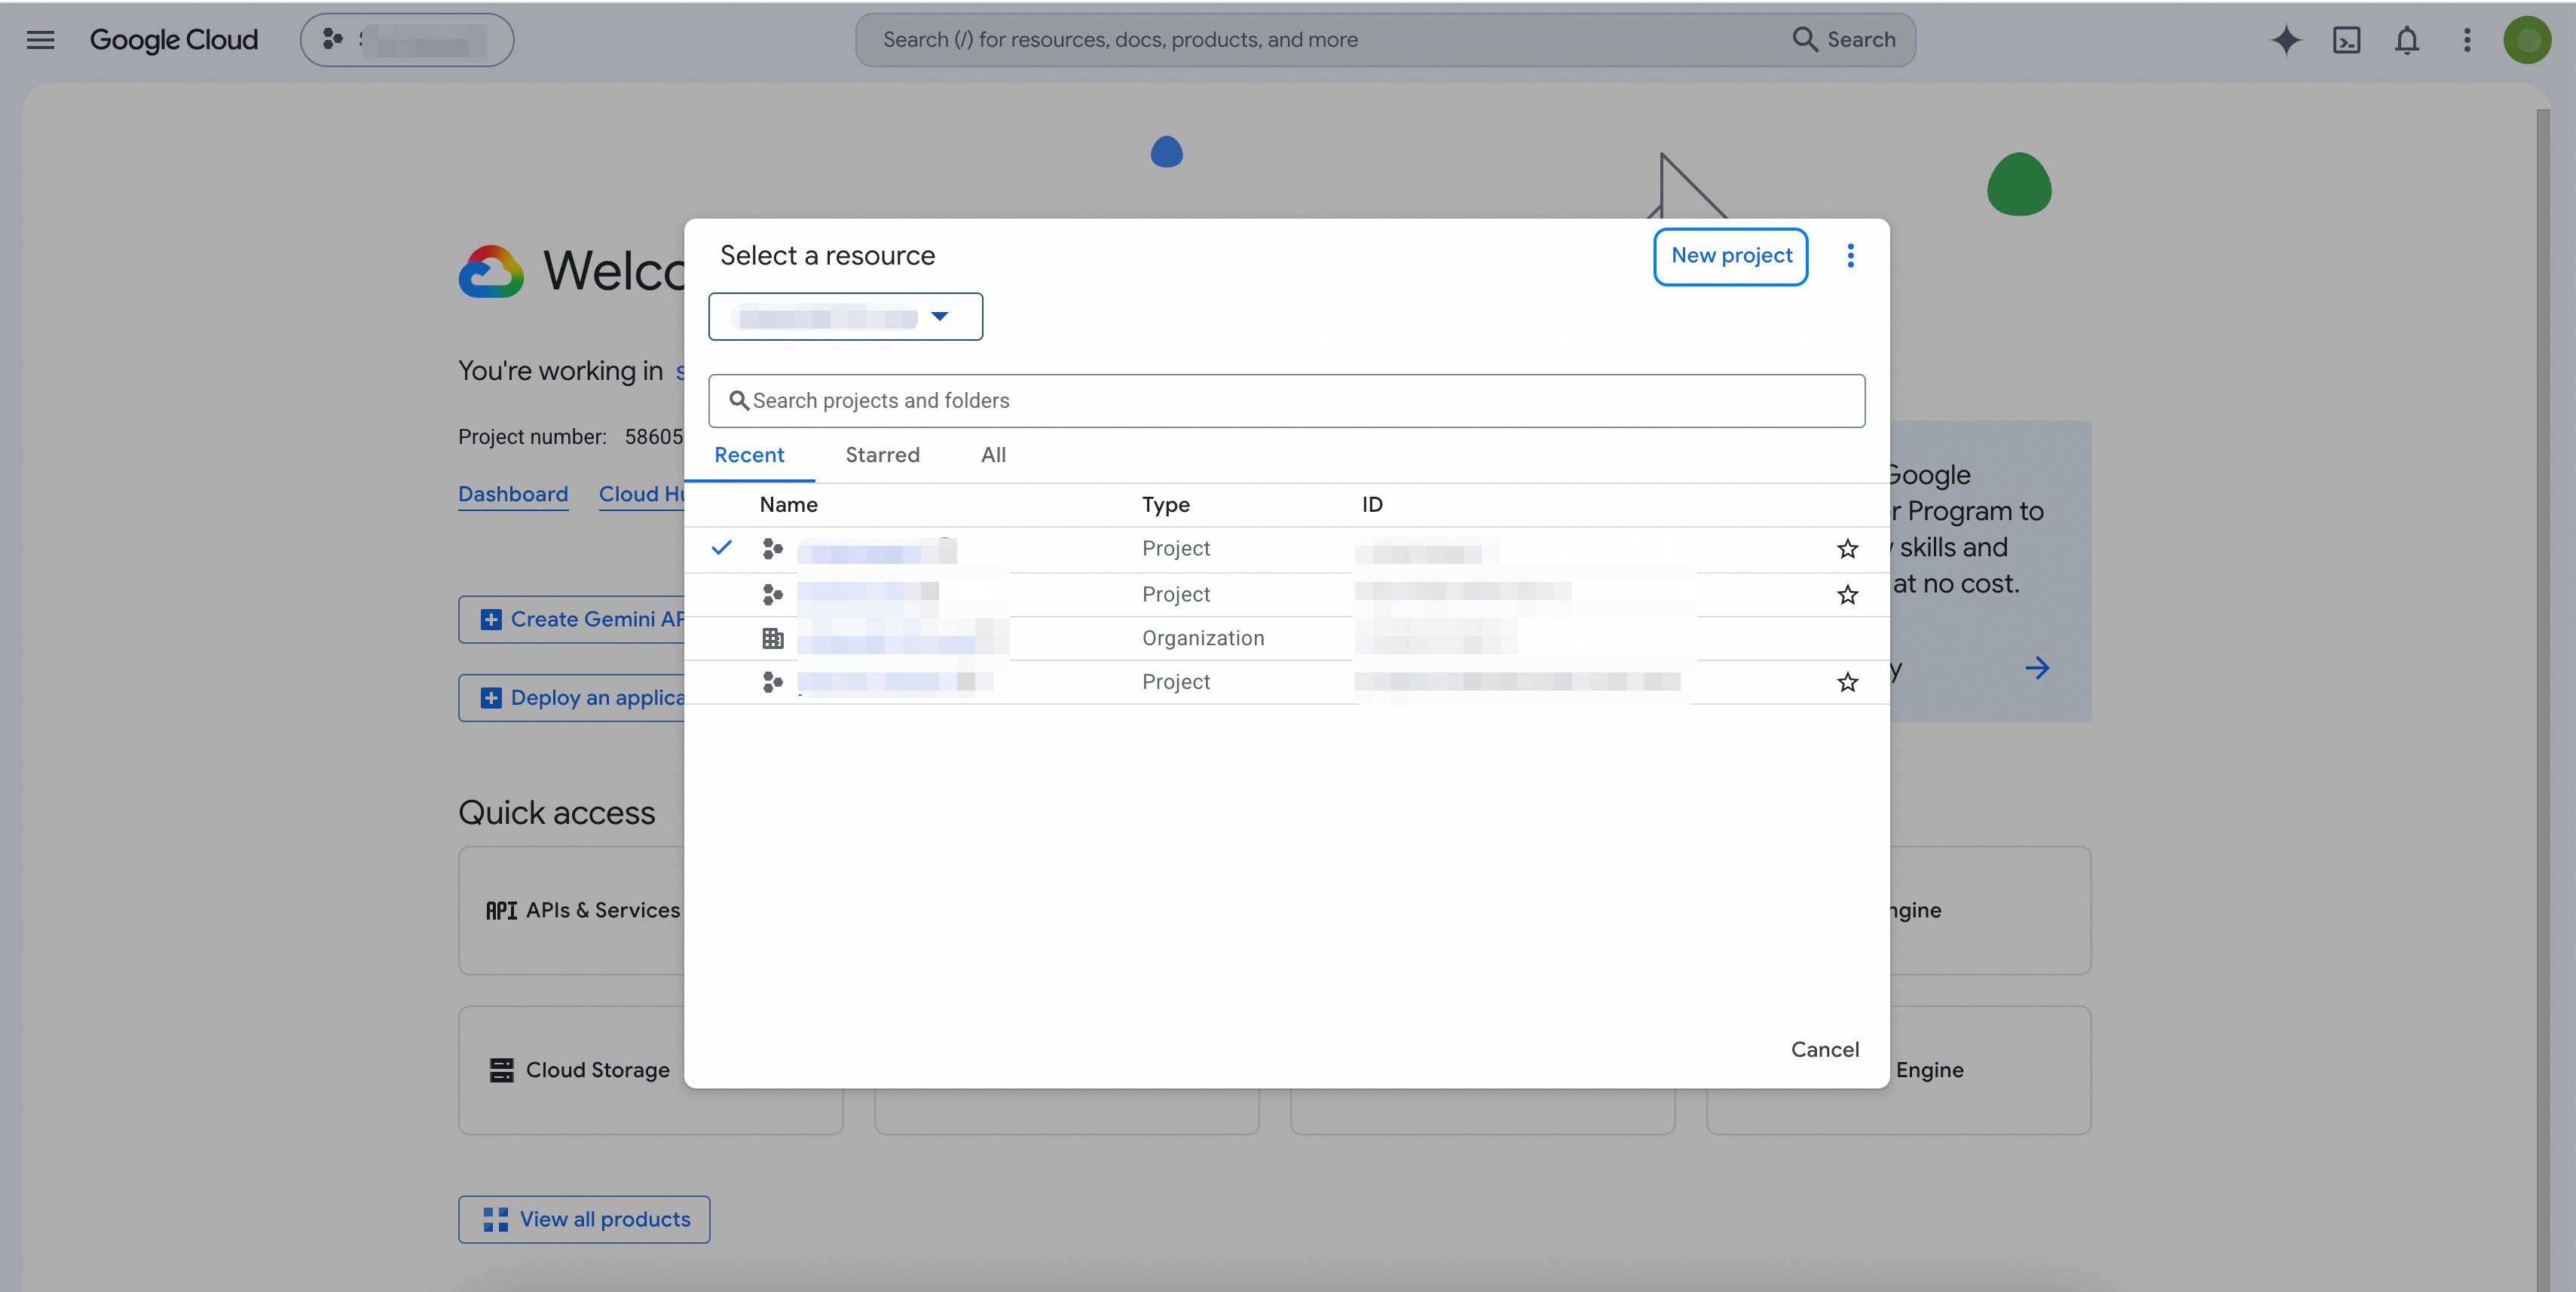
In the top navigation bar, click the project selector and choose New Project (or select an existing one).
-
Enter a project name (e.g.,
SmartStudio) and click Create.
Step 2: Configure the OAuth Consent Screen
-
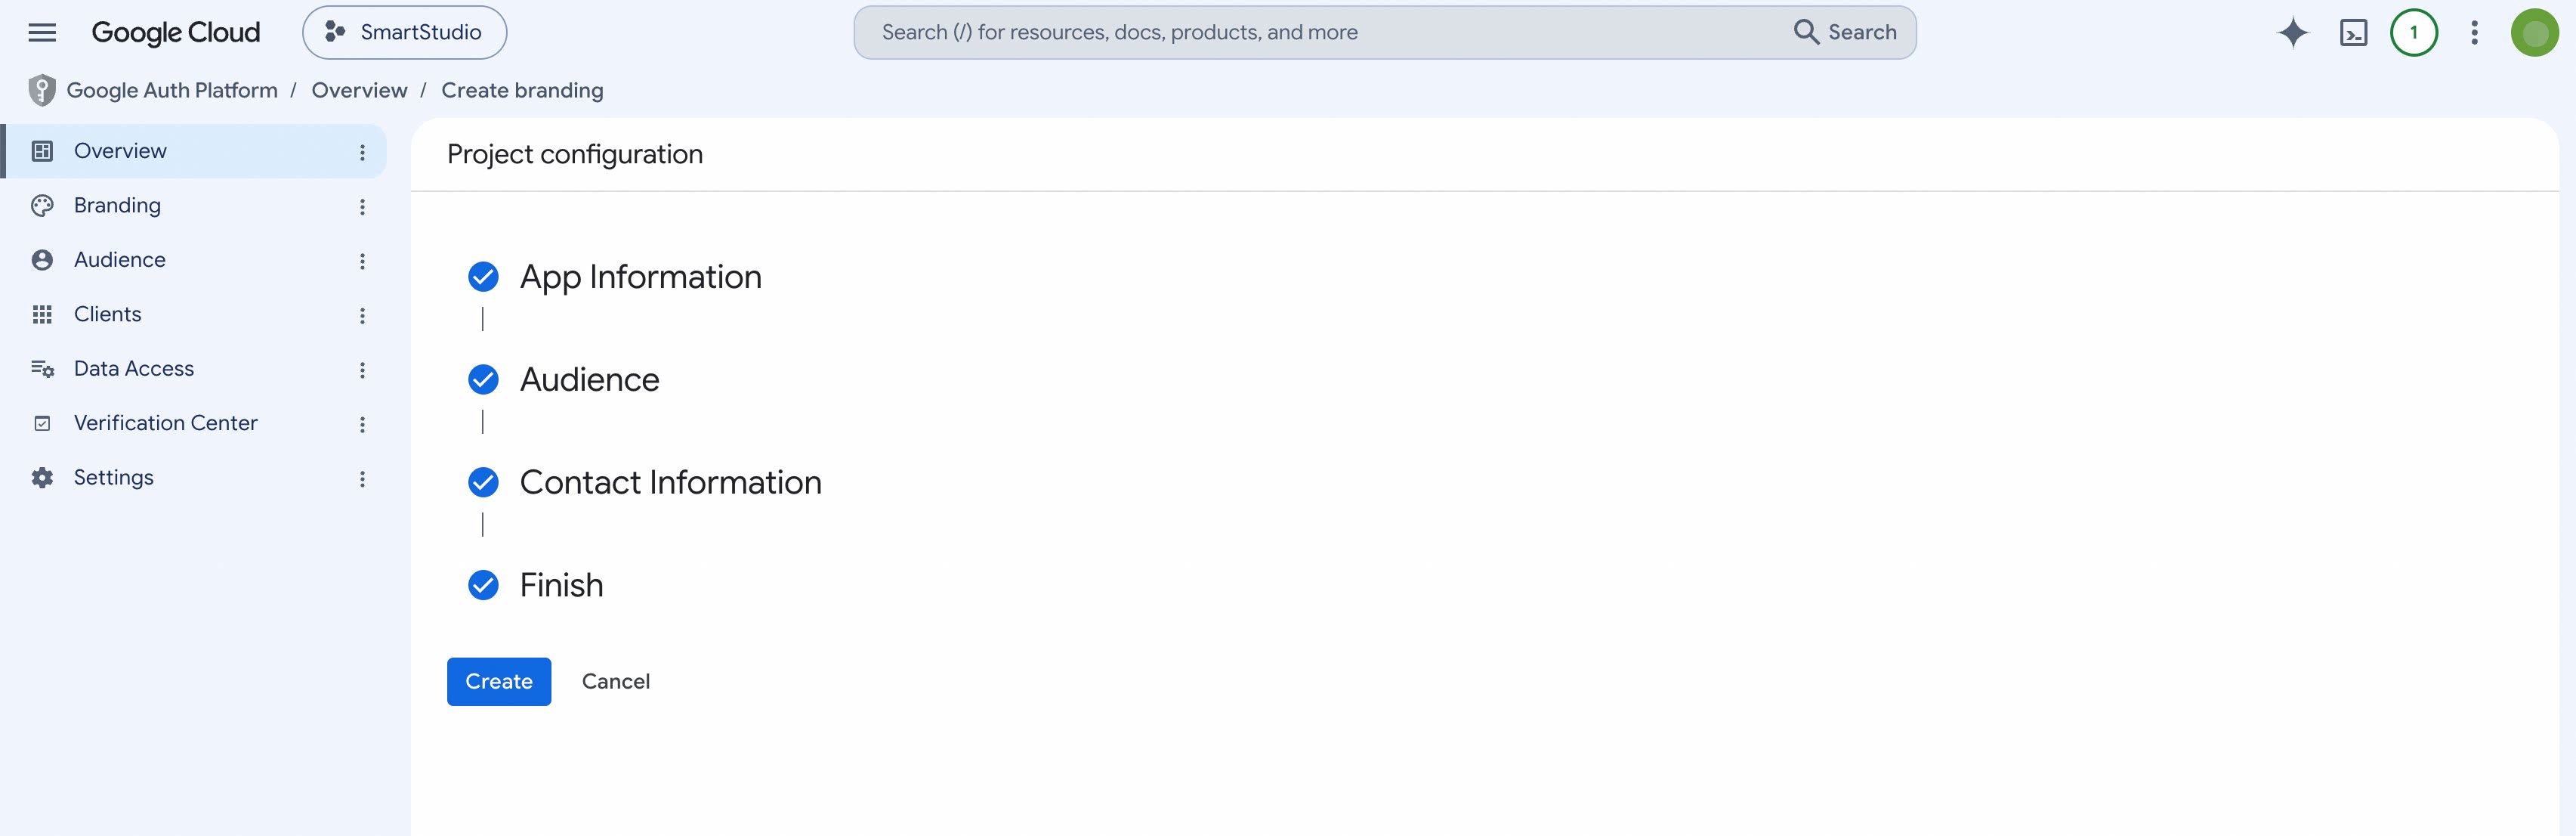
In the left menu, go to APIs & Services → OAuth consent screen.
-
Select User Type: choose External (or Internal if your app is restricted to your Google Workspace organization).
-
Fill in the required fields:
-
App name: your application name
-
User support email: select from the dropdown
-
Developer contact email: your email address
-
-
Click Save and Continue.
-
(External apps only) On the Test users page, add the email addresses of testers if the app is not yet published. Click Save and Continue, then Back to Dashboard.
Step 3: Create the OAuth Client Credentials
-
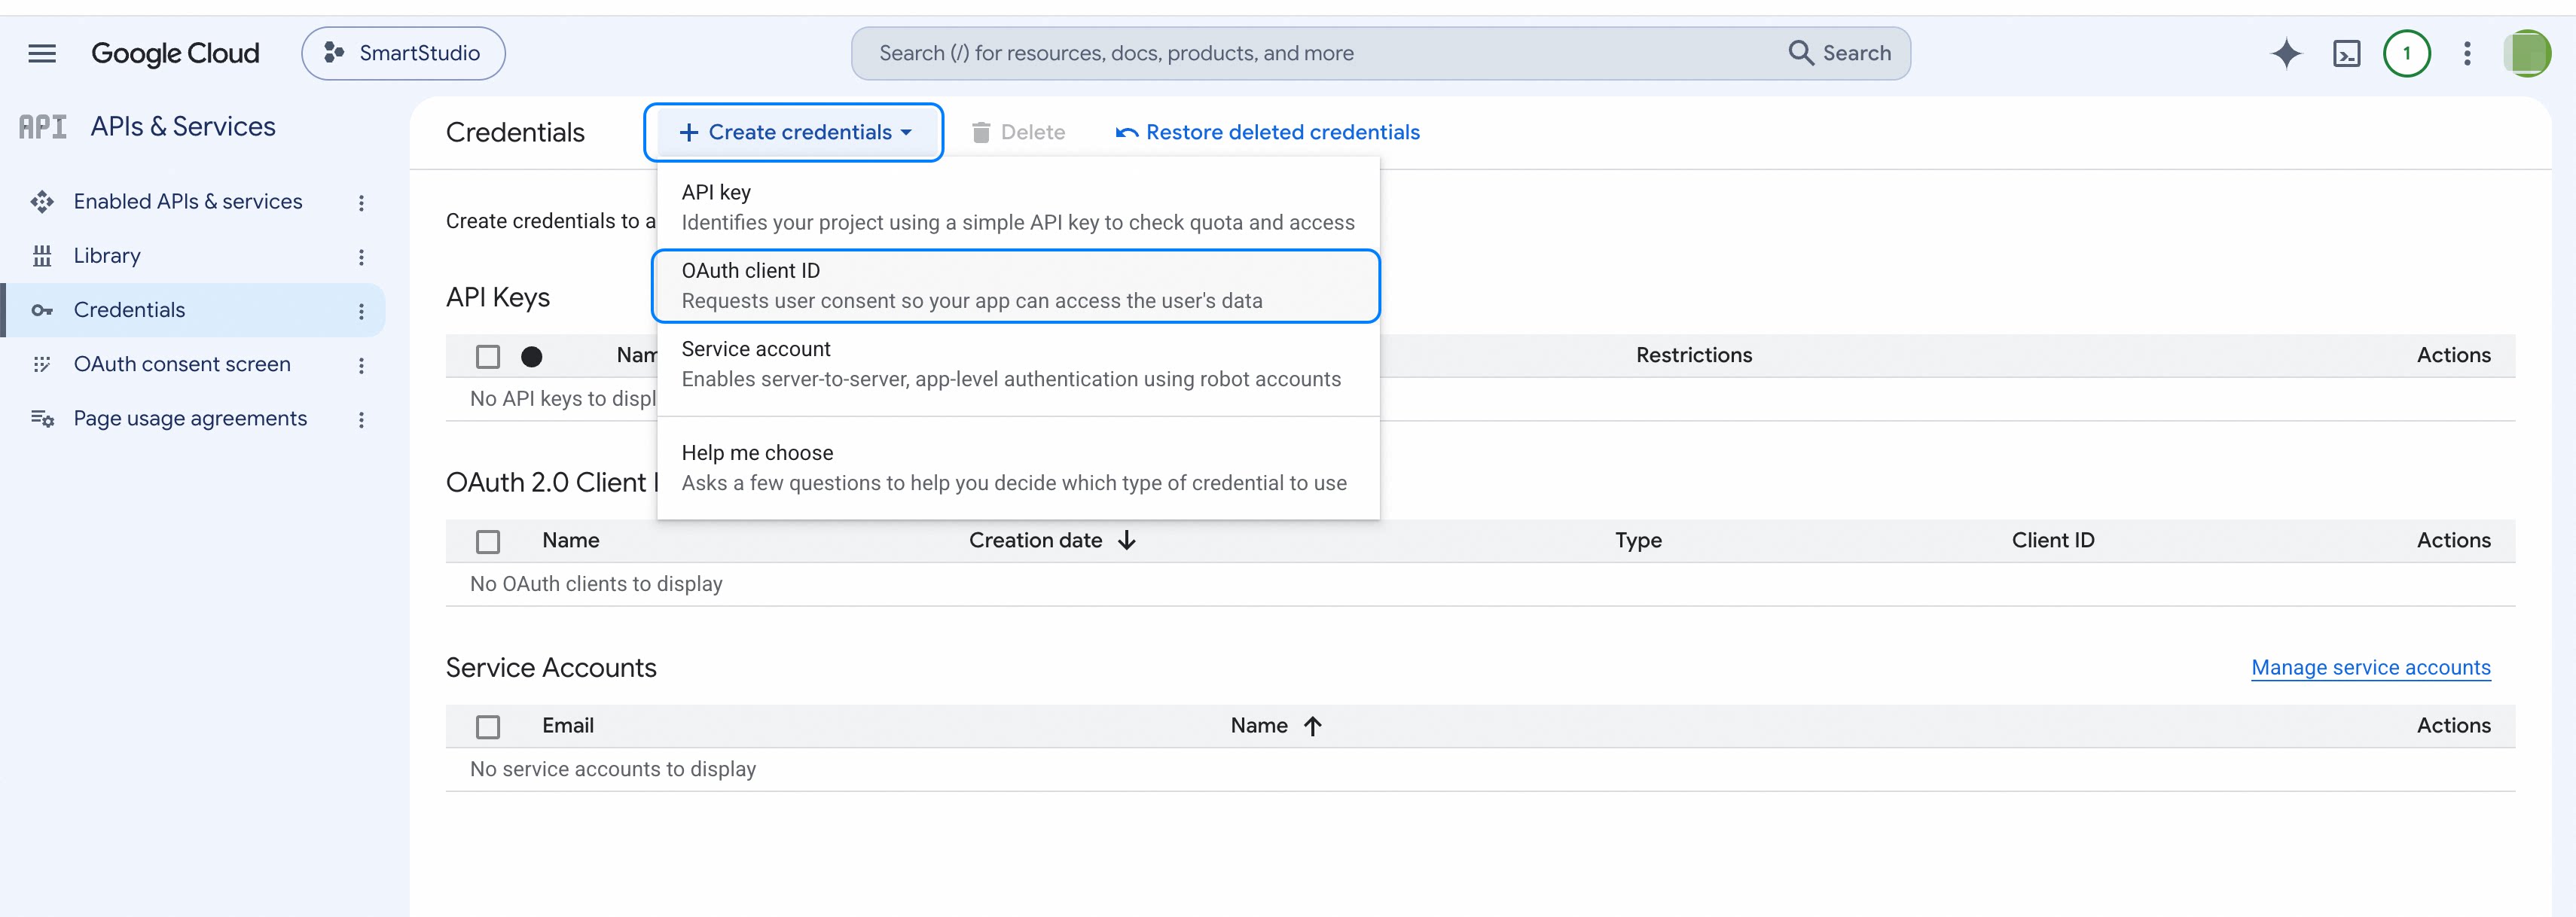
In the left menu, go to APIs & Services → Credentials.
-
Click + Create Credentials → OAuth client ID.
-
If prompted to configure the consent screen first, complete Step 2 above.
-
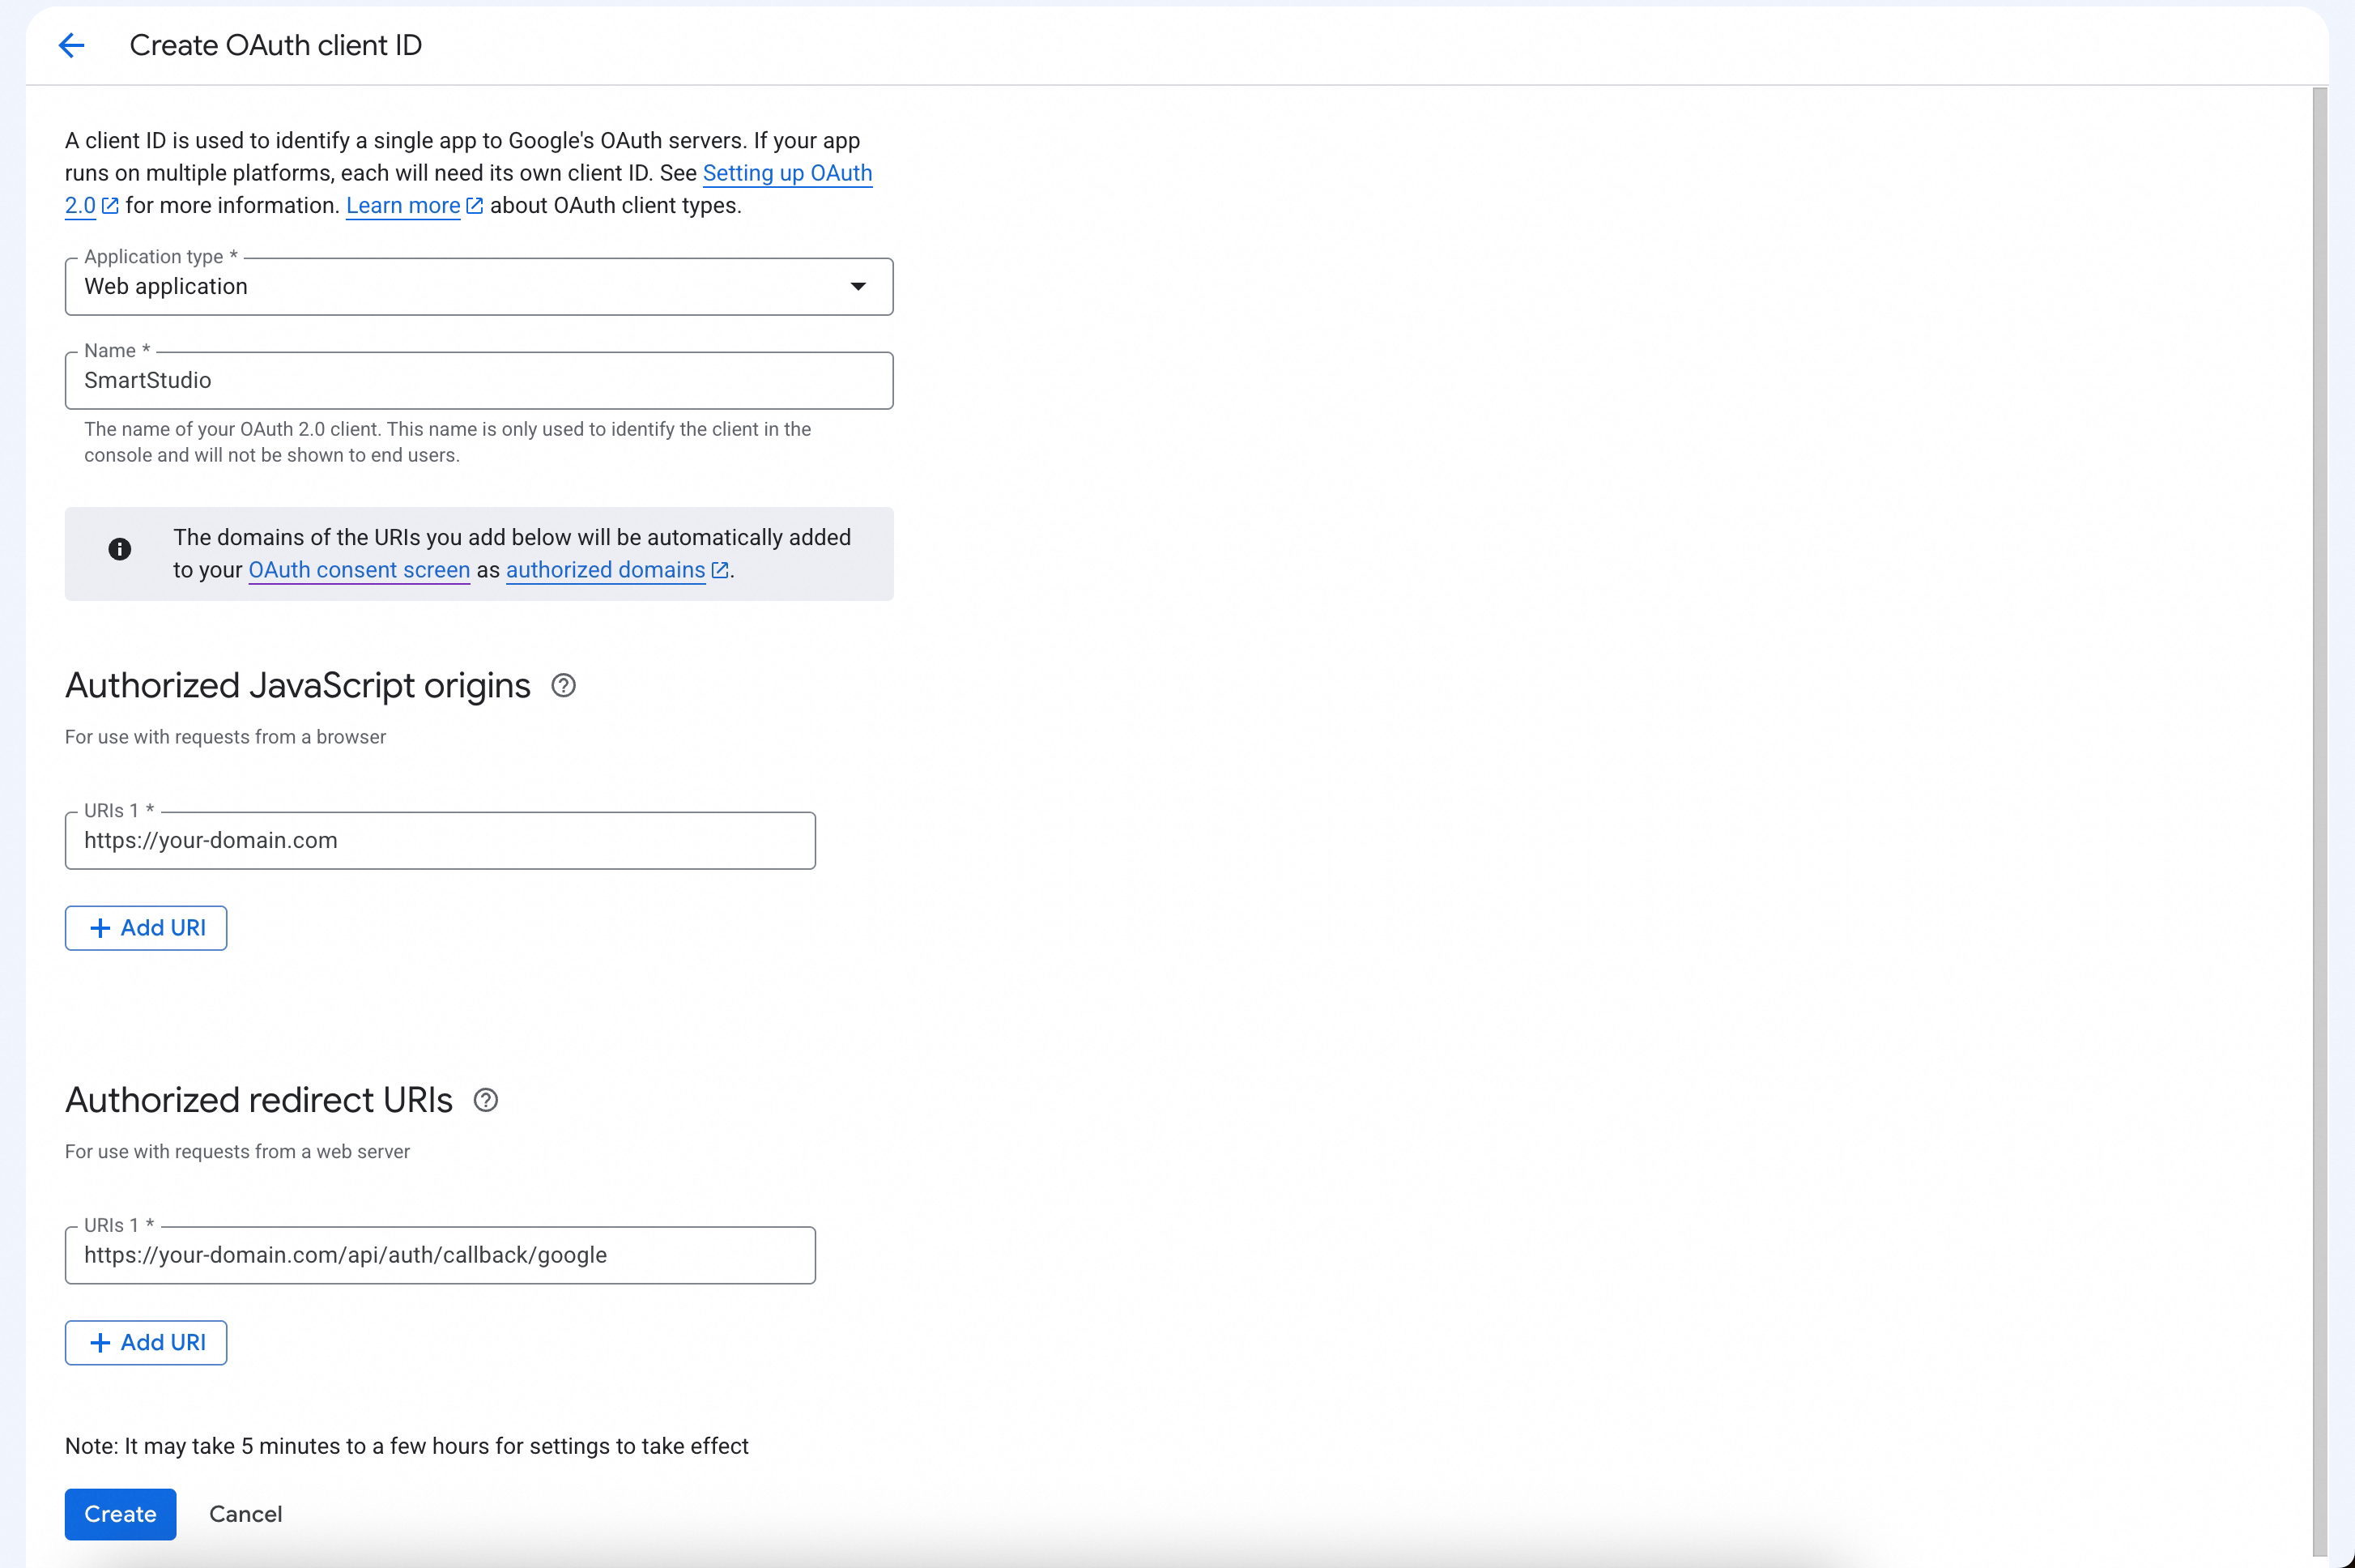
Set Application type to Web application.
-
Enter a Name for the client (e.g.,
MyApp Web Client). -
Under Authorized redirect URIs, click + Add URI and enter your redirect URI:
⚠️ The redirect URI must match your application configuration exactly (including scheme, domain, path, and trailing slash).
-
Click Create.
Step 4: Obtain the Client ID and Client Secret
-
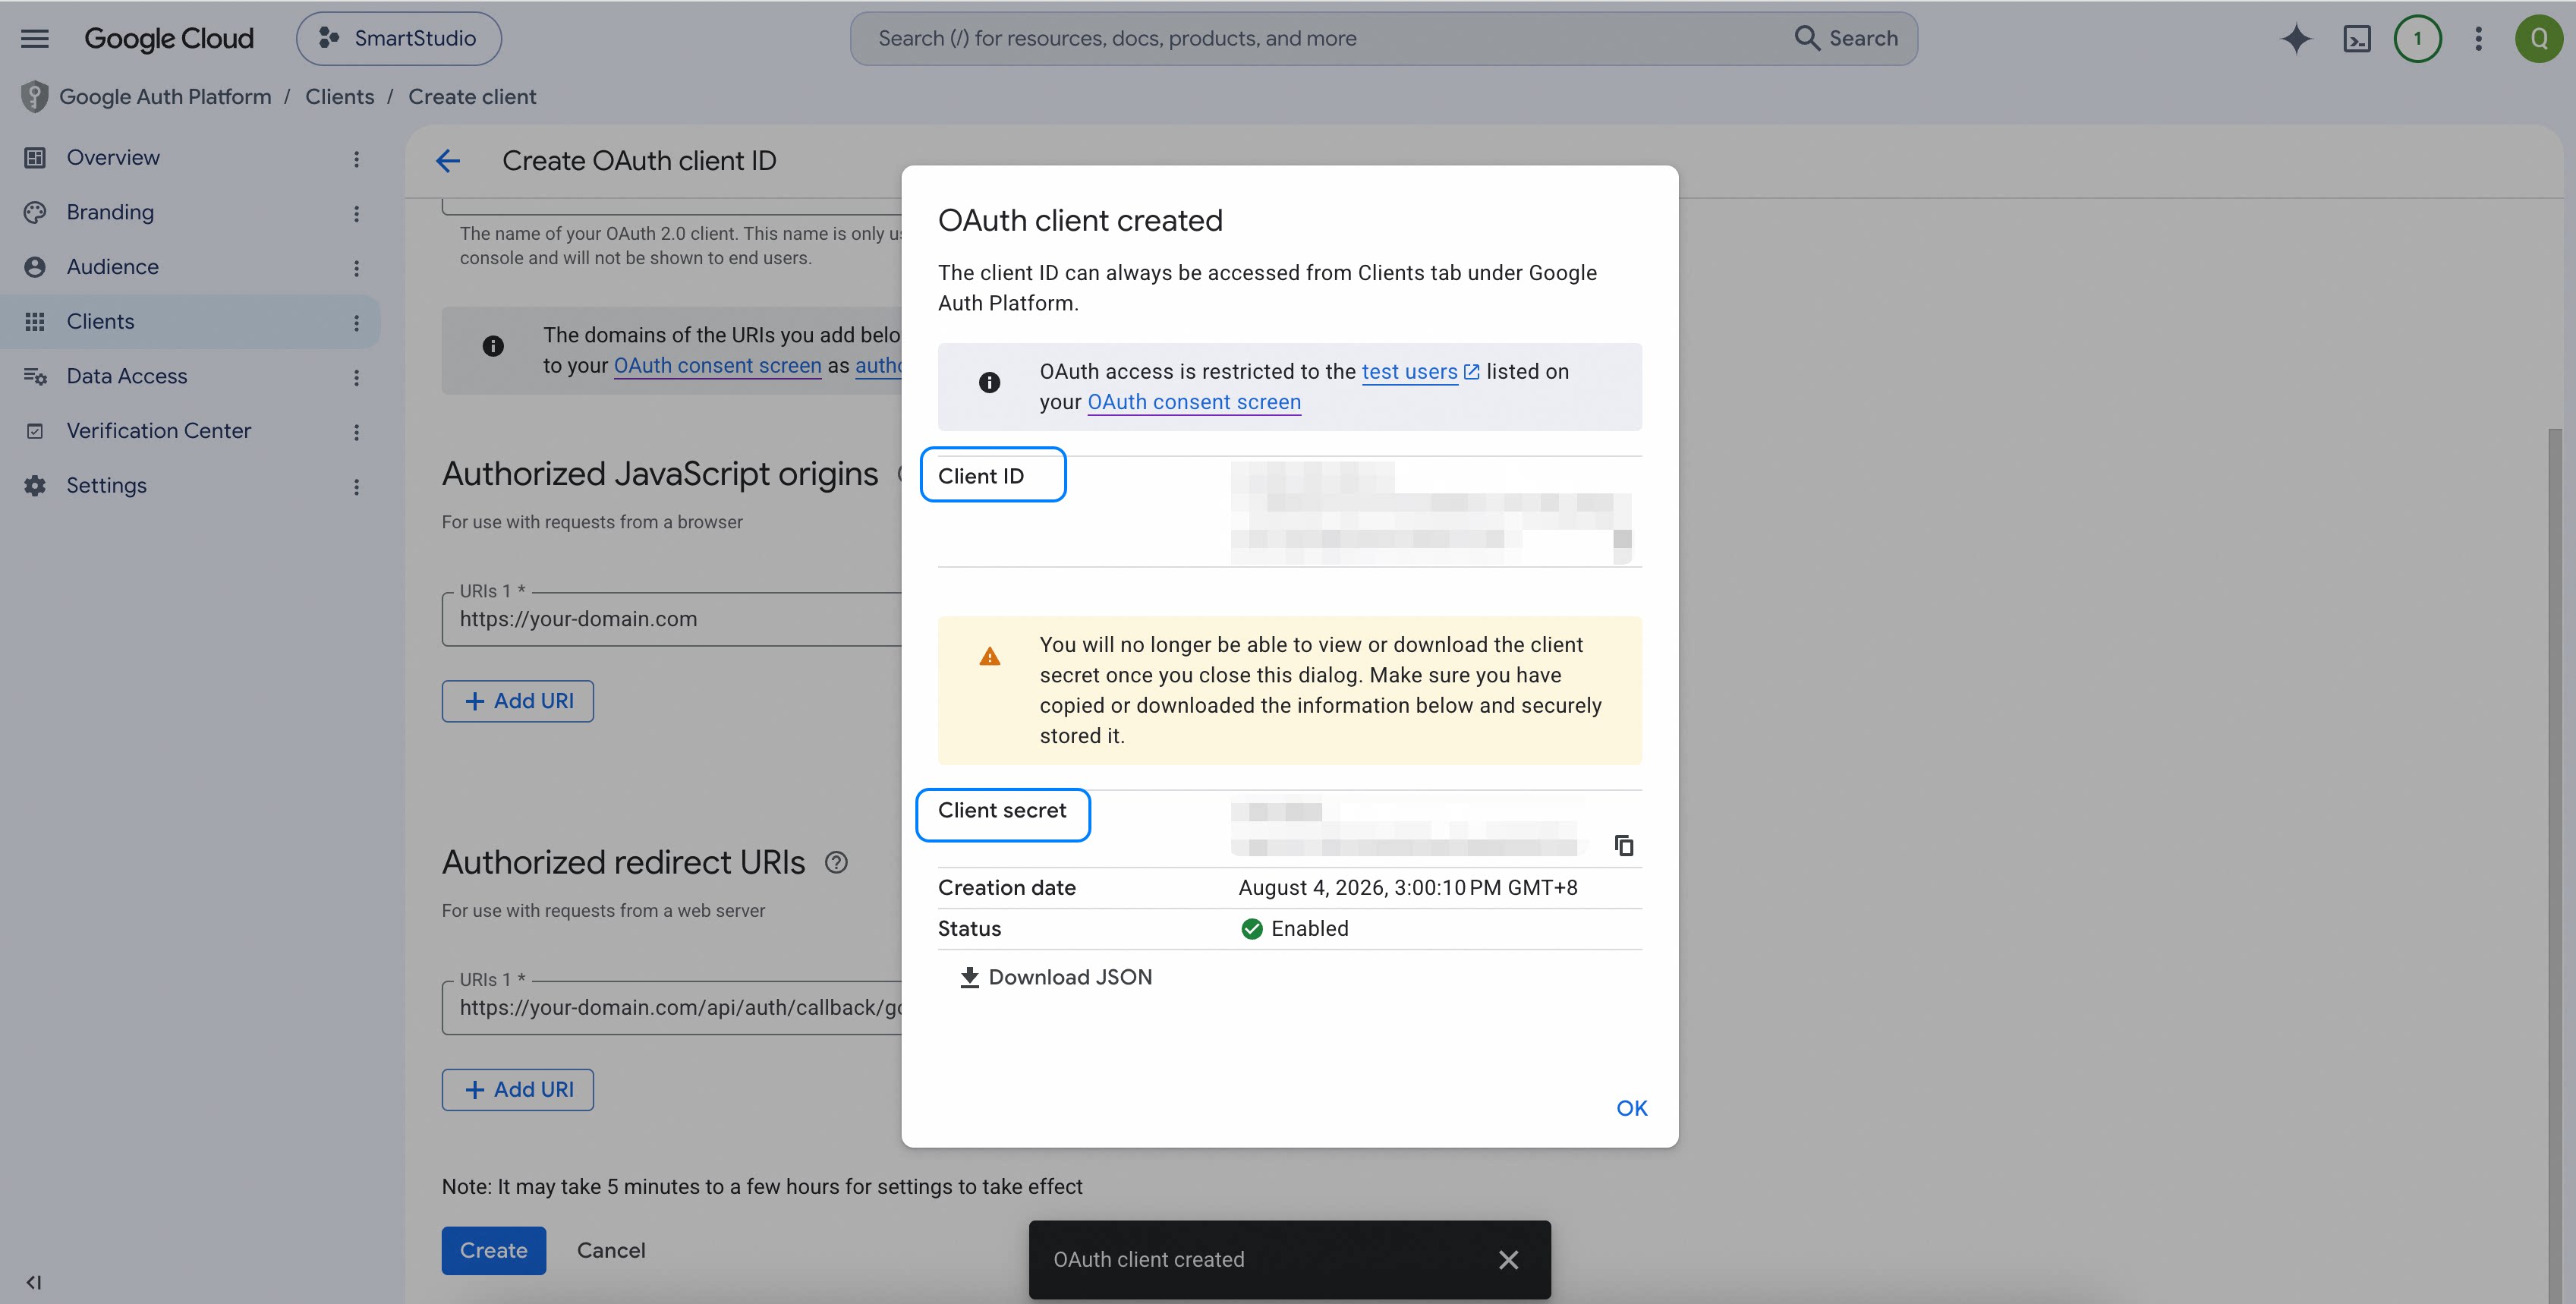
After creation, a dialog shows the Client ID and Client Secret.
-
Copy both values and store them securely (e.g., in the team's secret vault).
-
Click Download JSON as a backup if needed.
Step 5: Configure the Application
-
Log in to admin management page.
-
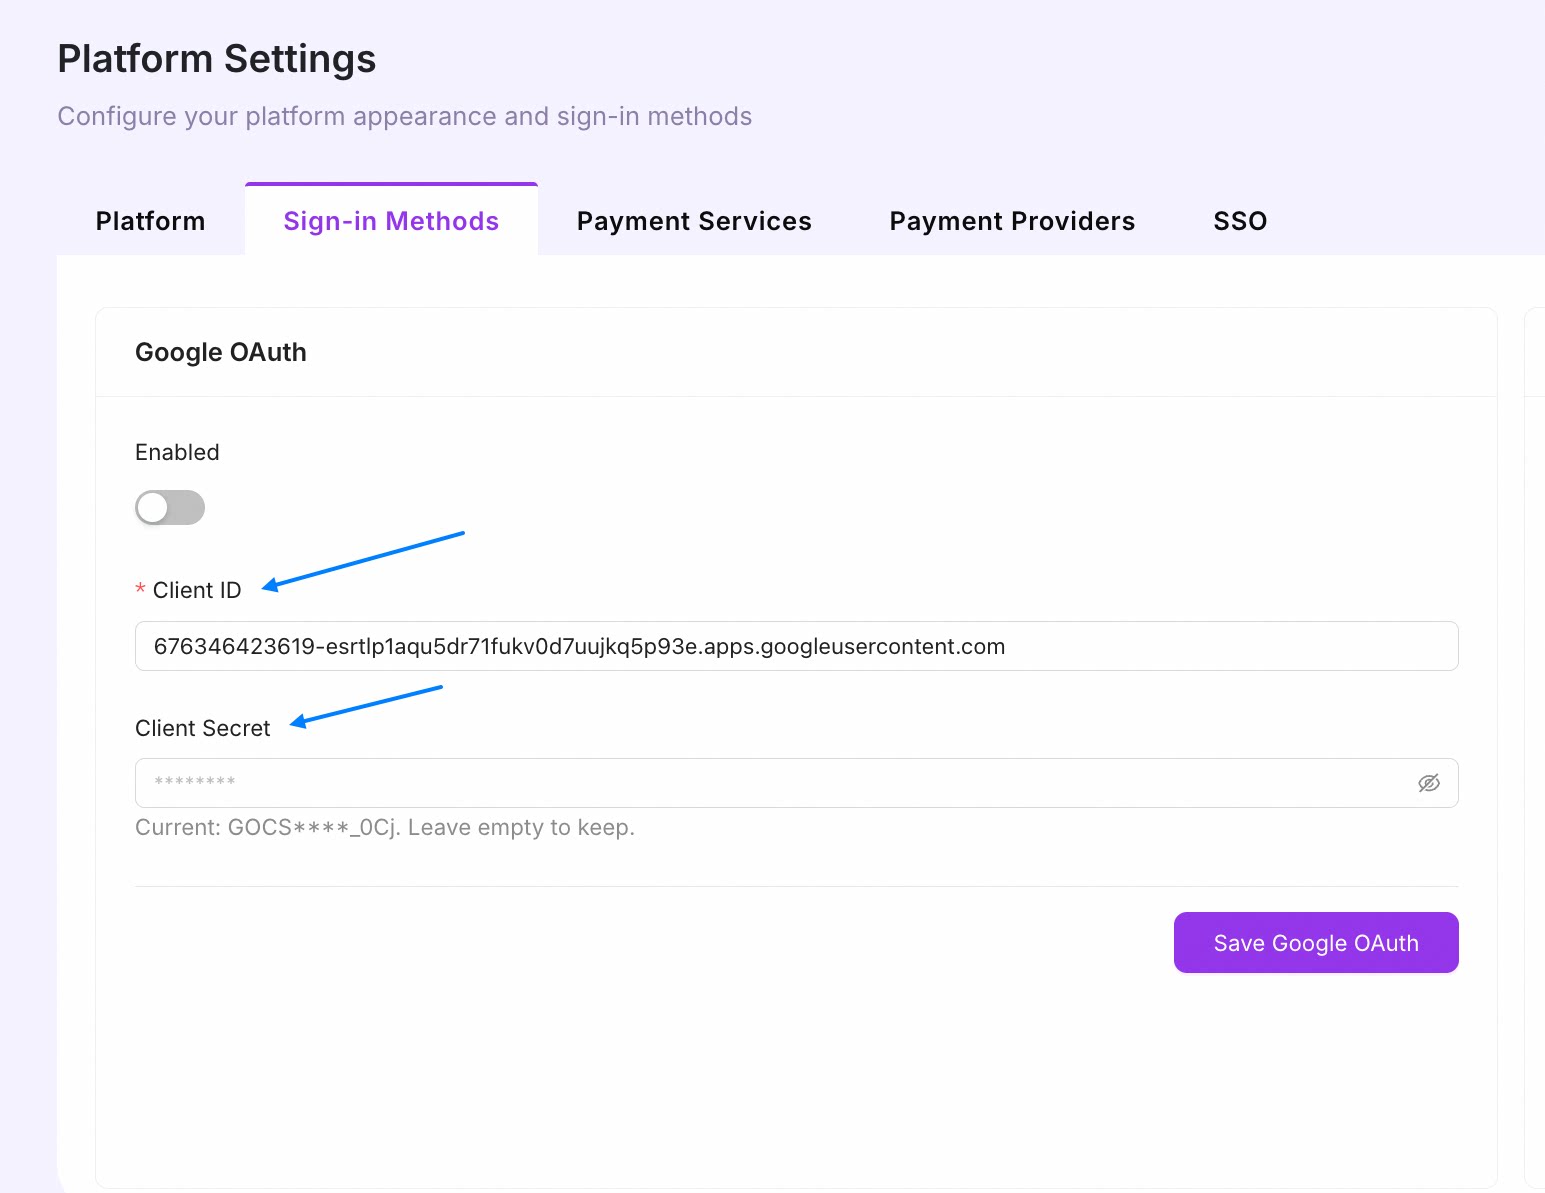
Navigate to Smart Studio Settings →Sign-in Methods → Google OAuth:
-
CLIENT ID= your Client ID -
CLIENT SECRET= your Client Secret
-
-
Save the configuration and Enabled the service if required.
Step 6: Verify
-
Open your application's login page and click Sign in with Google.
-
Complete the Google consent flow.
-
Confirm that you are redirected back to the application and logged in successfully.
GitHub OAuth configuration
Prerequisites
- A GitHub account with owner/admin permission on the target organization (for org-level apps), or a personal account (for user-level apps)
Steps
Step 1: Access Developer Settings
-
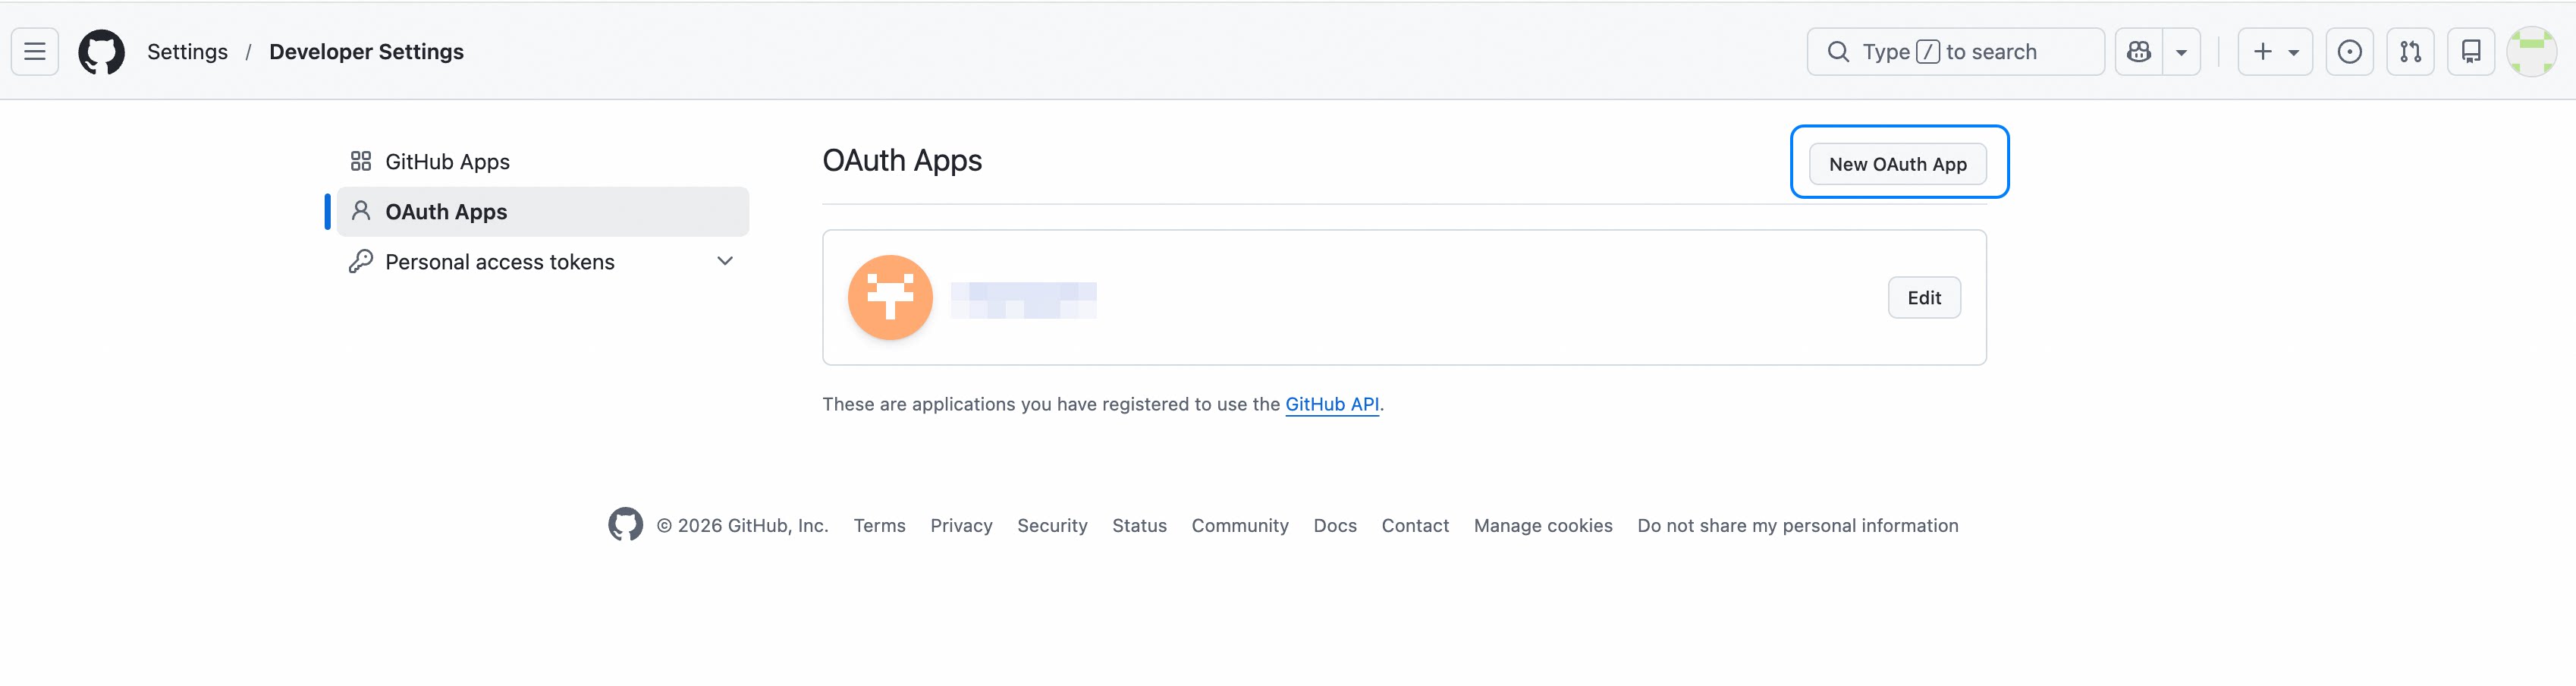
Organization app: GitHub → your organization → Settings → Developer settings → OAuth Apps
-
Personal app: GitHub → your avatar → Settings → Developer settings → OAuth Apps
Or go directly to: https://github.com/settings/developers
Step 2: Register a New OAuth App
-
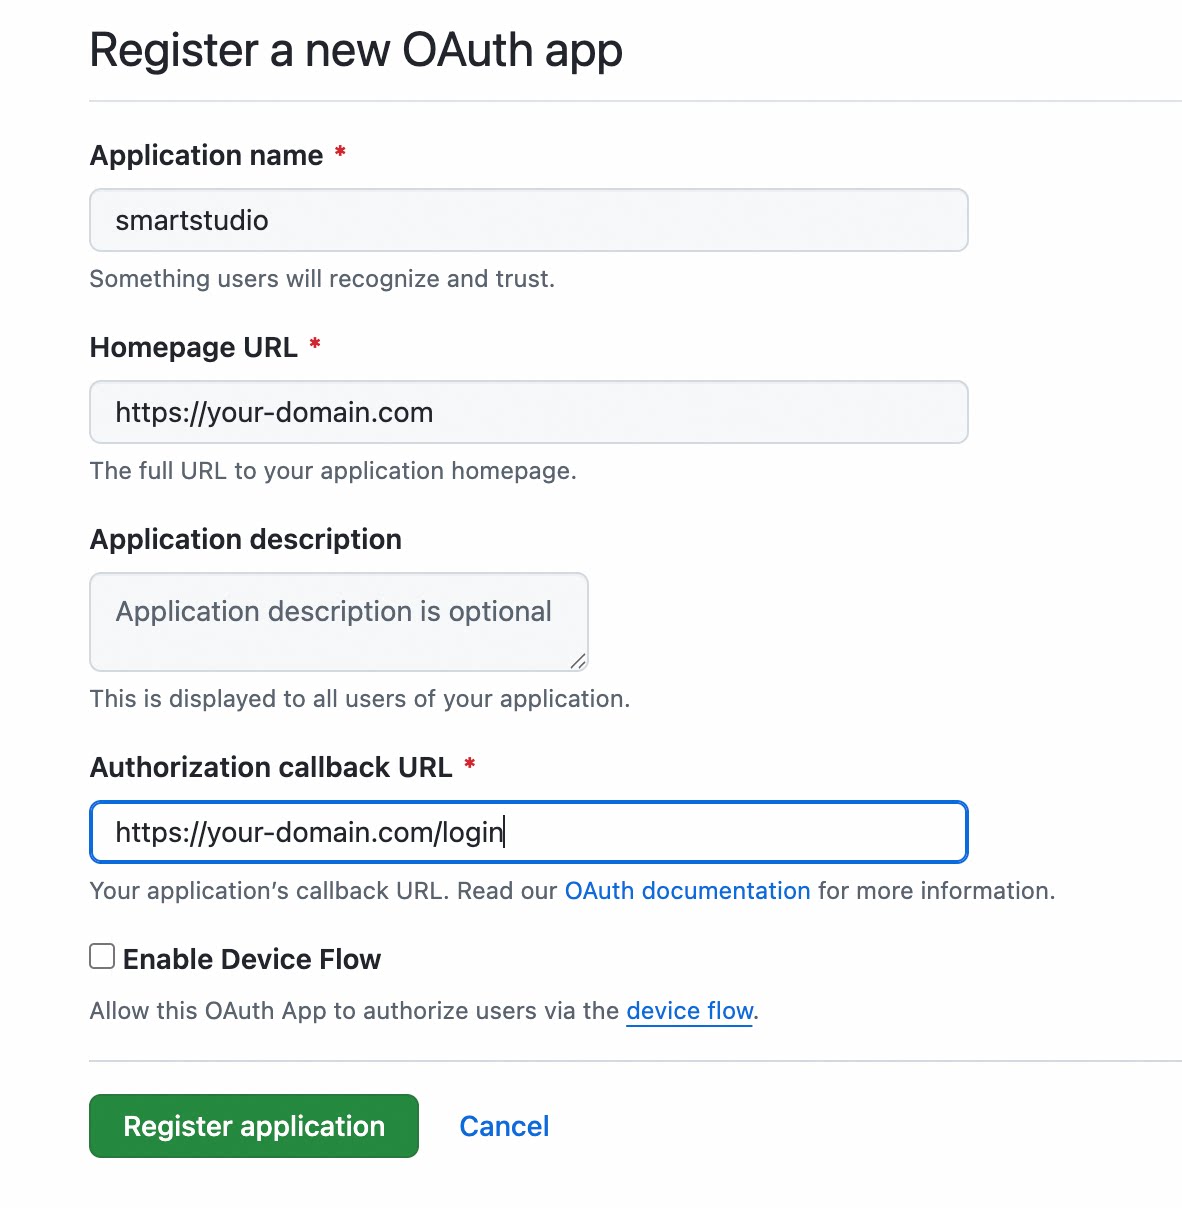
On the OAuth Apps page, click New OAuth App.
-
Fill in the registration form:
-
Application name: a user-facing name shown during authorization (e.g.,
MyApp) -
Homepage URL:
https://your-domain.com -
Application description (optional)
-
Authorization callback URL:
https://your-domain.com/login
⚠️ The callback URL must match your application configuration exactly.
-
-
Click Register application.
Step 3: Obtain the Client ID and Client Secret
-
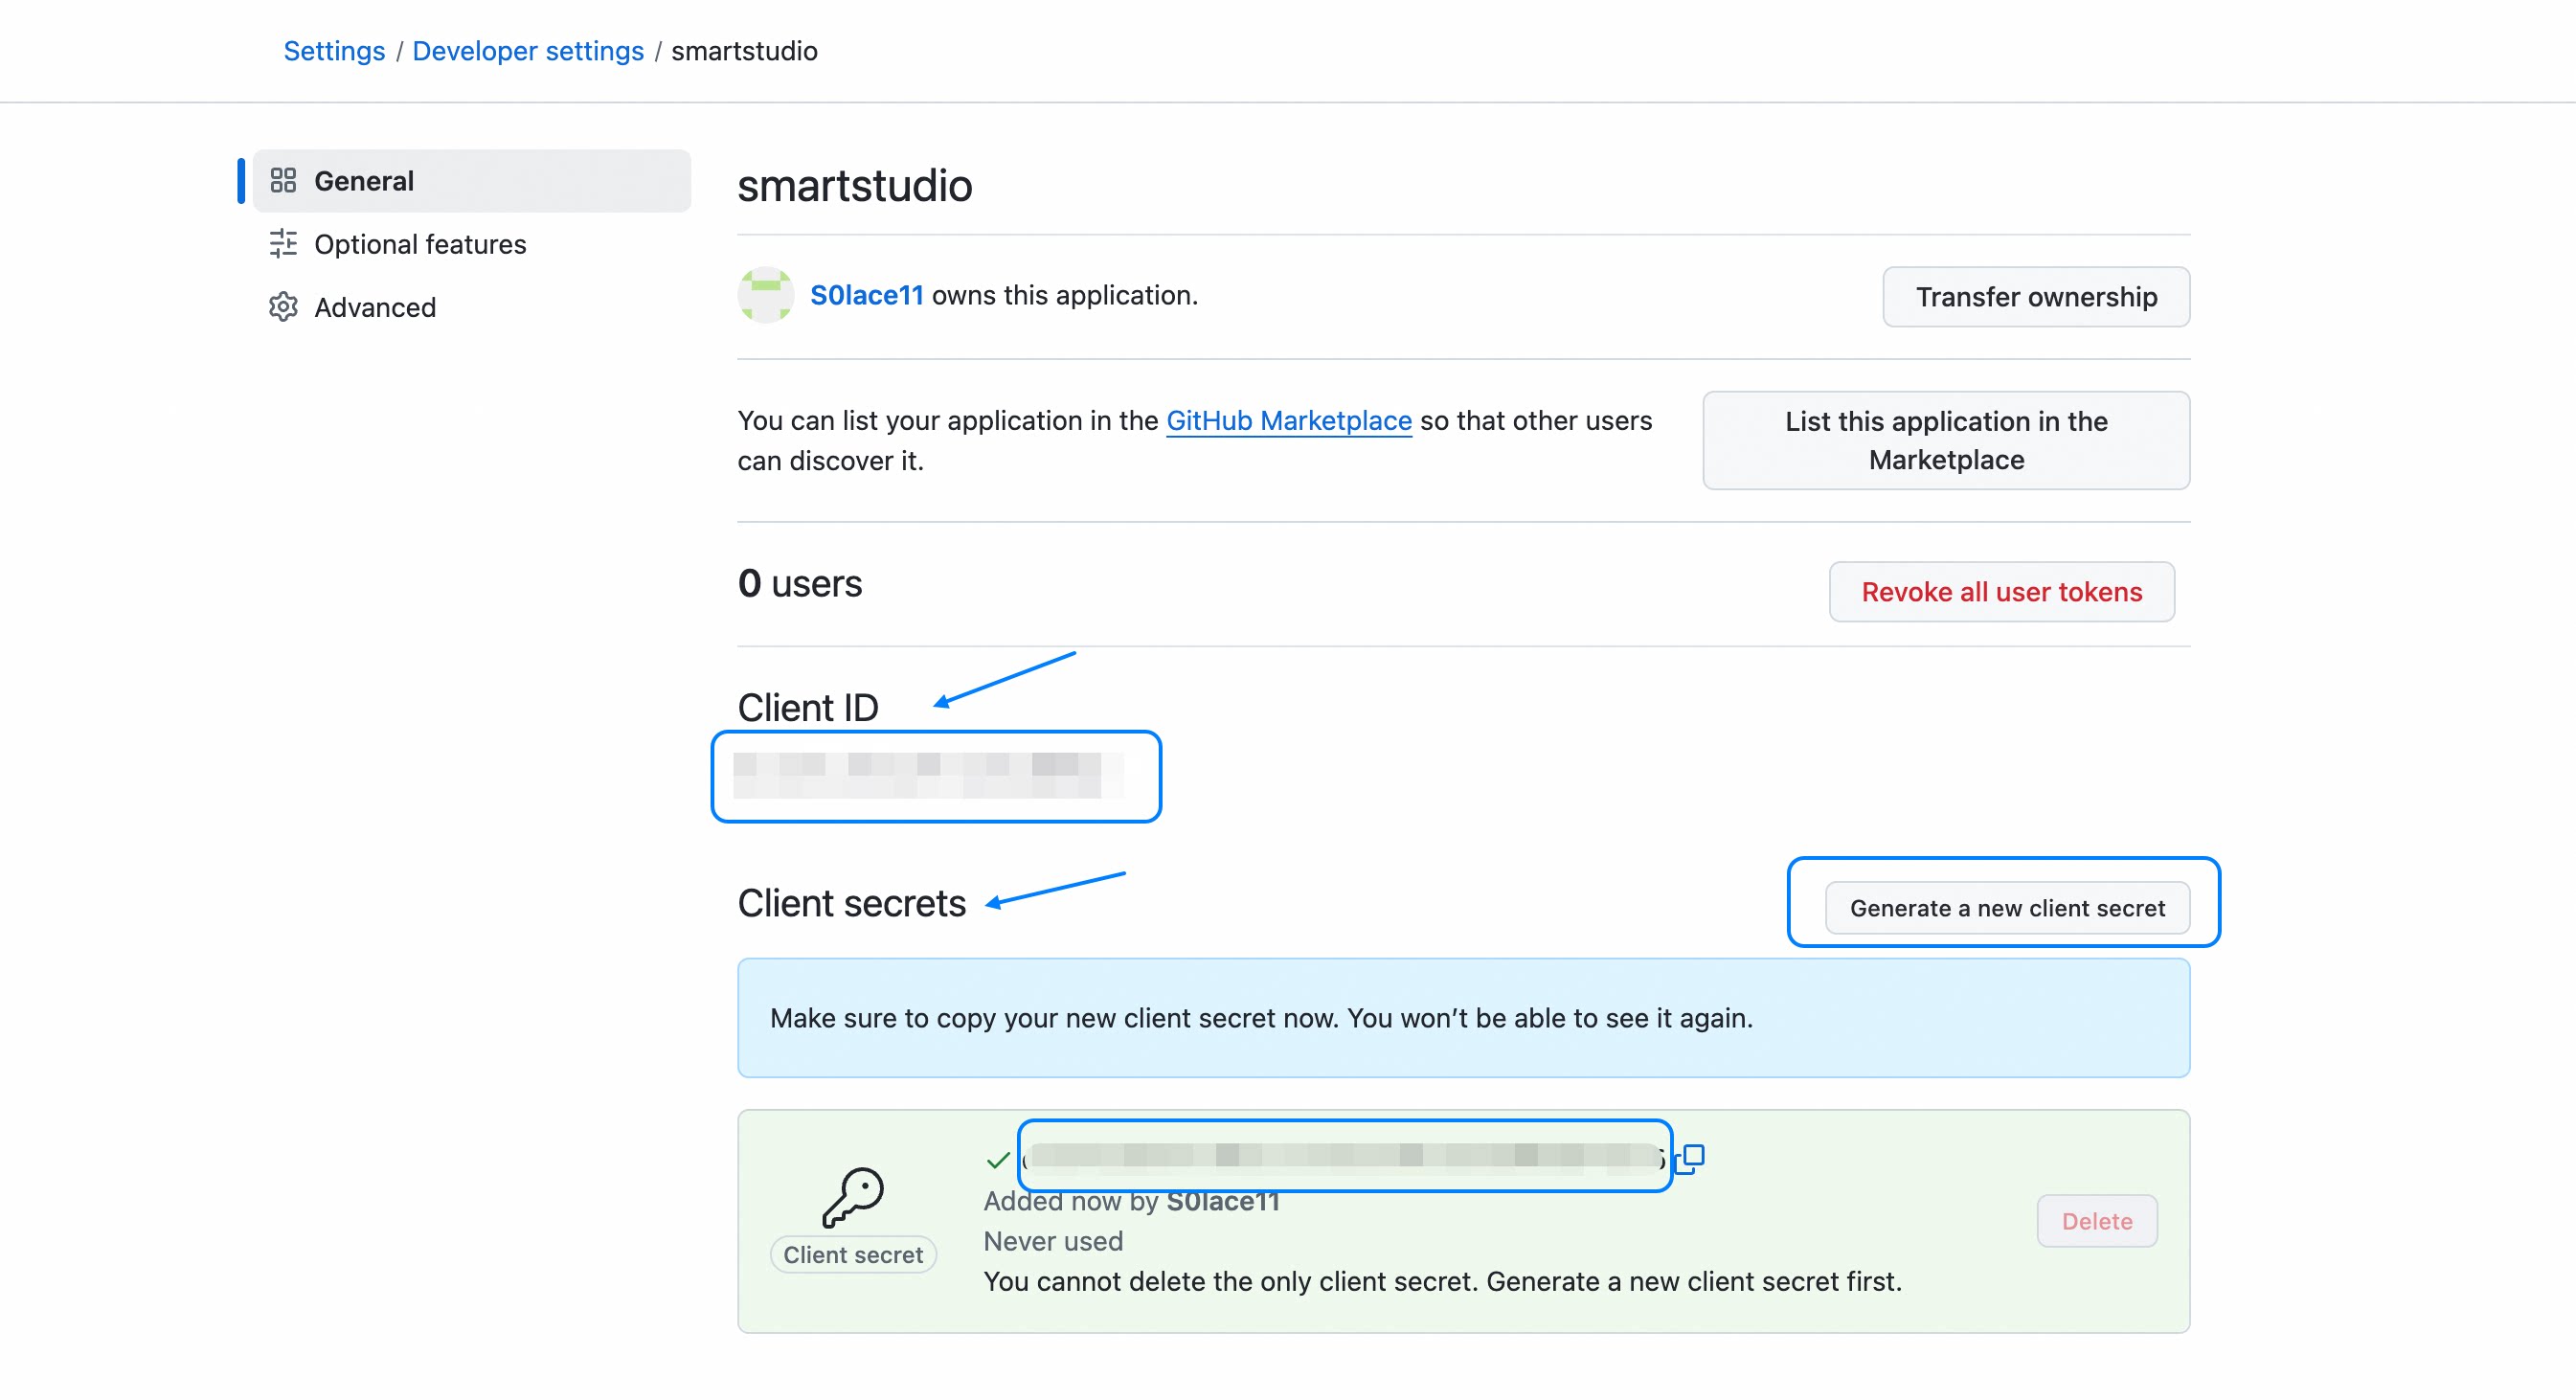
After registration, the app detail page displays the Client ID. Copy and record it.
-
Click Generate a new client secret (GitHub does not display secrets; a new one is generated each time).
-
Copy the Client Secret immediately — it is shown only once. Store it securely.
⚠️ If the secret is lost, you must generate a new one; the old one will be invalidated.
Step 4: Configure the Application
-
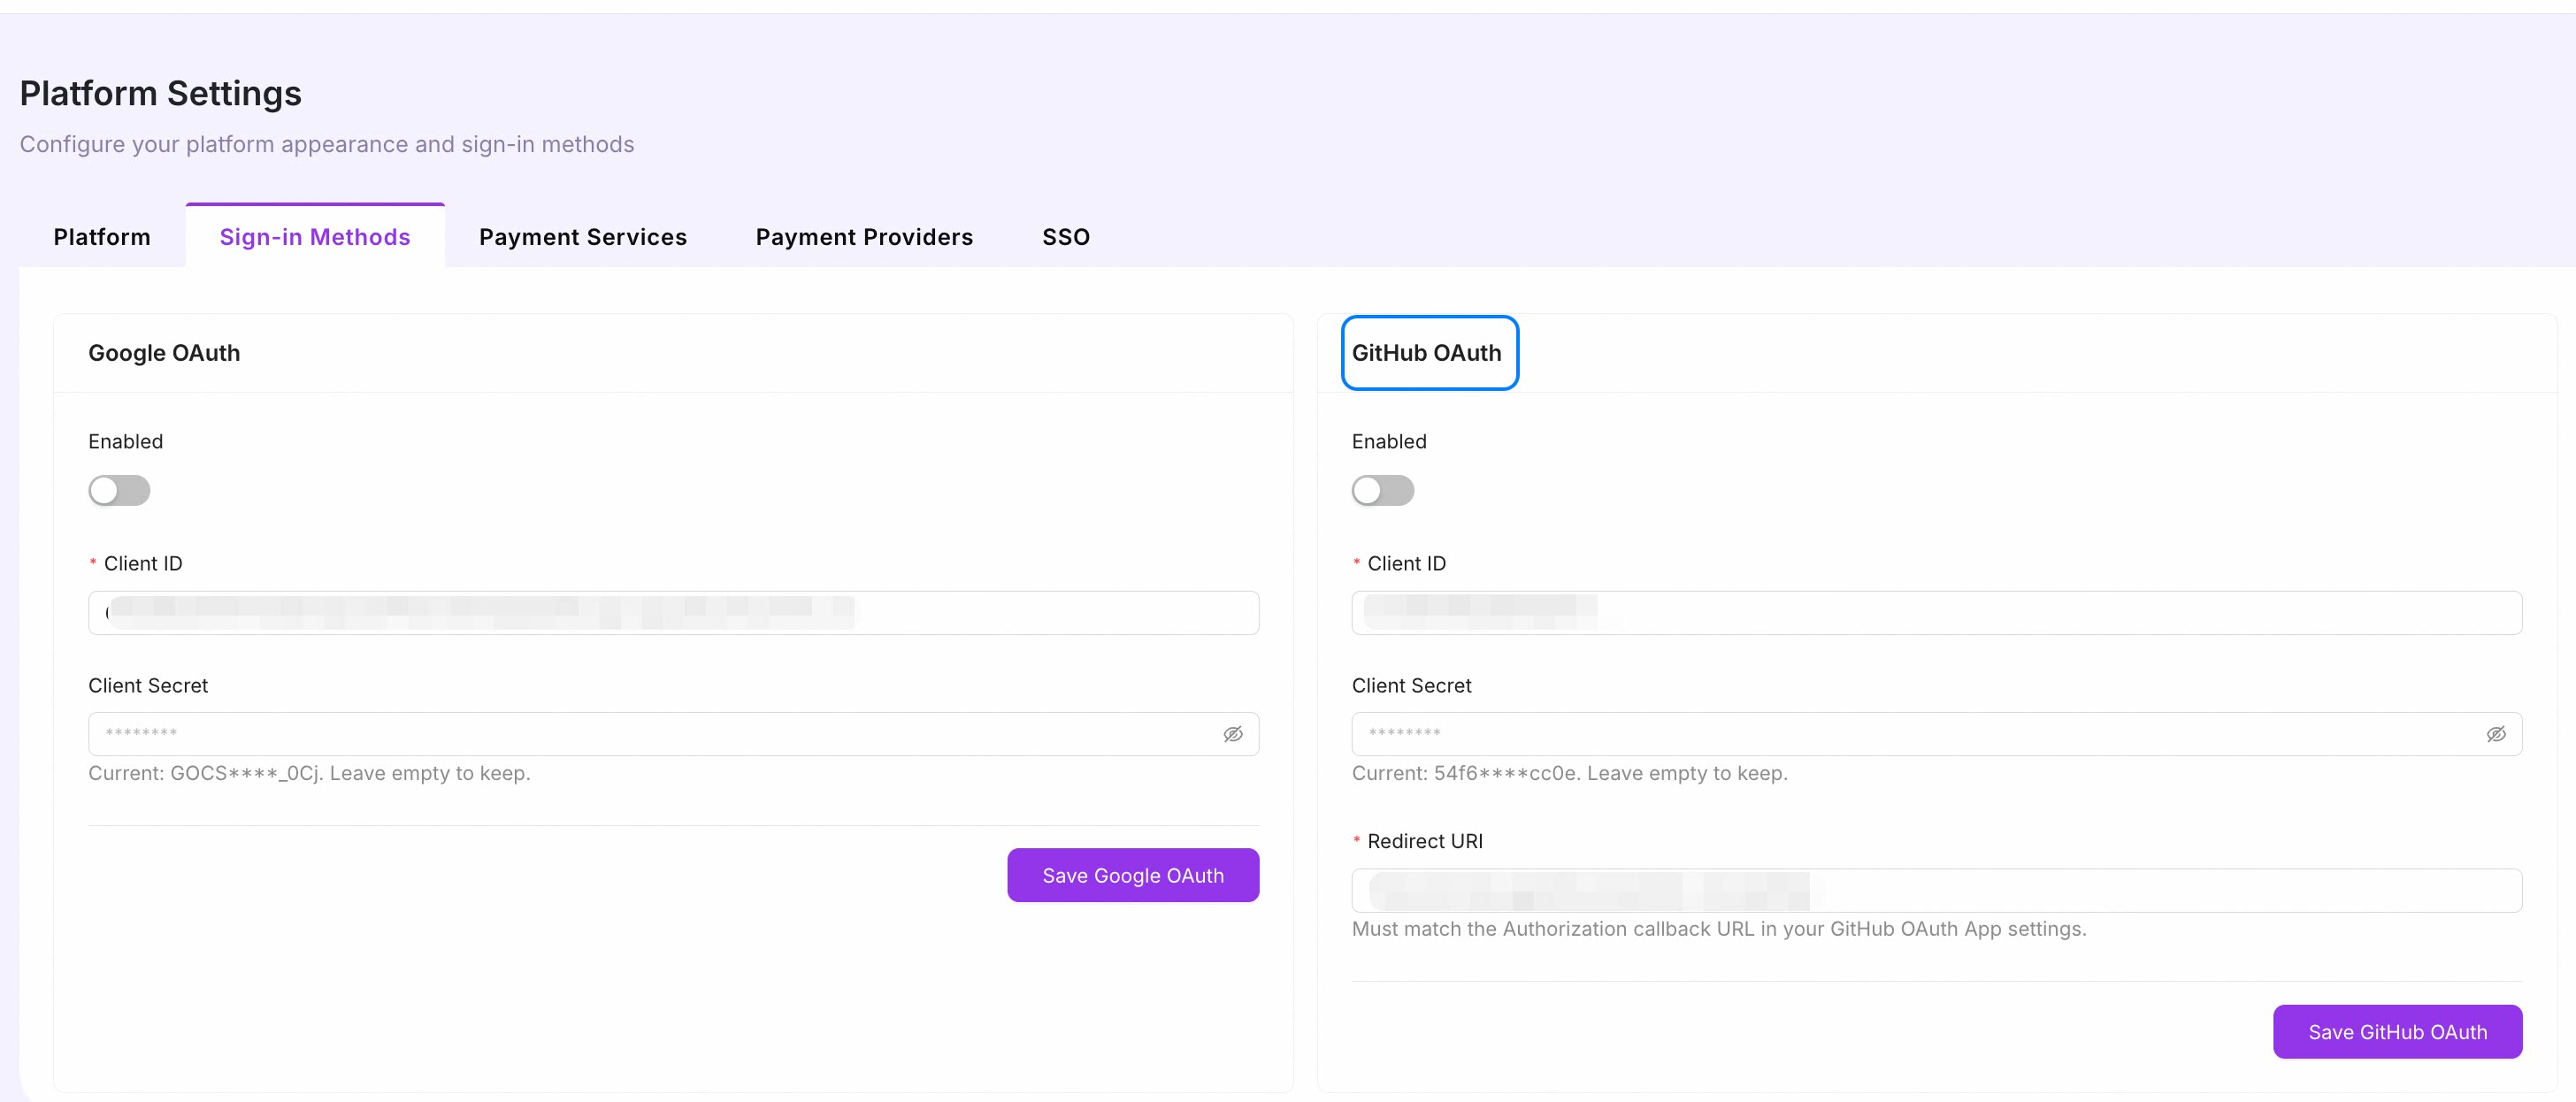
Navigate to Smart Studio Platform Settings → Sign-in Methods → Github OAuth
-
CLIENT ID= your Github Client ID -
CLIENT SECRET= your Github Client Secret -
REDIRECT URI= your Redirect URL
-
-
Save the configuration and restart/redeploy the service if required.
Step 5: Verify
-
Open your application's login page and click Sign in with GitHub.
-
Approve the authorization request on GitHub.
-
Confirm that you are redirected back and logged in successfully.
-
If you see
redirect_uri_mismatch, verify the callback URL registered on GitHub matches the application configuration exactly.
Tips
- OAuth changes affect new sessions only — existing logged-in users are not disrupted.
- You can enable both Google and GitHub OAuth simultaneously.
- After enabling an OAuth provider, test the sign-in flow with a non-admin account.
Next Step
Continue with Payment Services.