Payment Providers
The Payment Providers tab lets you manage payment provider definitions and their configurations. Use this page to add new payment providers or configure existing ones.
Provider definitions table
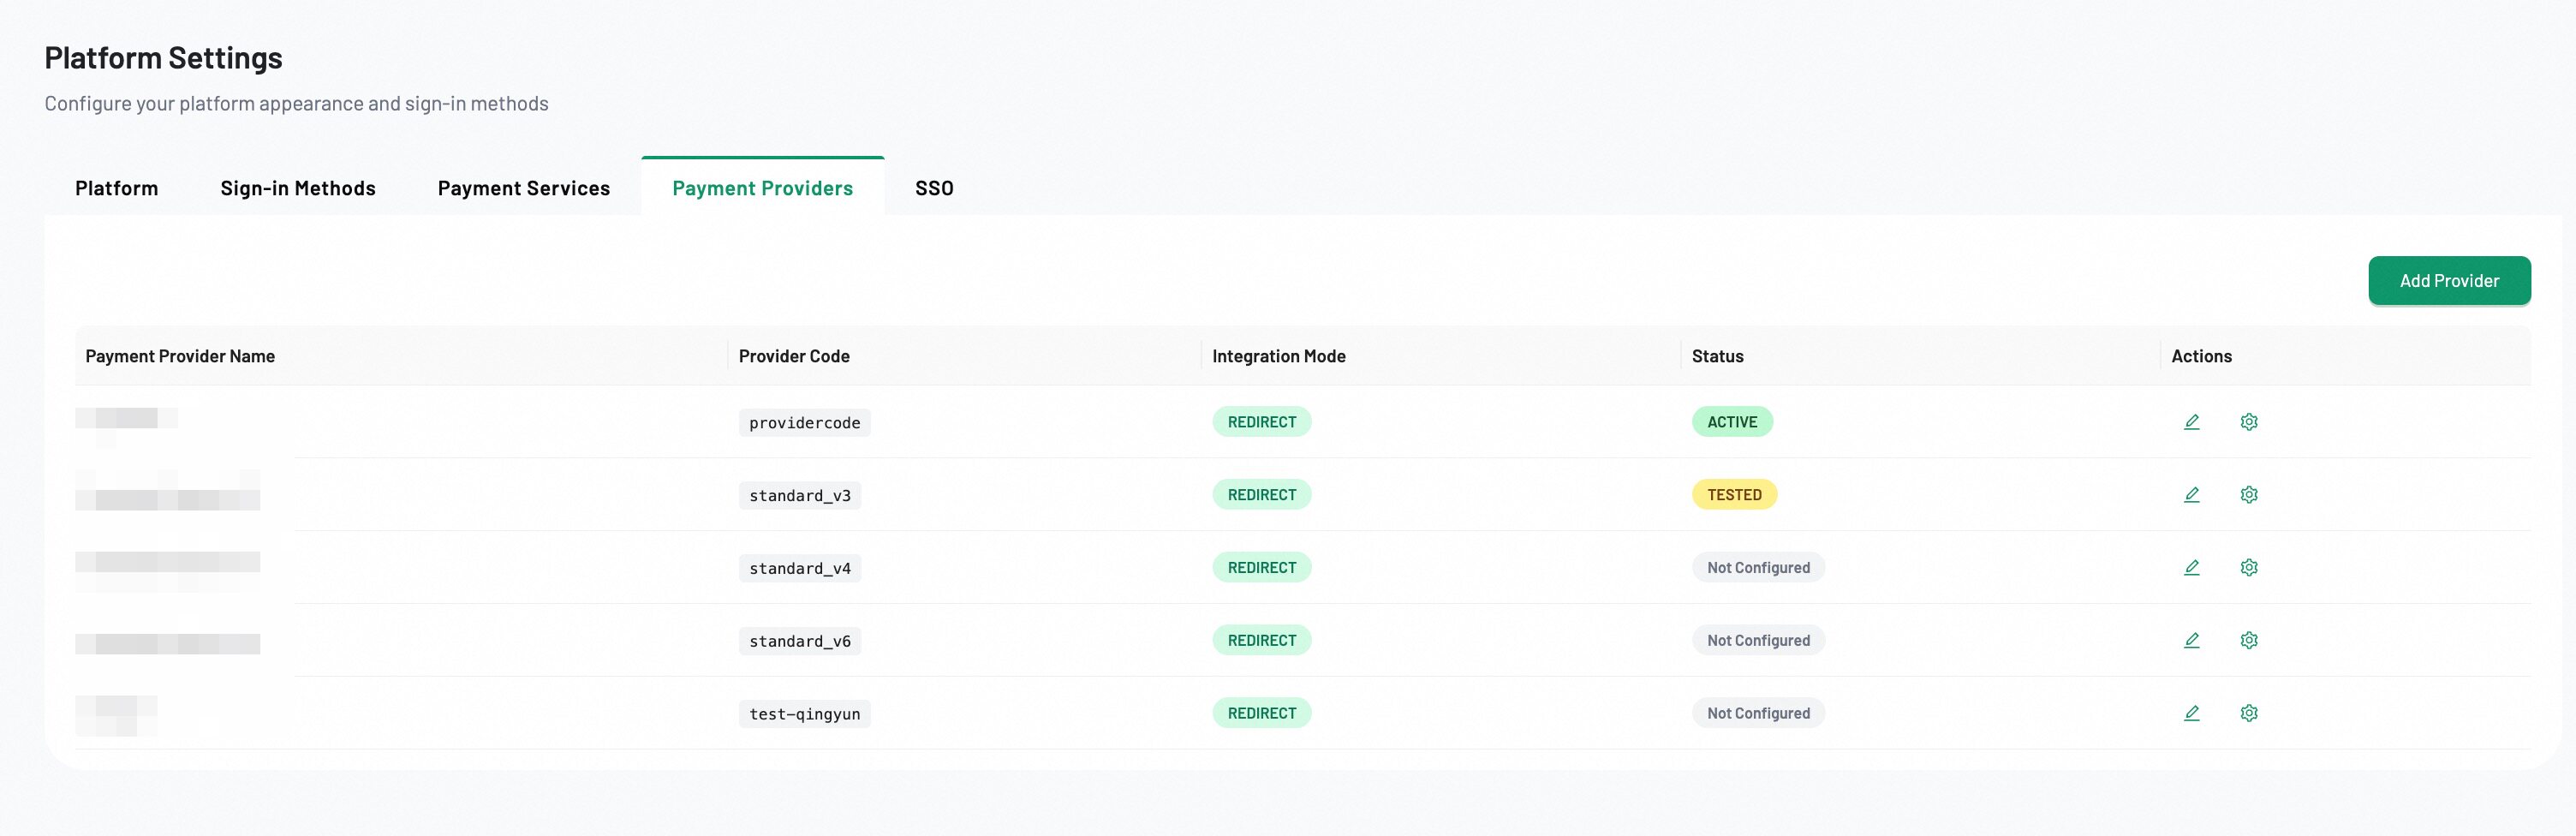
The table displays all registered payment providers with the following columns:
| Column | Description |
|---|---|
| Payment Provider Name | The display name of the payment provider. |
| Provider Code | The unique identifier for the provider (e.g., stripe_v1). |
| Integration Mode | How the provider integrates with the platform. |
| Status | The configuration status: Not Configured, DRAFT, TESTED, ACTIVE, or DISABLED. |
| Actions | Edit the provider definition or configure the provider. |
Add a Provider
- Click Add Provider in the top-right corner.
- Fill in the provider definition fields.
- Click Create to register the provider.
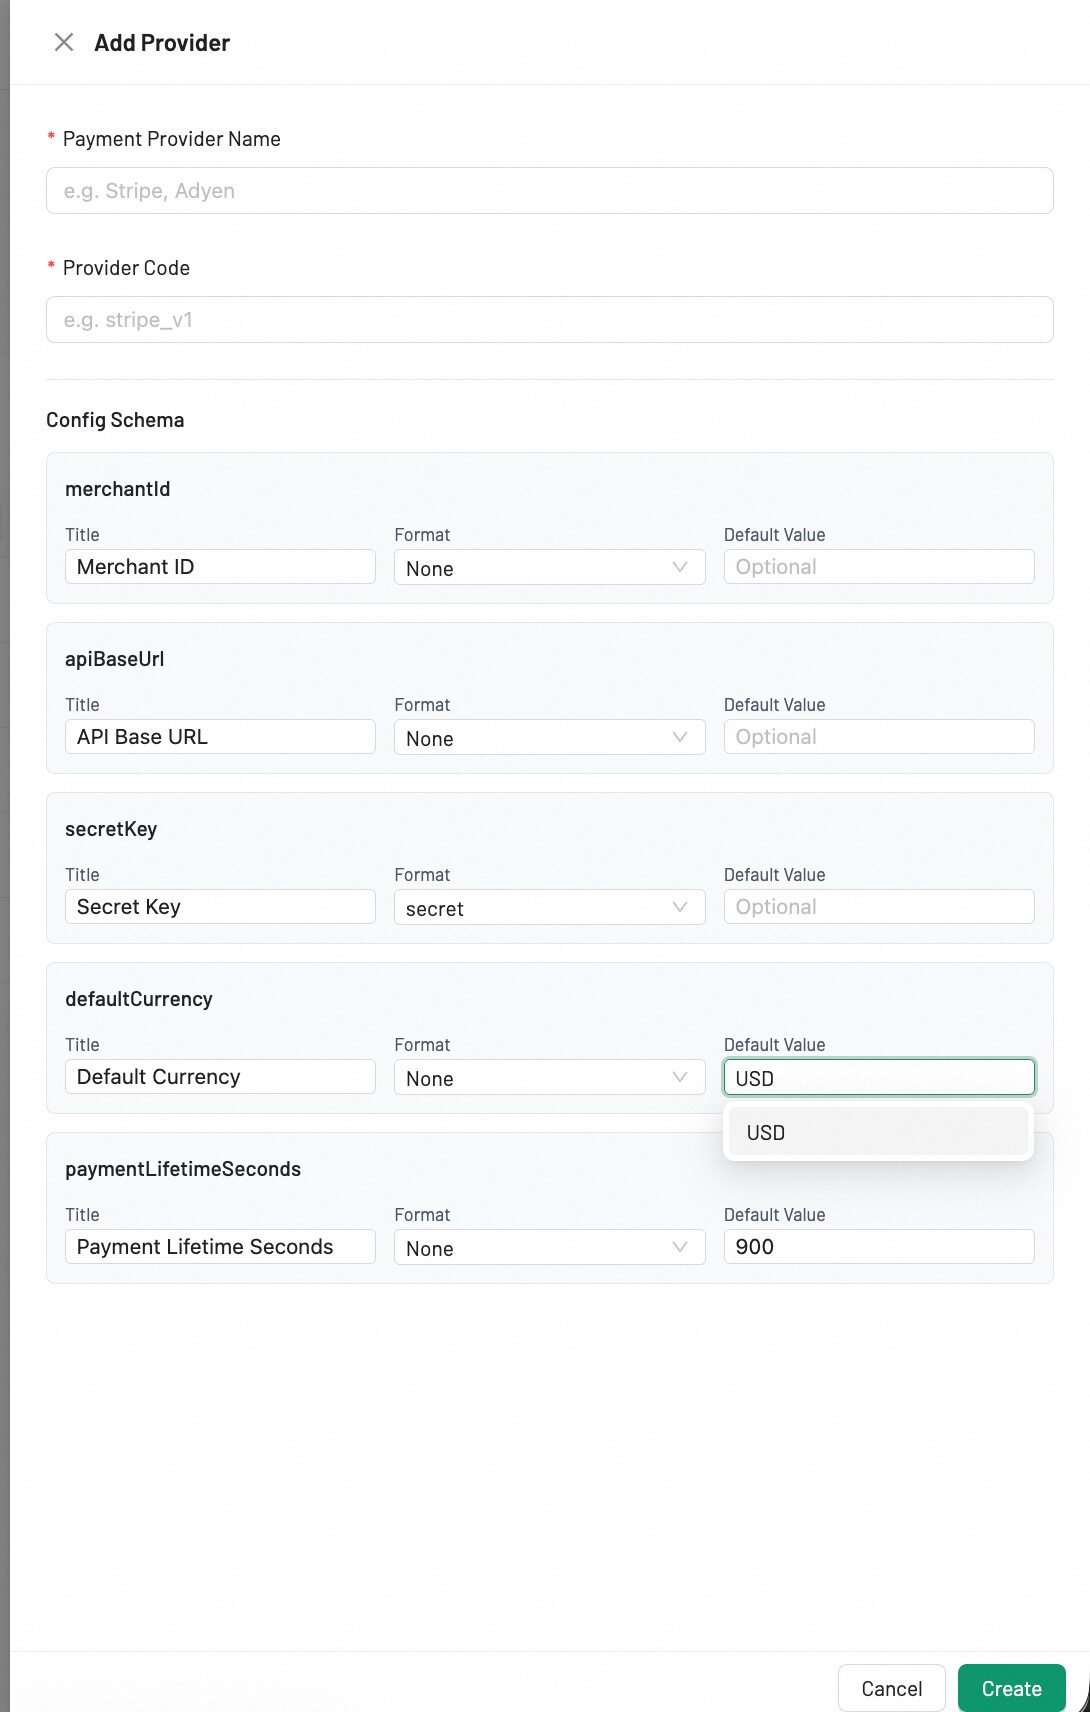
Provider definition fields
| Field | Required | Description |
|---|---|---|
| Payment Provider Name | Yes | The display name of the provider (e.g., Adyen, PayPal). |
| Provider Code | Yes | A unique identifier for the provider (e.g., adyen_v1). This field cannot be changed after creation. |
| Merchant ID | Yes | The merchant identifier issued by the payment provider. |
| API Base URL | Yes | The base URL for the provider's API endpoints (e.g., https://checkout-test.adyen.com/v71). |
| Secret Key | Yes | The secret key for API authentication. This field is masked after configuration. |
| Default Currency | Yes | The default currency for transactions. Supports 130+ ISO 4217 currency codes. |
| Payment Lifetime Seconds | Yes | The duration (in seconds) before a payment request expires. |
Edit a Provider
- Find the provider in the table.
- Click the Edit icon to modify the provider definition.
- Update the Payment Provider Name as needed.
- Click Save to apply changes.
The Provider Code and Config Schema fields cannot be modified after creation. The original Config Schema is preserved when editing.
Configure a Provider
After defining a provider, you can configure its connection settings:
- Find the provider in the table.
- Click Configure to open the configuration page.
- Fill in the provider-specific credentials and settings.
- Click Save to store the configuration.
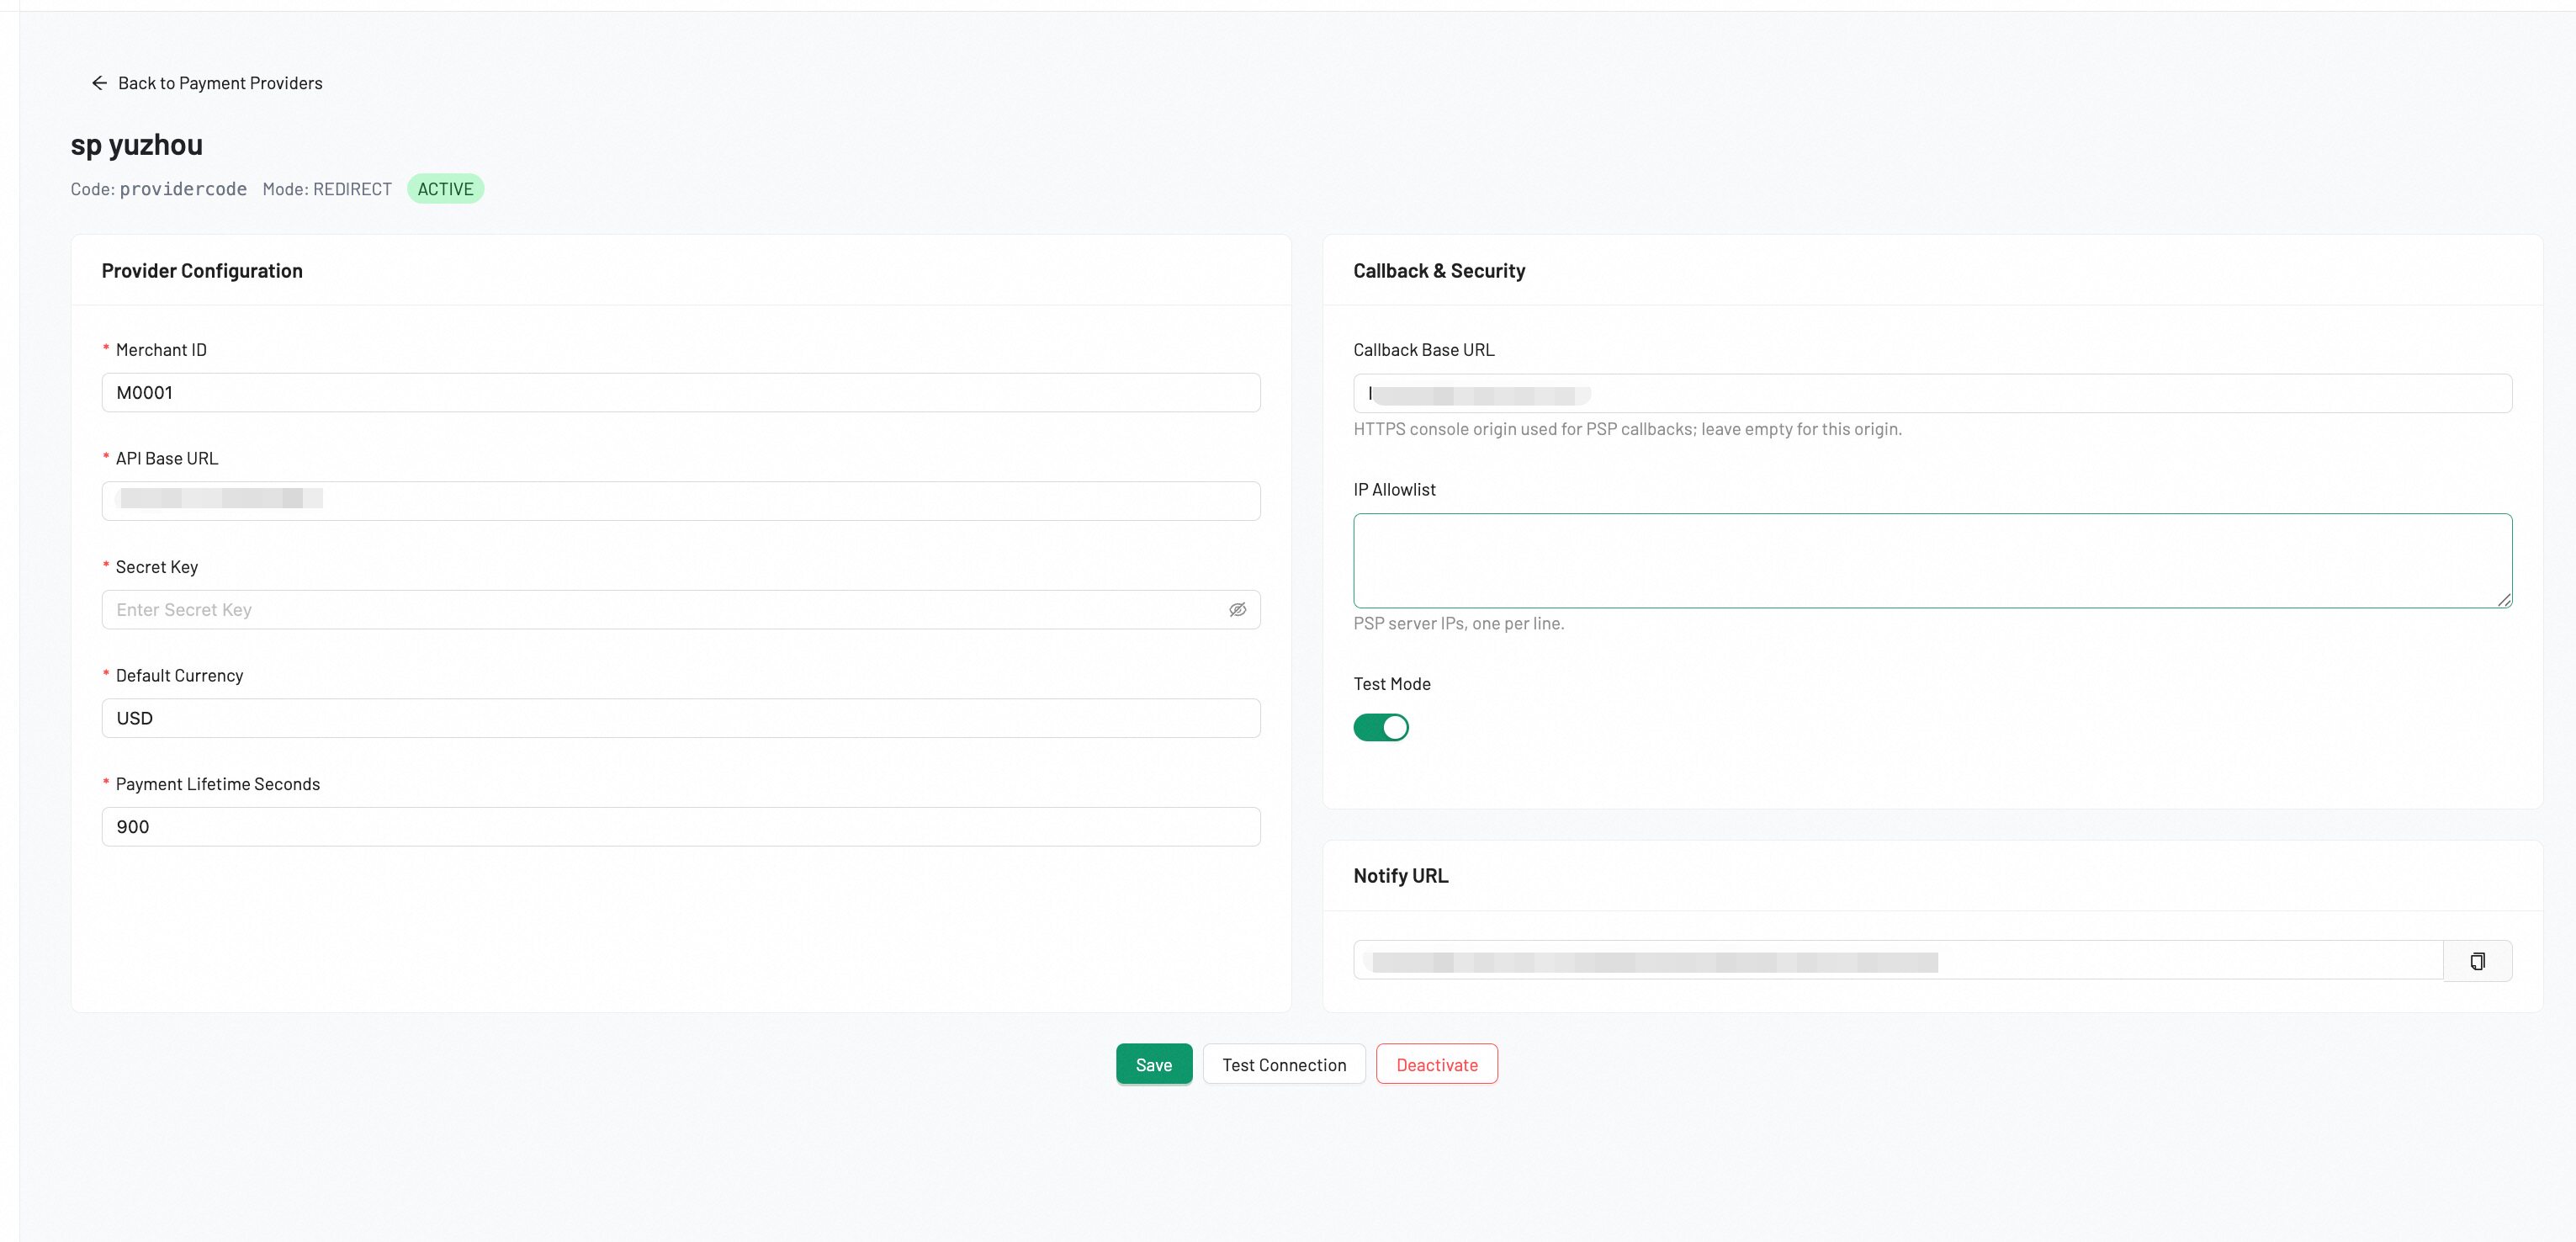
The configuration page contains the following fields:
-
Provider Configuration: Enter the provider-specific credentials based on the Config Schema (e.g., Merchant ID, API Base URL, Secret Key).
-
Callback Base URL: HTTPS console origin used for PSP callbacks; leave empty for this origin (e.g.,
https://console.example.com). -
IP Allowlist: PSP server IPs, one per line (e.g.,
192.168.1.1). -
Test Mode: Enable test mode for sandbox testing (e.g., routes requests to the provider's test environment).
-
Notify URL: Read-only field showing the system-generated callback URL for payment notifications.
After saving the configuration, use Test Connection to verify connectivity. Once tested, click Activate to enable the provider for production use. You can Deactivate an active provider at any time.
Tips
- A provider must be defined before it can be configured.
- Use Test Connection to verify connectivity before activating the provider.
- Disabled providers cannot process payments until re-enabled.
For Developers
If you are implementing the payment channel, you need the full technical specification — the init API, the async notify, the HMAC-SHA256 signature scheme, amount/currency rules, and worked examples. Download it and hand it to your developers:
Standard Payment Protocol Integration Guide
Next Step
Continue with SSO.