Activate Cluster
Activate Cluster is the entry point for bringing your GPU infrastructure into Smart Studio. The guided workflow installs the platform agent, verifies every machine, and deploys the Smart Studio platform to your servers.
| You provide | Smart Studio handles | Successful result |
|---|---|---|
| CPU and GPU servers, network access, and machine credentials | Agent connection, compatibility checks, and platform deployment | An Activated cluster with access to GPU Observability and model deployment |
Your progress is saved automatically. You can close the page at any time and resume from the same step later. You can also run multiple activations in parallel from the Activate Service list.
Prerequisites
Complete the following prerequisites:
- If you are deploying the Model Serving Platform (BYO-GPU): Review the BYO-GPU Requirements and confirm your infrastructure meets the minimum requirements.
- If you are deploying the API Router Platform (BYO-Key): Review the API Router Platform Requirements and confirm your infrastructure meets the minimum requirements.
- Confirm your Alibaba Cloud account can authorize the OSS, VPC, and ECI products.
- Keep the CPU server connected to the internet throughout the activation.
Step 0: Choose the Billing Model
- Review the billing rules and keep the agreement checkbox selected.
- Choose the billing model that fits your use case.
| Model Service Platform | API Router Platform | |
|---|---|---|
| Mode | BYO-GPU | BYO-Key |
| Use case | Deploy models on your own Compute Cards to get tokens for internal use or integrate into an existing platform | Resell Model APIs in white-labelled User Console and Admin Console |
| Billing model | Option A: Token Sharing Sharing rate: 15% Option B: Fixed Amount Fee Based on the compute specification provided by the user. | Option A: Token Sharing Sharing rate: Model Studio 5% / Other providers 8% |
The billing model cannot be changed after it is confirmed. Read the billing rules carefully before you make your selection.
Continue to the Next Step
Confirm your selections, click Confirm and Activate, then proceed to Step 1.
Step 1: Prepare the Environment
Read and understand the deployment architecture and install the Smart Studio agent on your CPU server.
Review the Reference Architecture
Choose the platform you want to deploy (Model Service Platform / API Router Platform), open the Architecture Overview panel and choose the topology that fits your environment: standard deployment or POC deployment. For a detailed walkthrough, see the BYO-GPU Requirements. If you are deploying the API Router Platform, refer to the API Router Platform Requirements for CPU-only infrastructure specifications.
Install the Agent
-
Copy the installation command from the page. Your server address and activation token are unique to your account.
-
Run the command on your CPU server:
curl -fsSL http://<server-address>/download/install.sh | bash -s -- \
  --server http://<server-address> \
--activation-token <your-activation-token> -
Keep the terminal session open. Wait for the agent to report running (
systemctl status xt-agent).

Use the exact command from your console. Do not modify the server address or token.
Continue to the Next Step
Click Completed and Next. Smart Studio verifies the agent connection and advances to Step 2.
If the agent is not detected, see The agent isn't detected.
Step 2: Provide Server Information
Enter the connection details for your servers.
Each server can be connected to using either a password or an SSH key.
Enter machine configuration
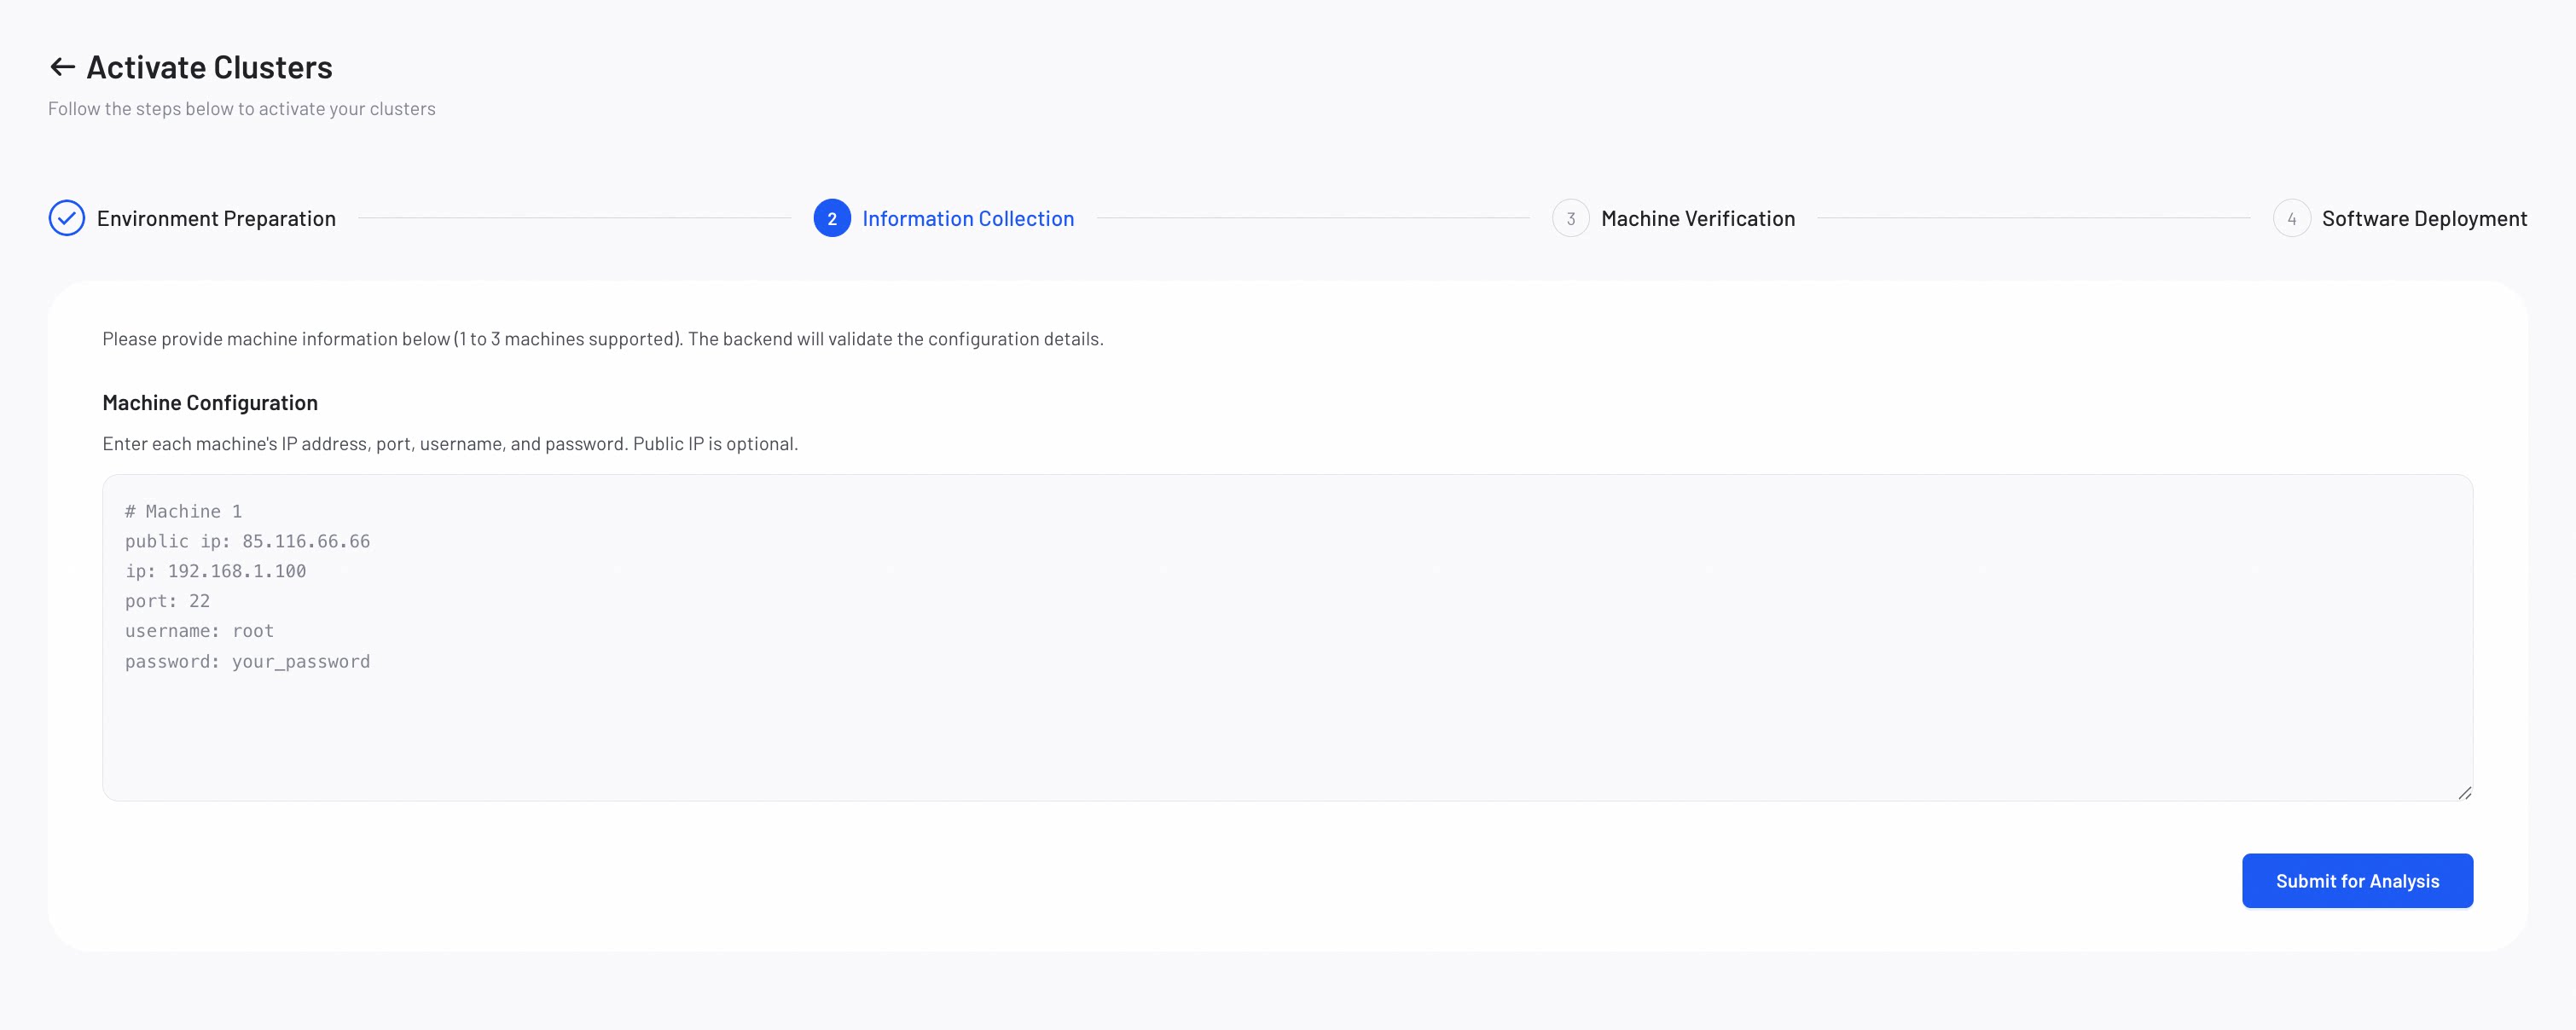
- Paste your server details into the Machine Configuration text area. Use the format shown on the page.
- To add multiple servers, add one block per server.
- Confirm every entry includes the ip: and username: fields. Each entry must include either the password: field or the private key path: field. The activation process rejects incomplete entries.
Format options
Option A: Password authentication
# Machine 1
public ip: xxx
ip: xxx
port: xxx
username: root
password: your_password
Option B: SSH key authentication
Use this option when your target machine is configured for key-based SSH access.
When using SSH key authentication, the private key path refers to the path of the SSH private key file on the Step 1 machine. The platform will read the private key from that path to connect to the target server.
You may use the same private key file for multiple machines, or a different private key file for each machine, depending on how your target machines are configured.
# Machine 1
public ip: xxx
ip: xxx
port: xxx
username: root
private key path: /root/.ssh/id_rsa
Continue to the Next Step Click Submit for Analysis. Then the AI agent analyzes your configuration and the process advances to Step 3 automatically.
If you want to change the information later, return to this page to adjust your configuration.
Step 3: Verify Machine Compatibility
AI Agent will run compatibility checks on each server in parallel and it will take several minutes to do the verification.
Understand the Status Labels
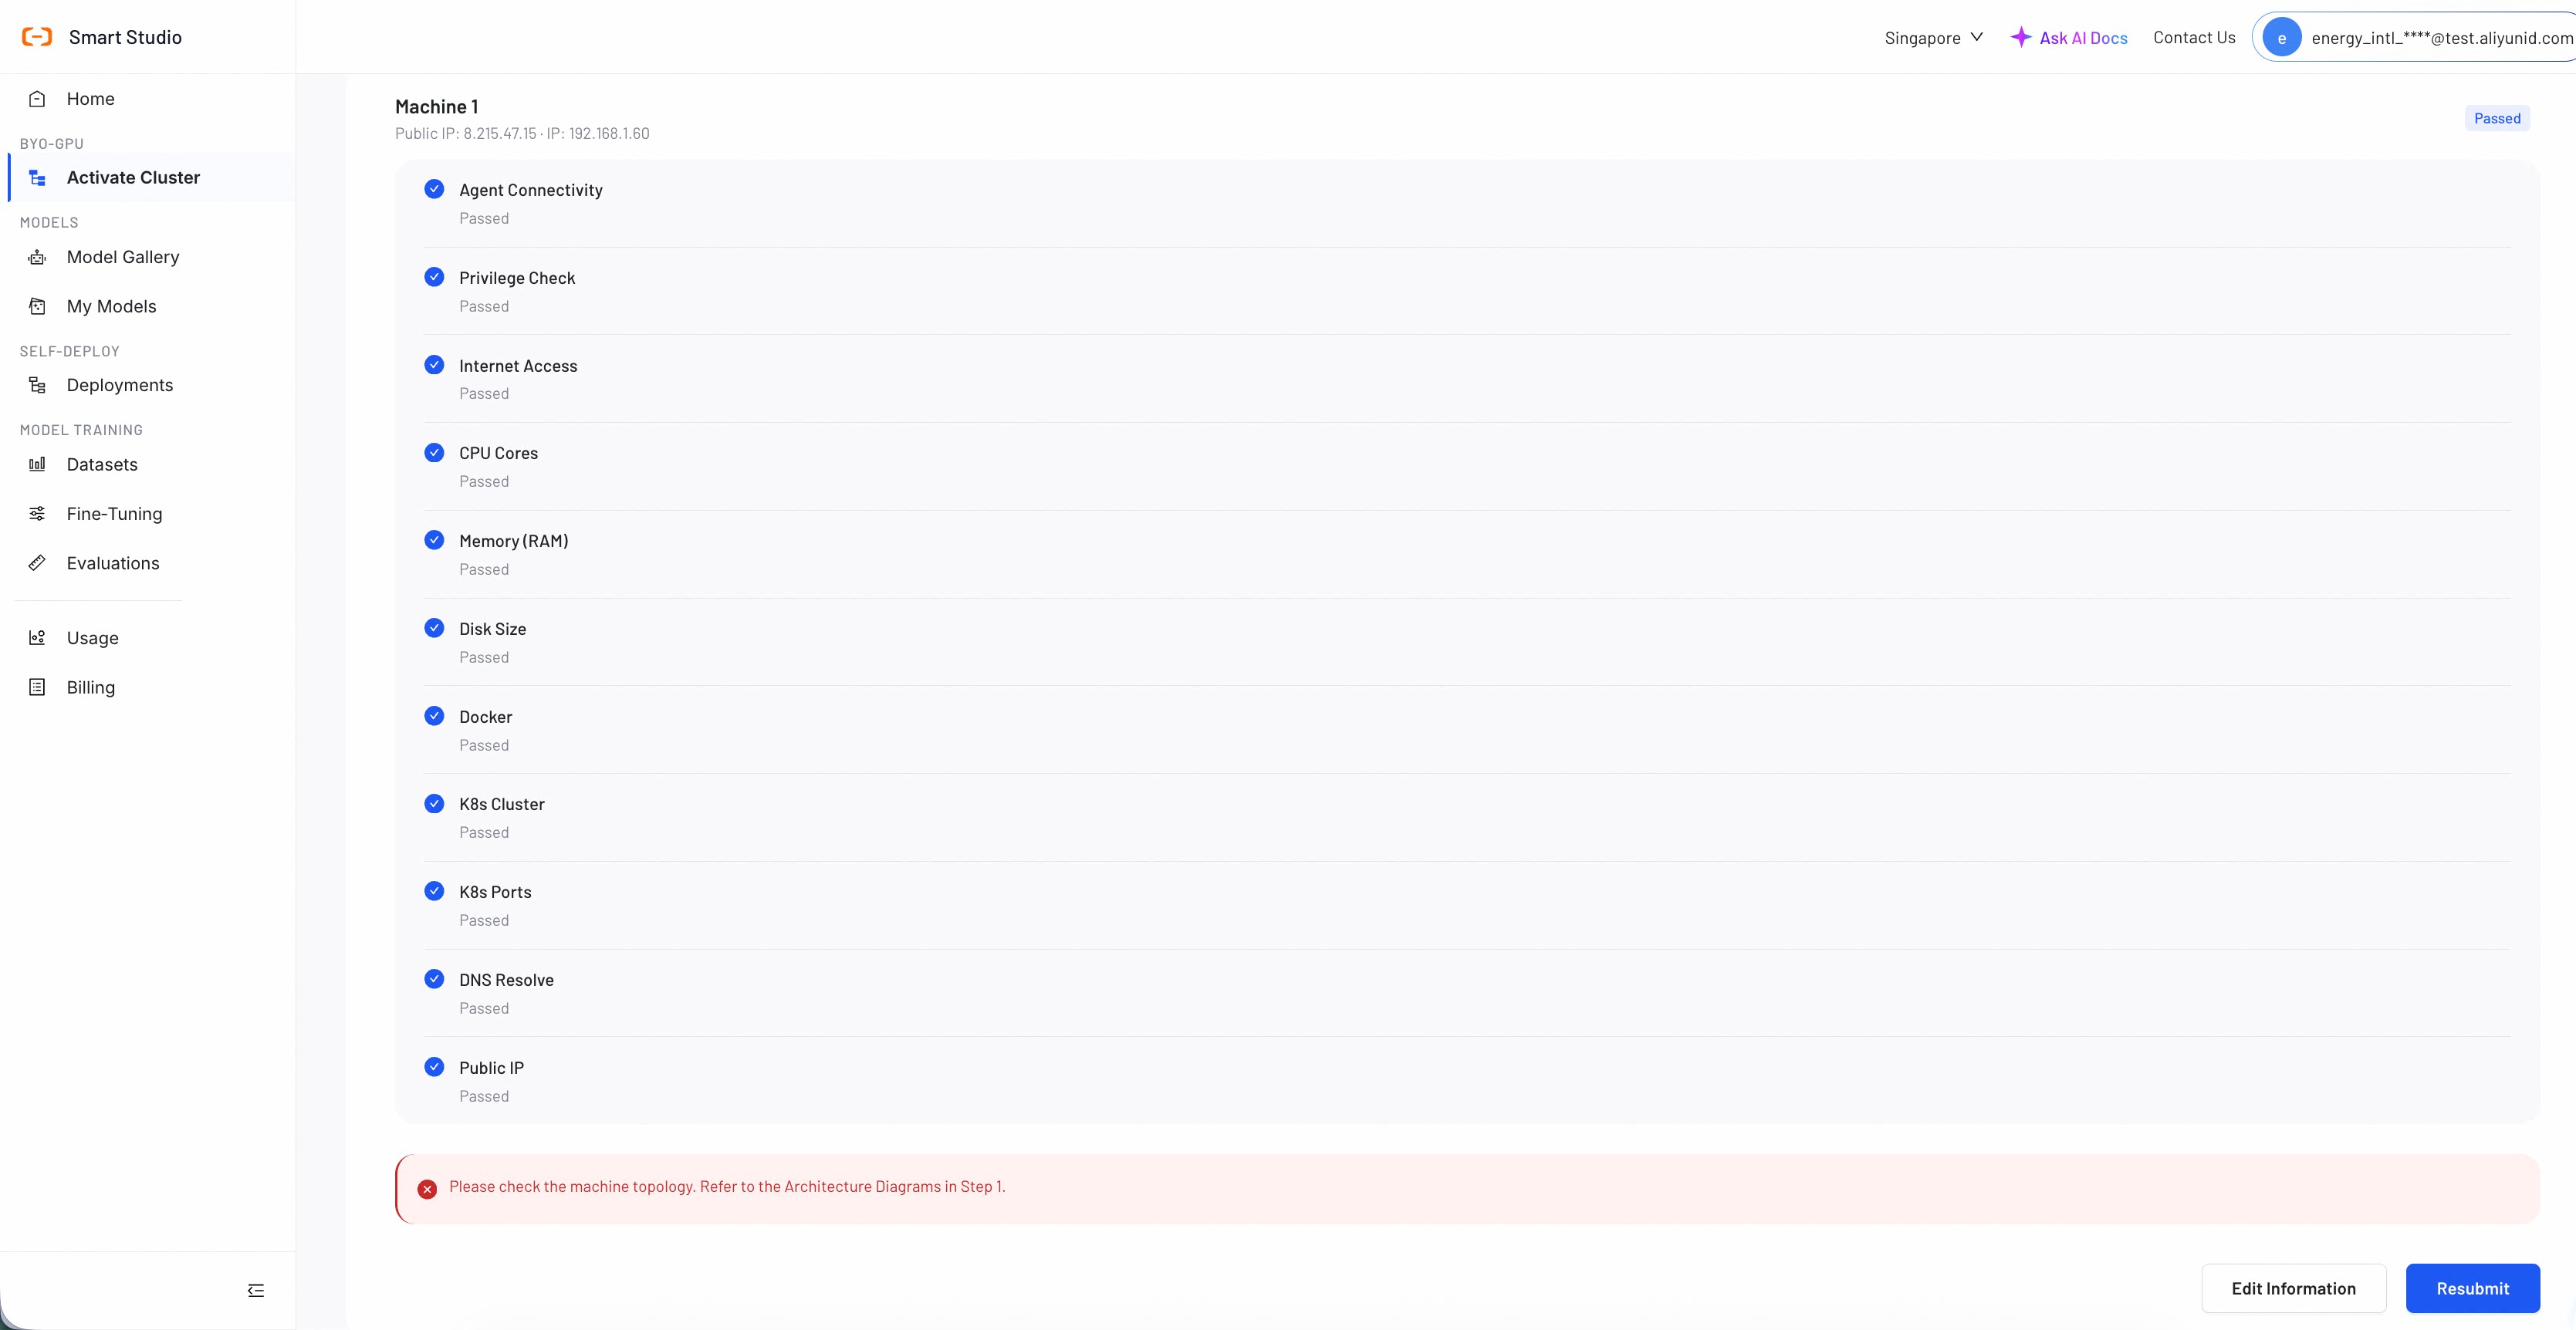
The page shows one card per server. Each card includes the server IP address, an overall status label, and the result of each check.
| Label | Meaning |
|---|---|
| Passed | The server meets all requirements. |
| Checking… | Verification is in progress. |
| Issues | One or more checks failed on this server. |
All buttons are disabled during verification.
Wait for Verification to Complete
When every server reports Passed, the wizard advances to Step 4 automatically.
Handle Failed Checks
If any server reports Issues, choose one of the following actions:
- Click Edit Information to return to Step 2 and update the server details.
- Click Resubmit to rerun the checks without changing the configuration. Use this option for transient network issues.
If any check fails, see Machine verification reports failed checks. If verification stops with a Connection Failed status, see Agent connection is lost during verification.
Step 4: Deploy the Platform
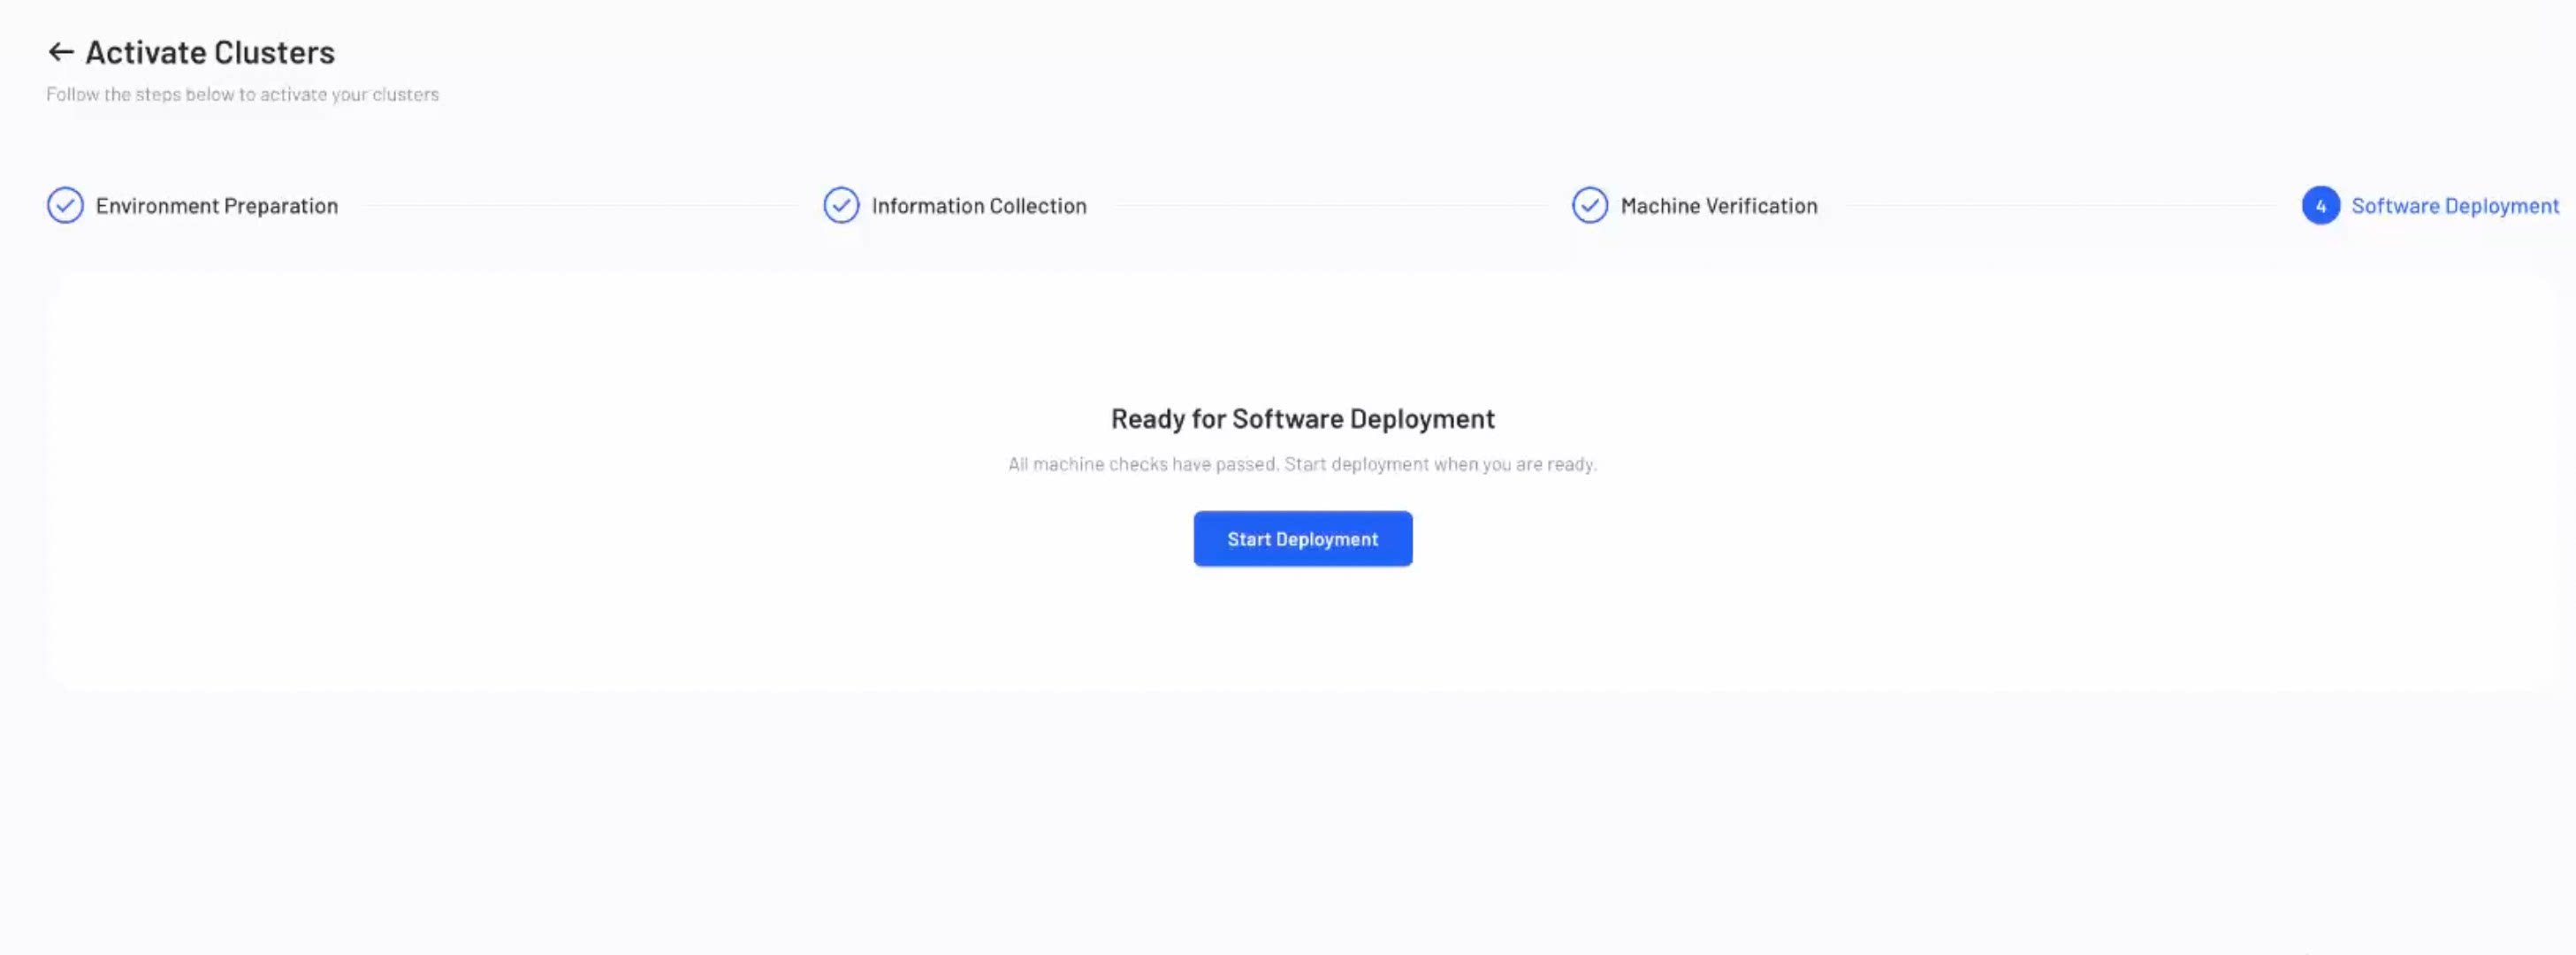
Once the previous steps are complete, you can start to deploy the platform on your servers. Deployment typically takes 60+ minutes and varies with your server configuration (larger memory usually takes longer). The page displays real-time deployment status:
Start Deployment
In Progress
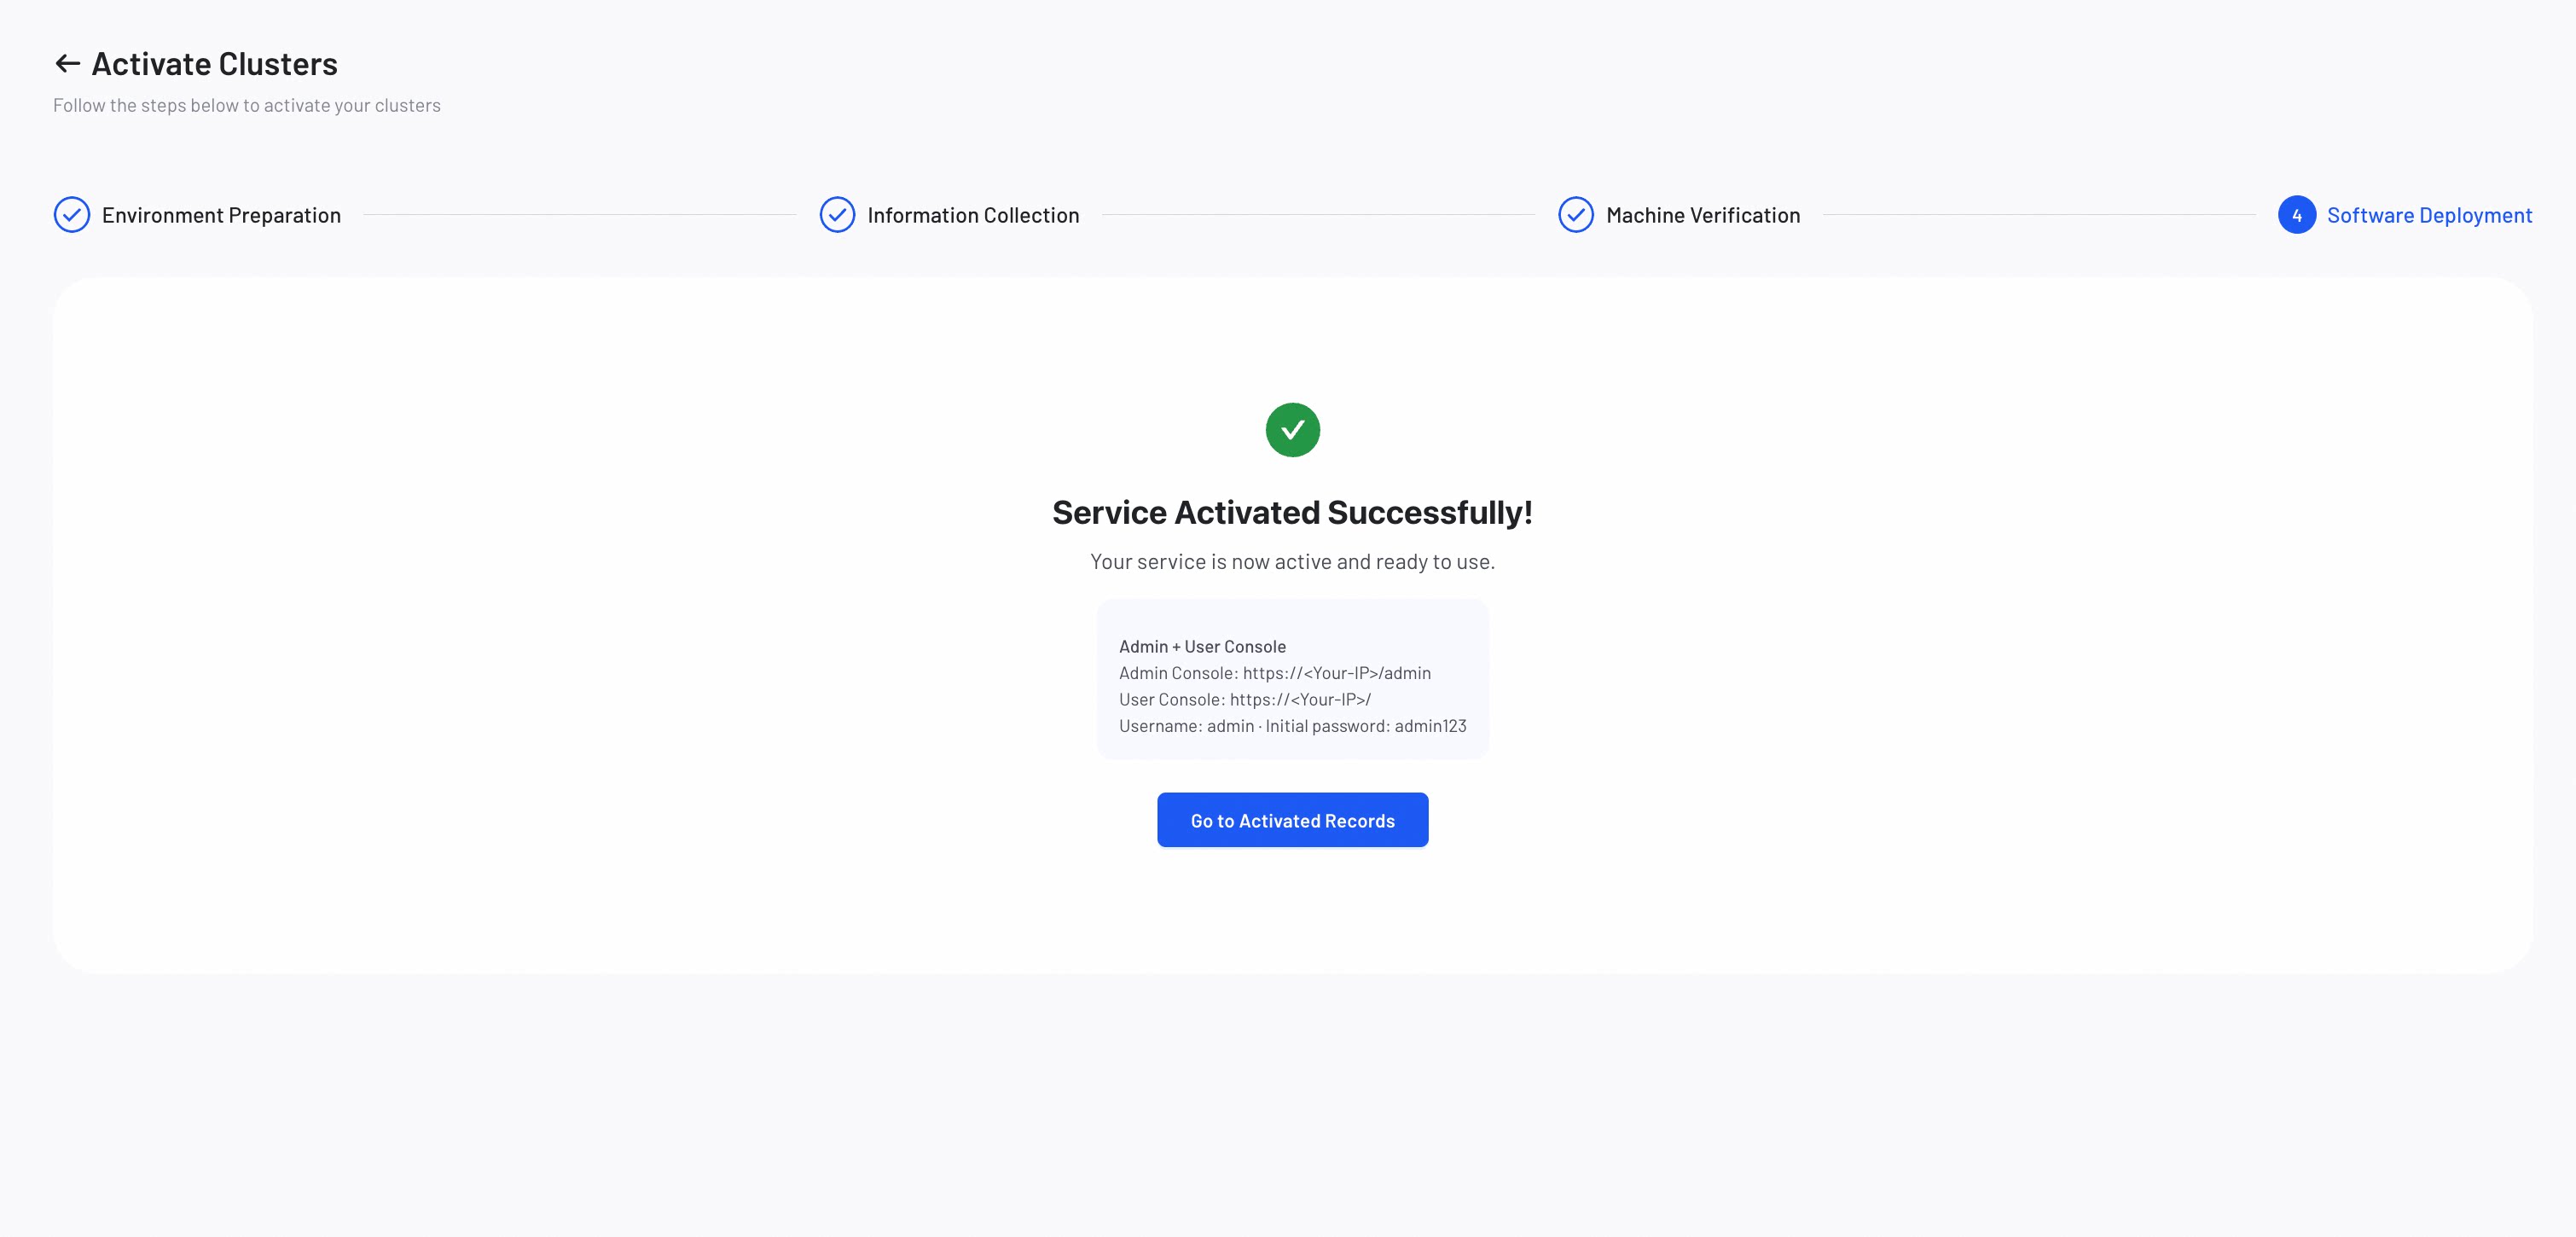
Activation Success
If deployment fails, see Platform deployment fails.
Manage Activated Clusters
After activation, you will move to the Activate Service list. From this list, you can resume any in-progress activation, Activate More Clusters, or stop a running service with Deactivate Service.
Each record also provides row actions: open the details dialog to view the machine configuration and platform access information, open GPU Observability for MSP clusters, or open CPU Observability for Router clusters.
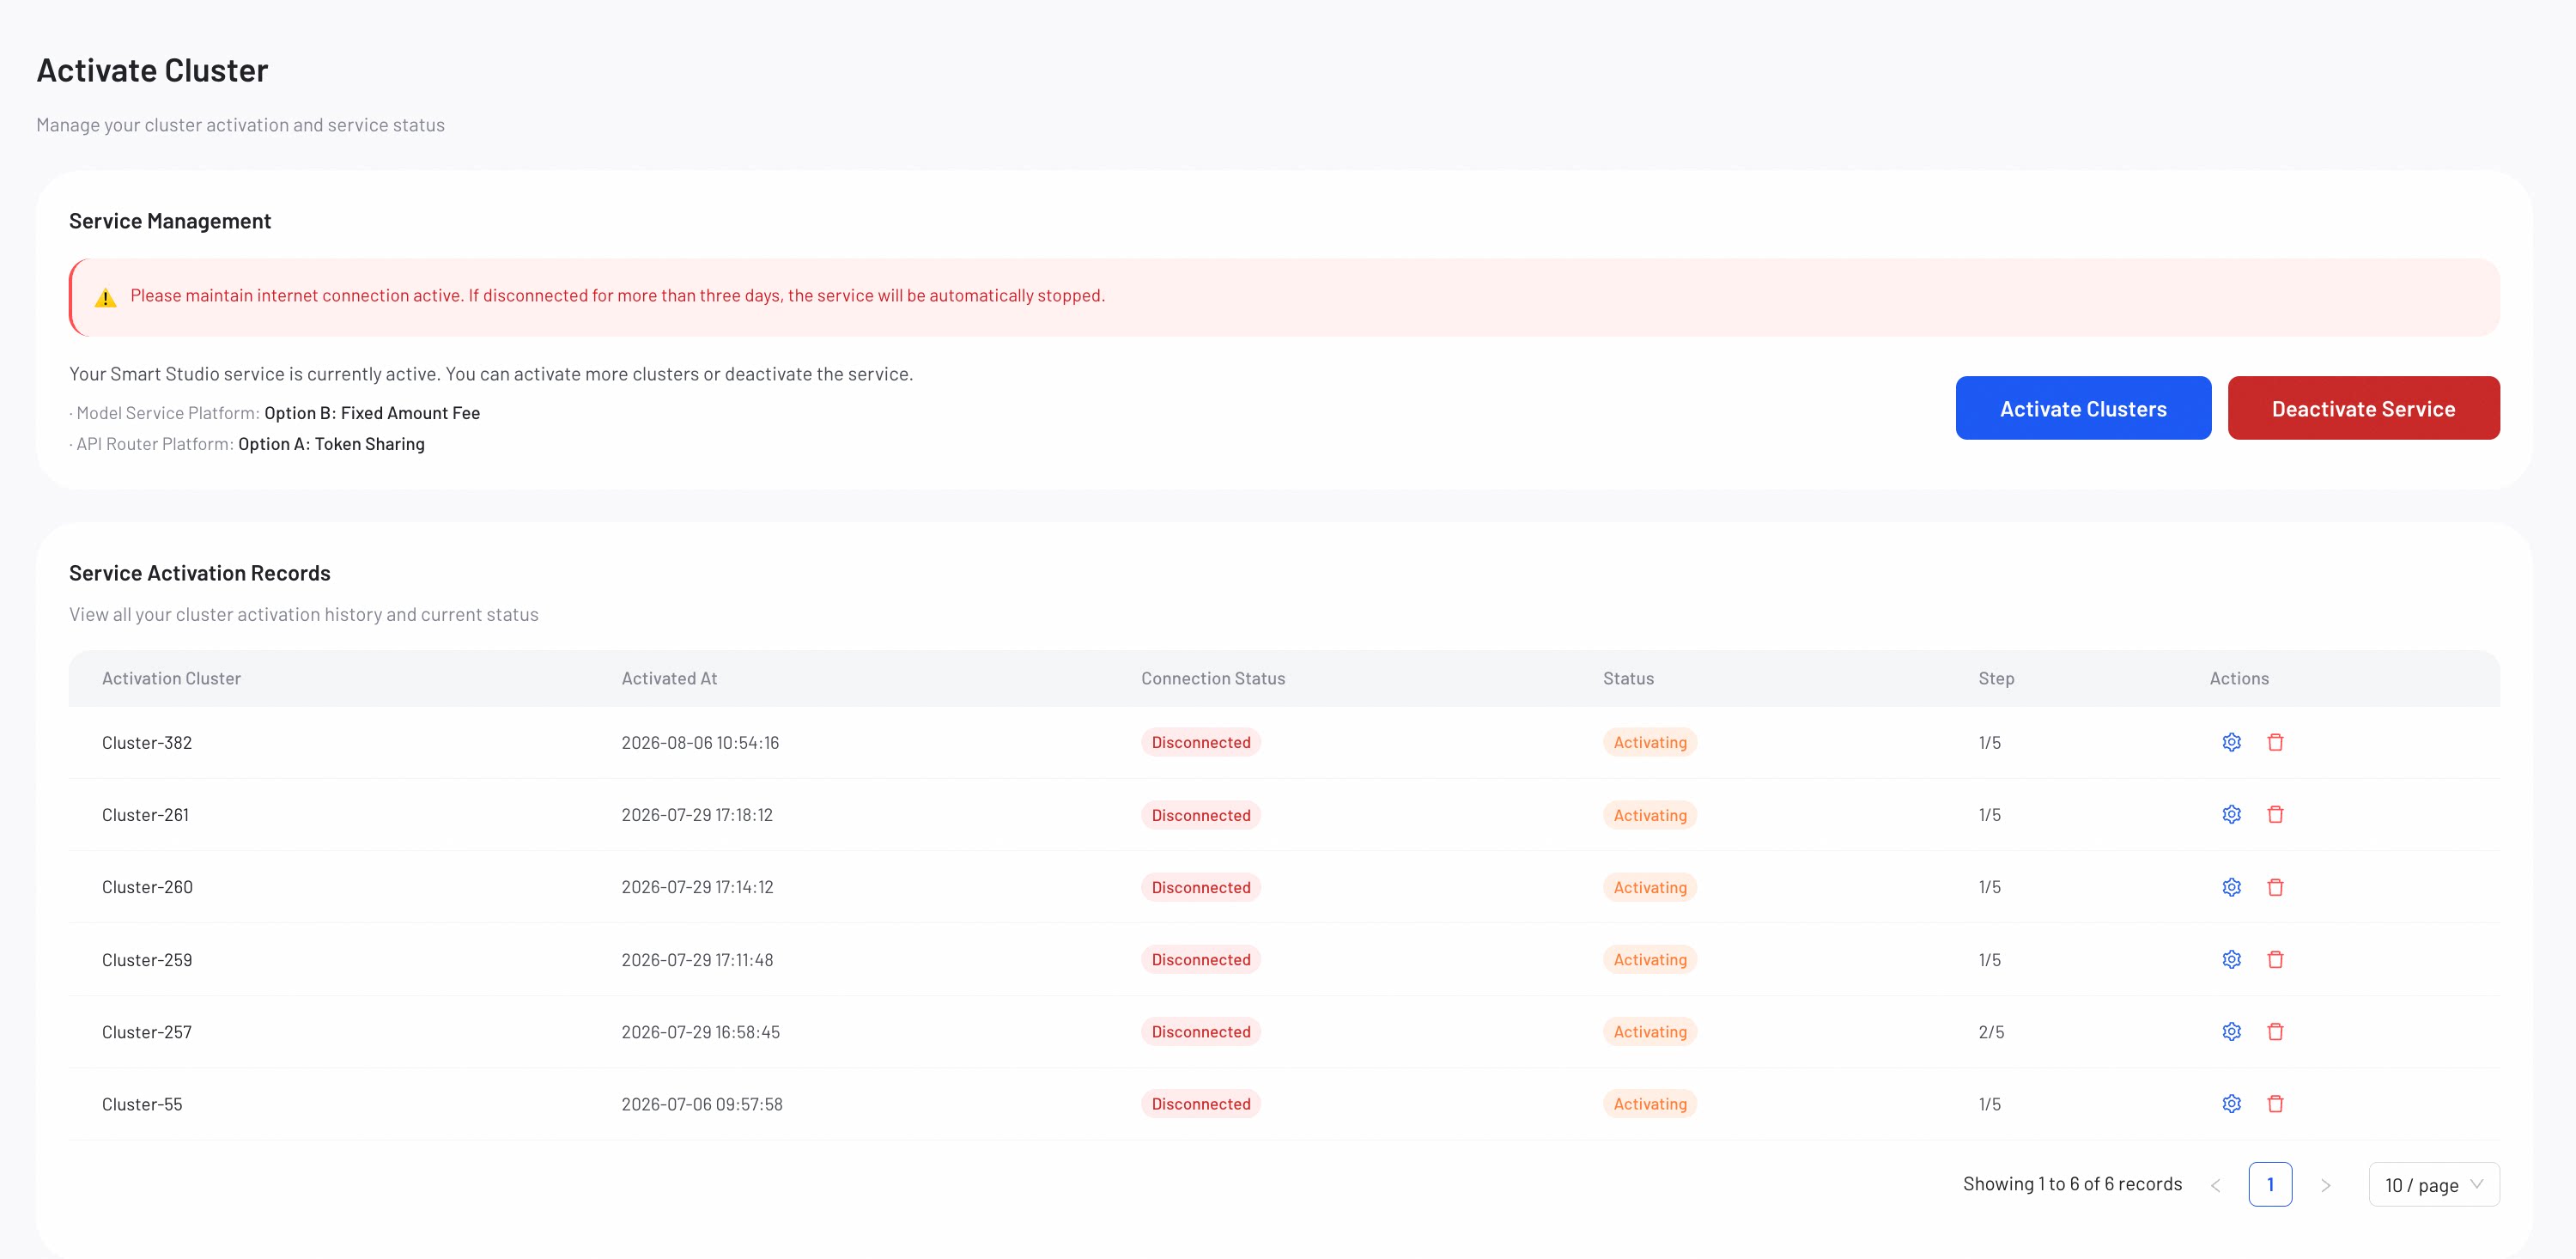
- All deployed Smart Studio software services and model services become unavailable after deactivation.
- The minimum guarantee fee & fixed amount fee stops on T+1.
Access the Platform
After Smart Studio is successfully deployed, your chosen platform is running on your servers. The IP address used to access the platform matches the machine configuration you provided in Step 2: Provide Server Information. You can log in with the default username and initial password.
If you chose to deploy the API Router Platform
You can access the platform using your server's IP address:
- Admin Console:
https://<Your-IP>/admin - User Console:
https://<Your-IP>/
From the Admin Console, administrators can:
- Onboard models — List models for sale on the platform.
- Set model pricing — Configure both the cost price and the selling price for each model.
- Manage customers — Manage customer accounts, discounts, and rate limits.
- View bills — Check usage statistics and billing details.
From the User Console, end-users can:
- Top up — Add balance to their account to use platform services.
- Call models — Invoke models listed on the platform via API.
- Try models — Experience model chat and generation capabilities online.
If you chose to deploy the Model Serving Platform (MSP)
You can access the MSP using the server's IP address with the /msp-console path. For example, if your server's internal IP is 192.168.0.1, users within the same VPC can access the MSP at http://192.168.0.1/msp-console.
From the MSP console, you can:
- Deploy models — Deploy open-source models to your GPU cluster.
- Manage serving services — Start, stop, scale, and monitor model services.
- Monitor performance — Track inference latency, throughput, and resource utilization.
Monitor Status
After activation, each platform provides built-in monitoring to help you track resource usage and service health.
- Model Serving Platform: Open GPU Observability to monitor GPU utilization, memory consumption, and the running status of your model services.
- API Router Platform: Open CPU Observability to monitor CPU usage, API request volume, latency, error rates, and other performance metrics.
Troubleshooting
Use the following sections to resolve common activation issues.
The Agent Isn't Detected
After you click Completed and Next, the activation token can't be validated. This usually means the agent didn't start on your CPU server, or the token expired.
To fix it:
- Confirm the installation command finished on your CPU server.
- If the agent isn't running, reinstall it using the exact command shown in your console.
- If the token expired, refresh the page to get a new command, then reinstall the agent.
- Click Completed and Next again.
Machine Verification Reports Failed Checks
One or more servers show the Issues label, it means a check did not meet the compatibility requirement. Common causes include an unreachable IP, missing GPU driver, closed port, or insufficient SSH permission.
To fix it:
- Expand the failed server card to see which check failed.
- For incorrect server details, click Edit Information to return to Step 2 and correct the configuration.
- For transient network issues, click Resubmit to rerun the checks.
- If the failure persists, review your infrastructure against the BYO-GPU Requirements.
Platform Deployment Fails
The deployment page shows a Partial failure state with a Retry Deployment button. One or more platform components failed to deploy. A temporary resource issue on the target servers is the most common cause.
To fix it:
- Click Retry Deployment to restart the deployment.
- If deployment fails repeatedly, verify your servers still meet the BYO-GPU Requirements requirements.
- Contact support if the failure persists.
Agent Connection Is Lost During Verification
If Step 3 shows a Connection Failed status and verification stops, meaning the agent installed in Step 1 is no longer reachable.
To fix it:
- On your CPU server, confirm the agent process is still running.
- If the agent stopped, reinstall it using the exact command from your console.
- Return to Step 3 and click Resubmit to rerun the checks.
Video Tutorial
Watch the following video for a step-by-step walkthrough of the self-service activation process.
Verify the Result
Activation is complete when:
- The activation record shows Activated.
- Connection Status shows Connected.
- The GPU Observability action is available.
- The expected nodes and GPU capacity appear in the dashboard.
Open GPU Observability before creating a model deployment. This confirms that Smart Studio can see the resources you expect to allocate.
Next Step
After GPU Observability confirms the expected nodes and capacity:
- Choose a platform model in Model Gallery or upload your own asset in My Models.
- Follow Create Deployment.
- Review Usage and Billing after the workload starts.