Monetize Your GPUs
The GPU Monetization enables you to deploy and sell model services using your own GPU infrastructure.
Model deployment happens in the Model Serving Platform. Pricing and billing operations happen in the Admin Console.
This guide shows you how to monetize your GPUs through four steps: deploying a model, importing the API Key, setting cost prices, and configuring selling prices.
Step 1: Deploy a model as a service
Navigate to Model Serving Platform to deploy your model.
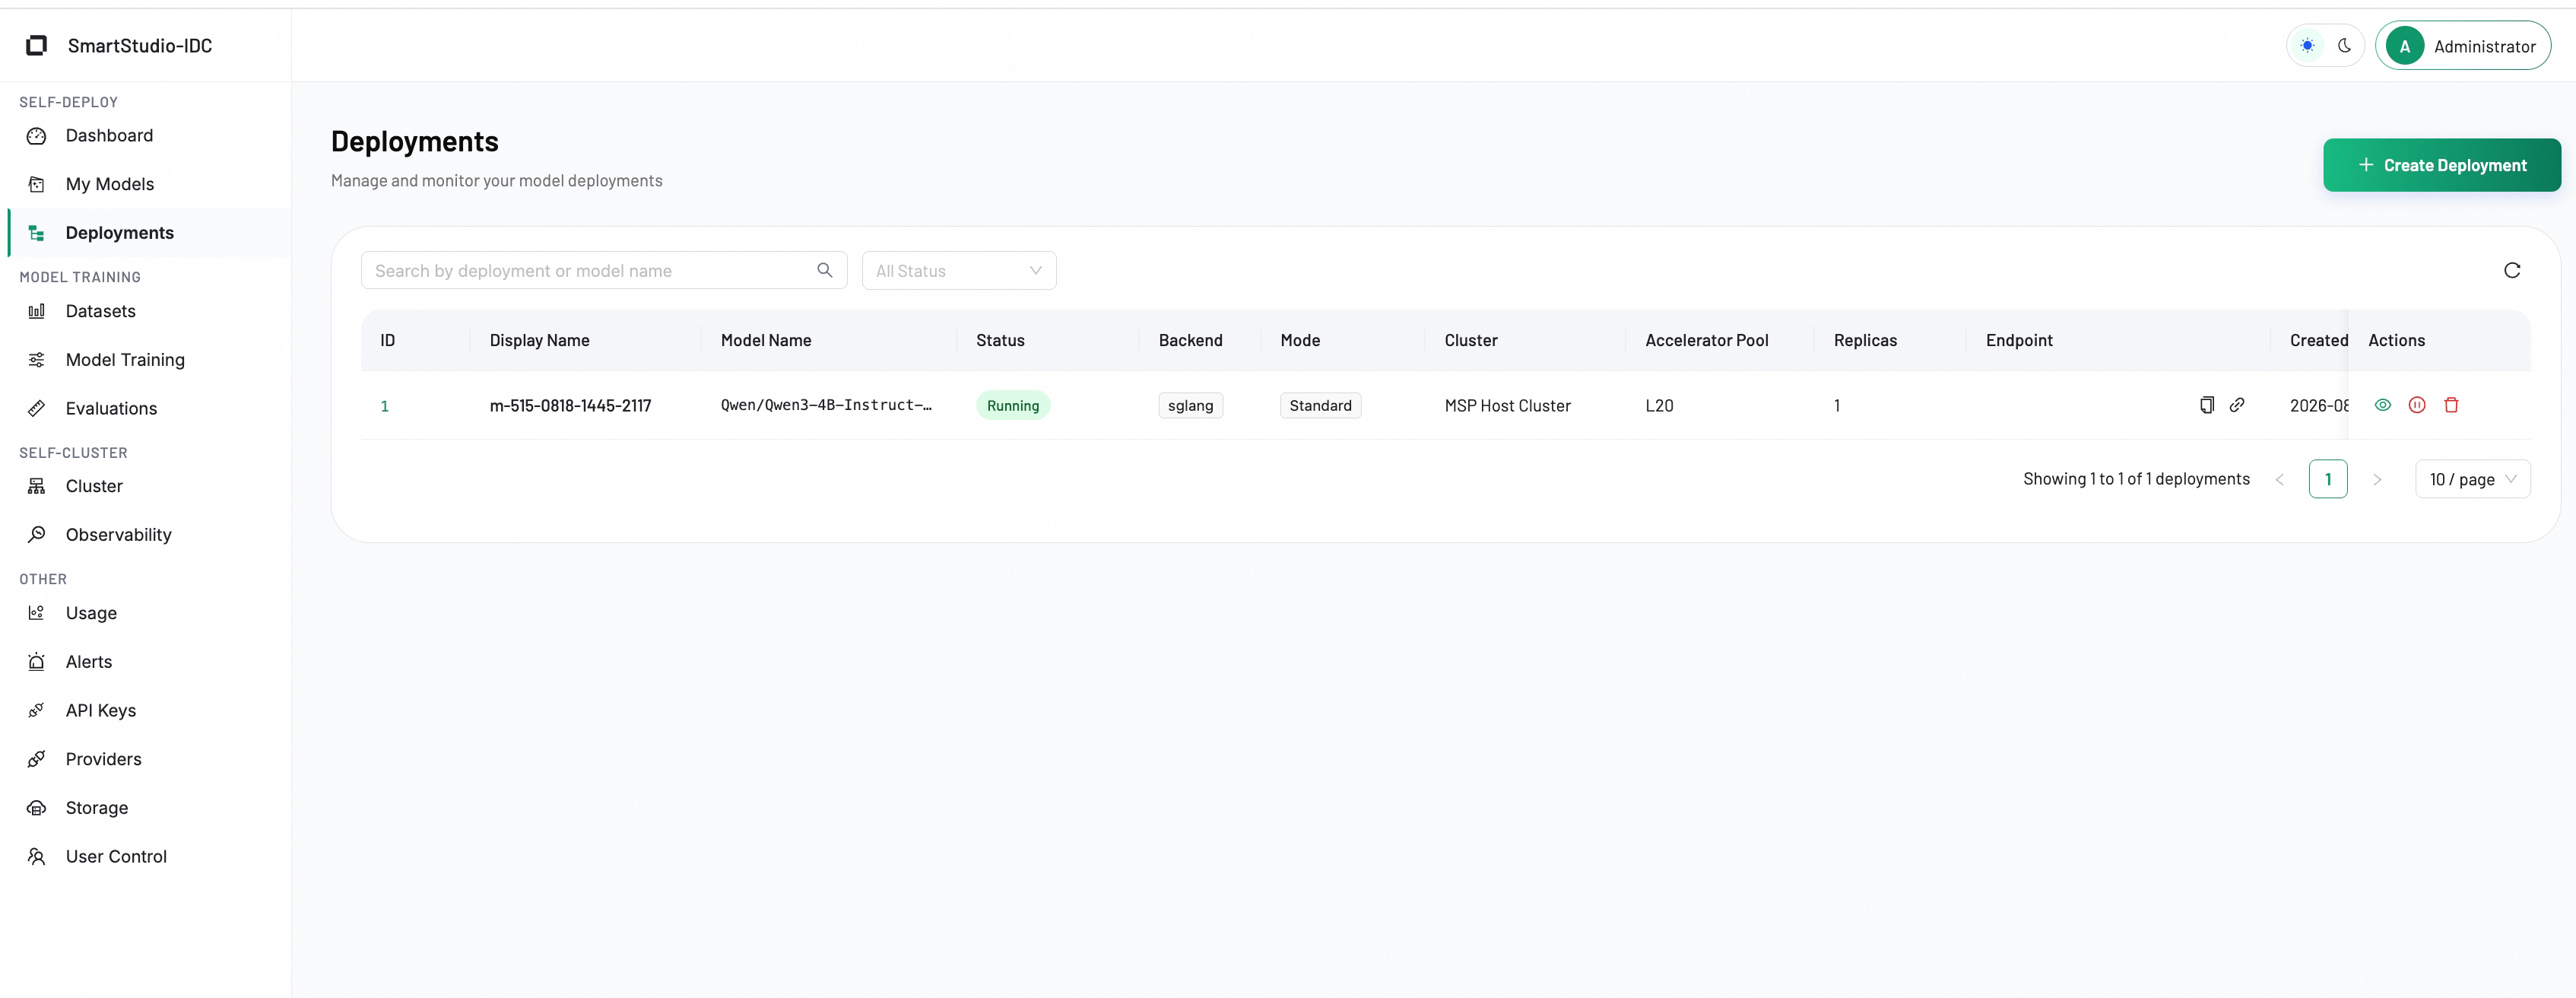
If you have not activated the Model Serving Platform, visit the activation page first.
After deployment, create an API Key for the model service. Navigate to API Keys and click Create API Key. The key value starts with sss-. Save the key value. You need it in the next step.
Step 2: Import the API Key into the Admin Console
The Admin Console needs the API Key to call your deployed models. Navigate to the Provider API Key page.
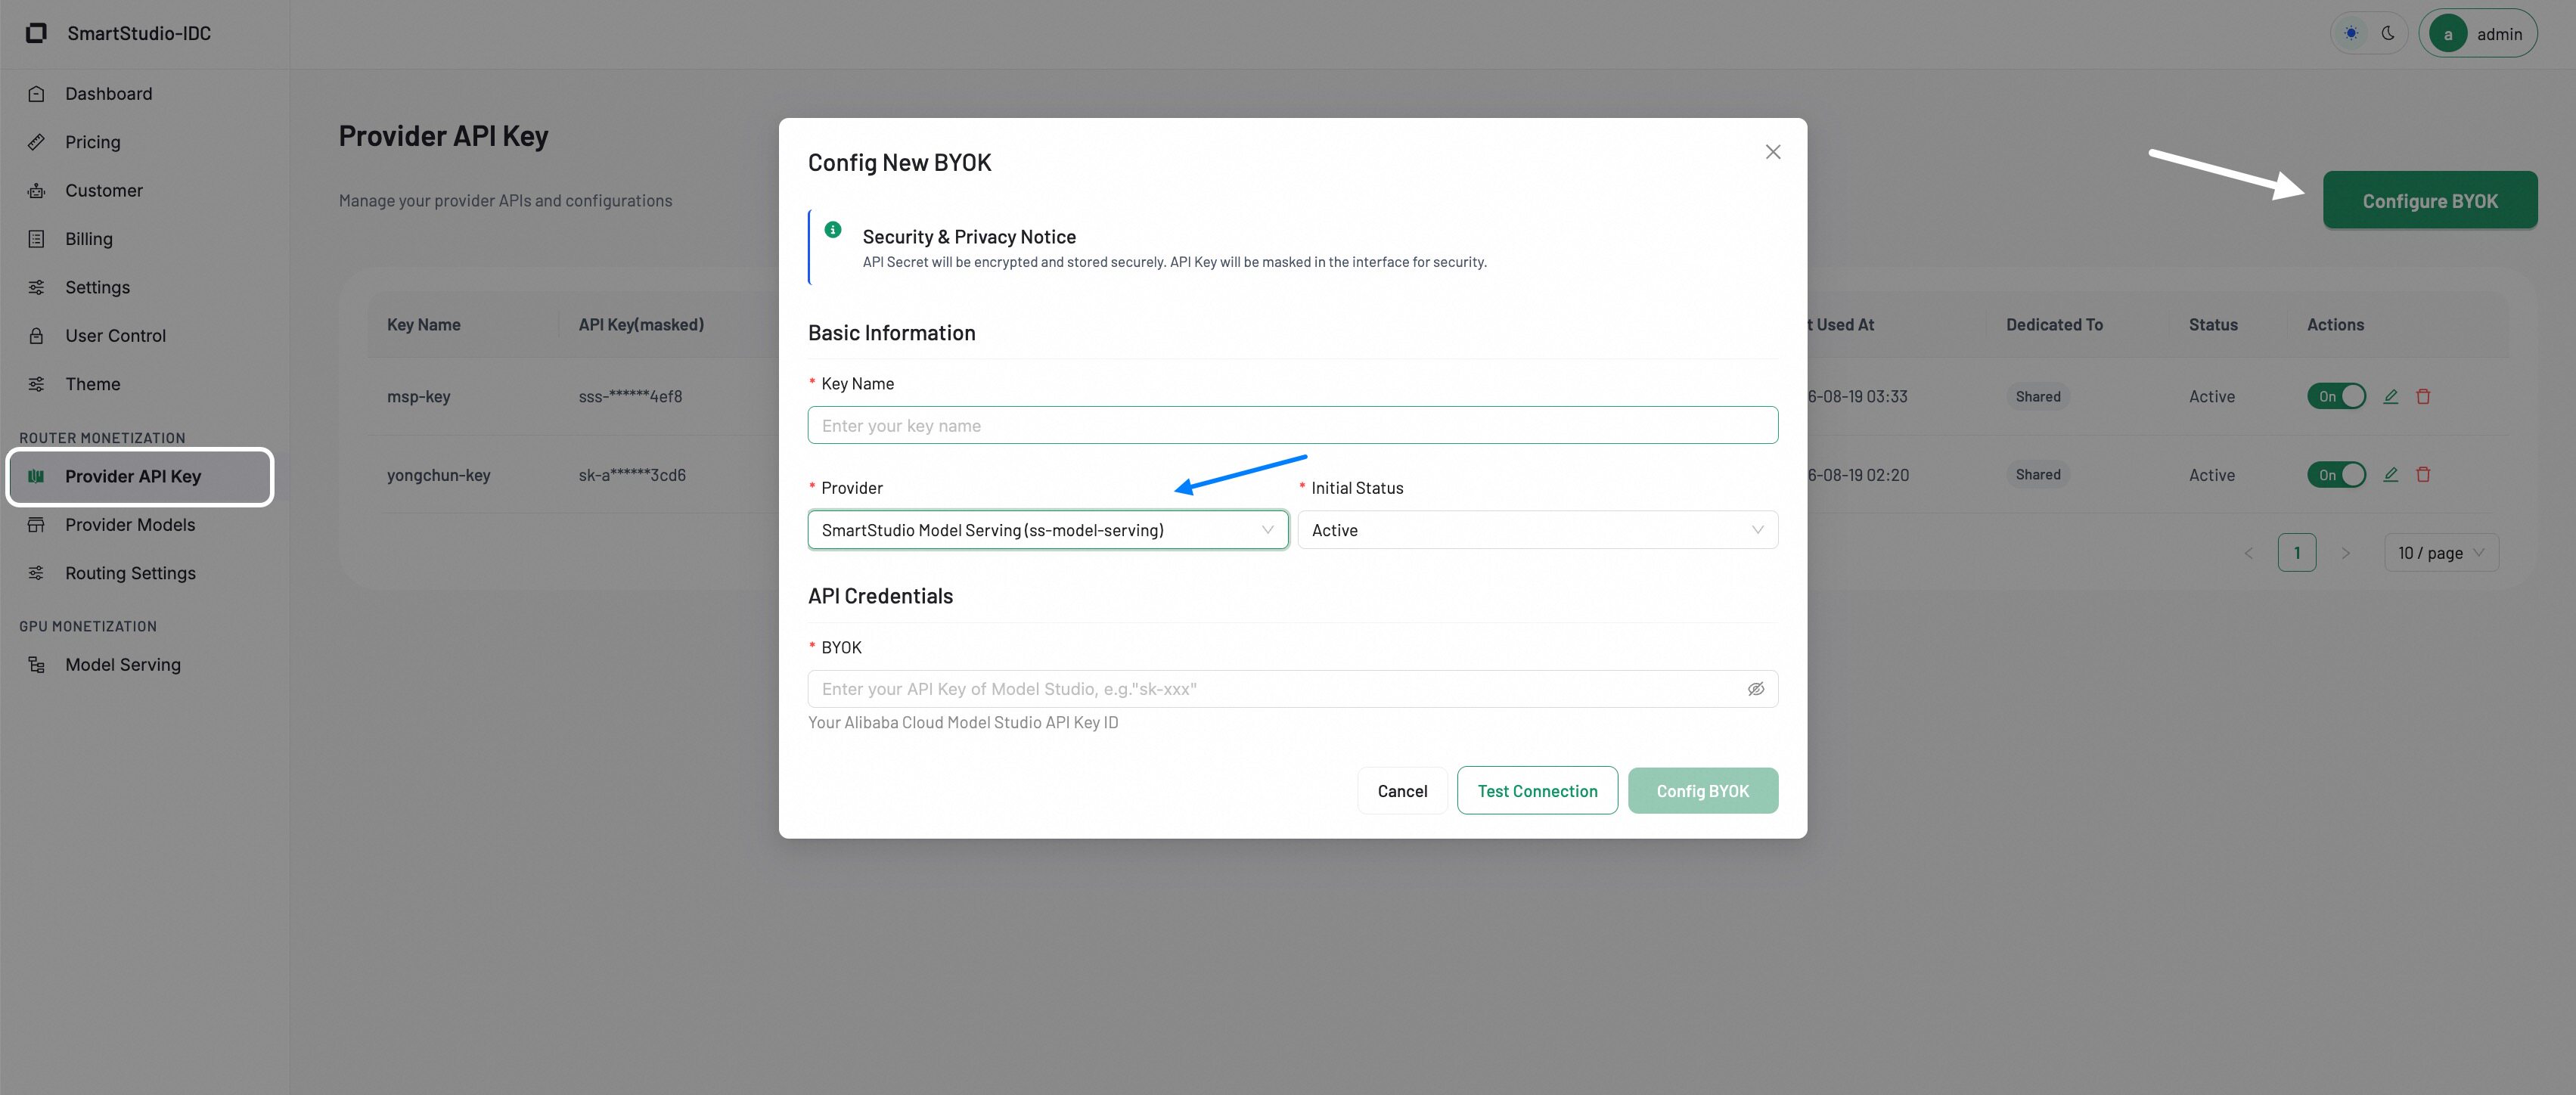
- Click Config BYOK.
- Enter a Key Name and select
SmartStudio Model Serving(ss-model-serving)as the Provider. - Paste the
sss-API Key from Step 1 into the BYOK field. - Click Test Connection. The BYOK configuration completes after the test succeeds.
Step 3: Set model cost price
After deploying your model, configure its cost structure in the Admin Console.
Add a model
Click Add Model. A form opens for you to define the model's identity and capabilities.
| 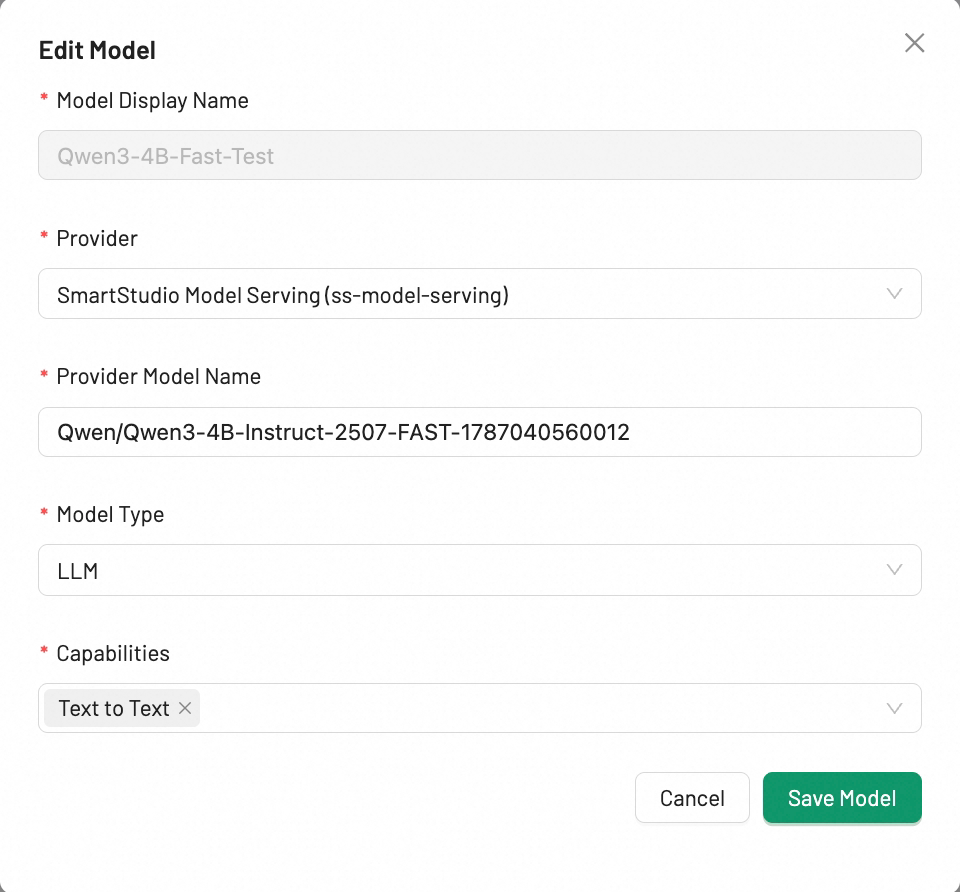 |
After filling in the details, click Save Model. The model will now appear in the Provider Models list.
Define model costs
After adding a model, define its cost structure. Most models need a single tier with a Context Range of 0 to ∞ (infinity). Click Add Tier to create complex pricing structures. Example: charge different rates for larger contexts.
Within each tier, fill in only the fields relevant to the model's capabilities.
| 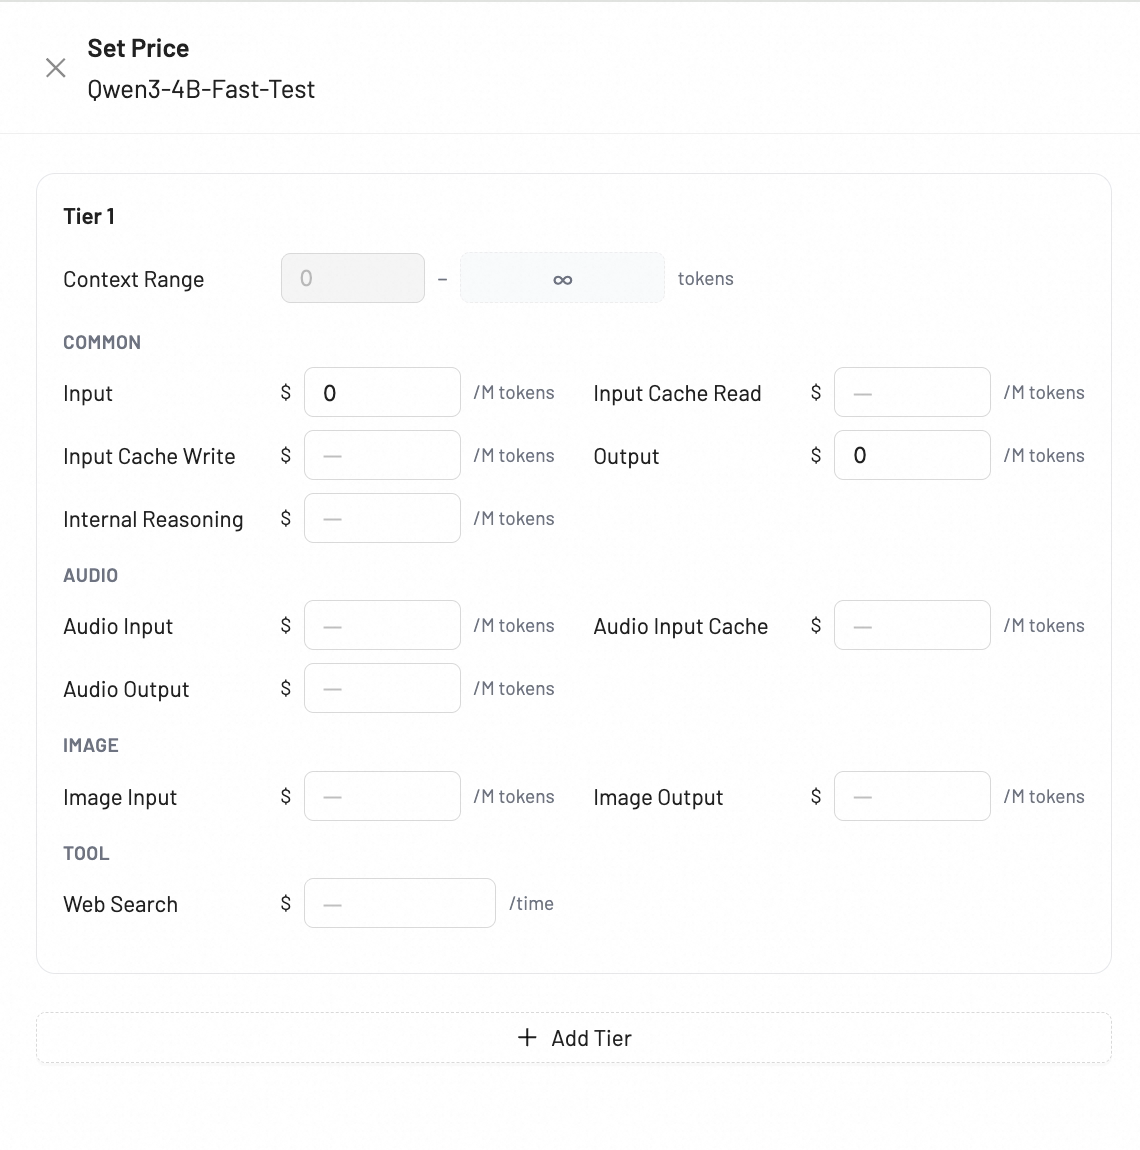 |
After filling in the relevant cost fields, click Save. Click List to make the model available for pricing and visible to customers.
Step 4: Set model selling prices
After configuring a model's costs, define its selling price. Make the model available to your end-users.
Navigate to the Pricing page. This page lists all models configured in Step 3. The cost price is shown for your reference.
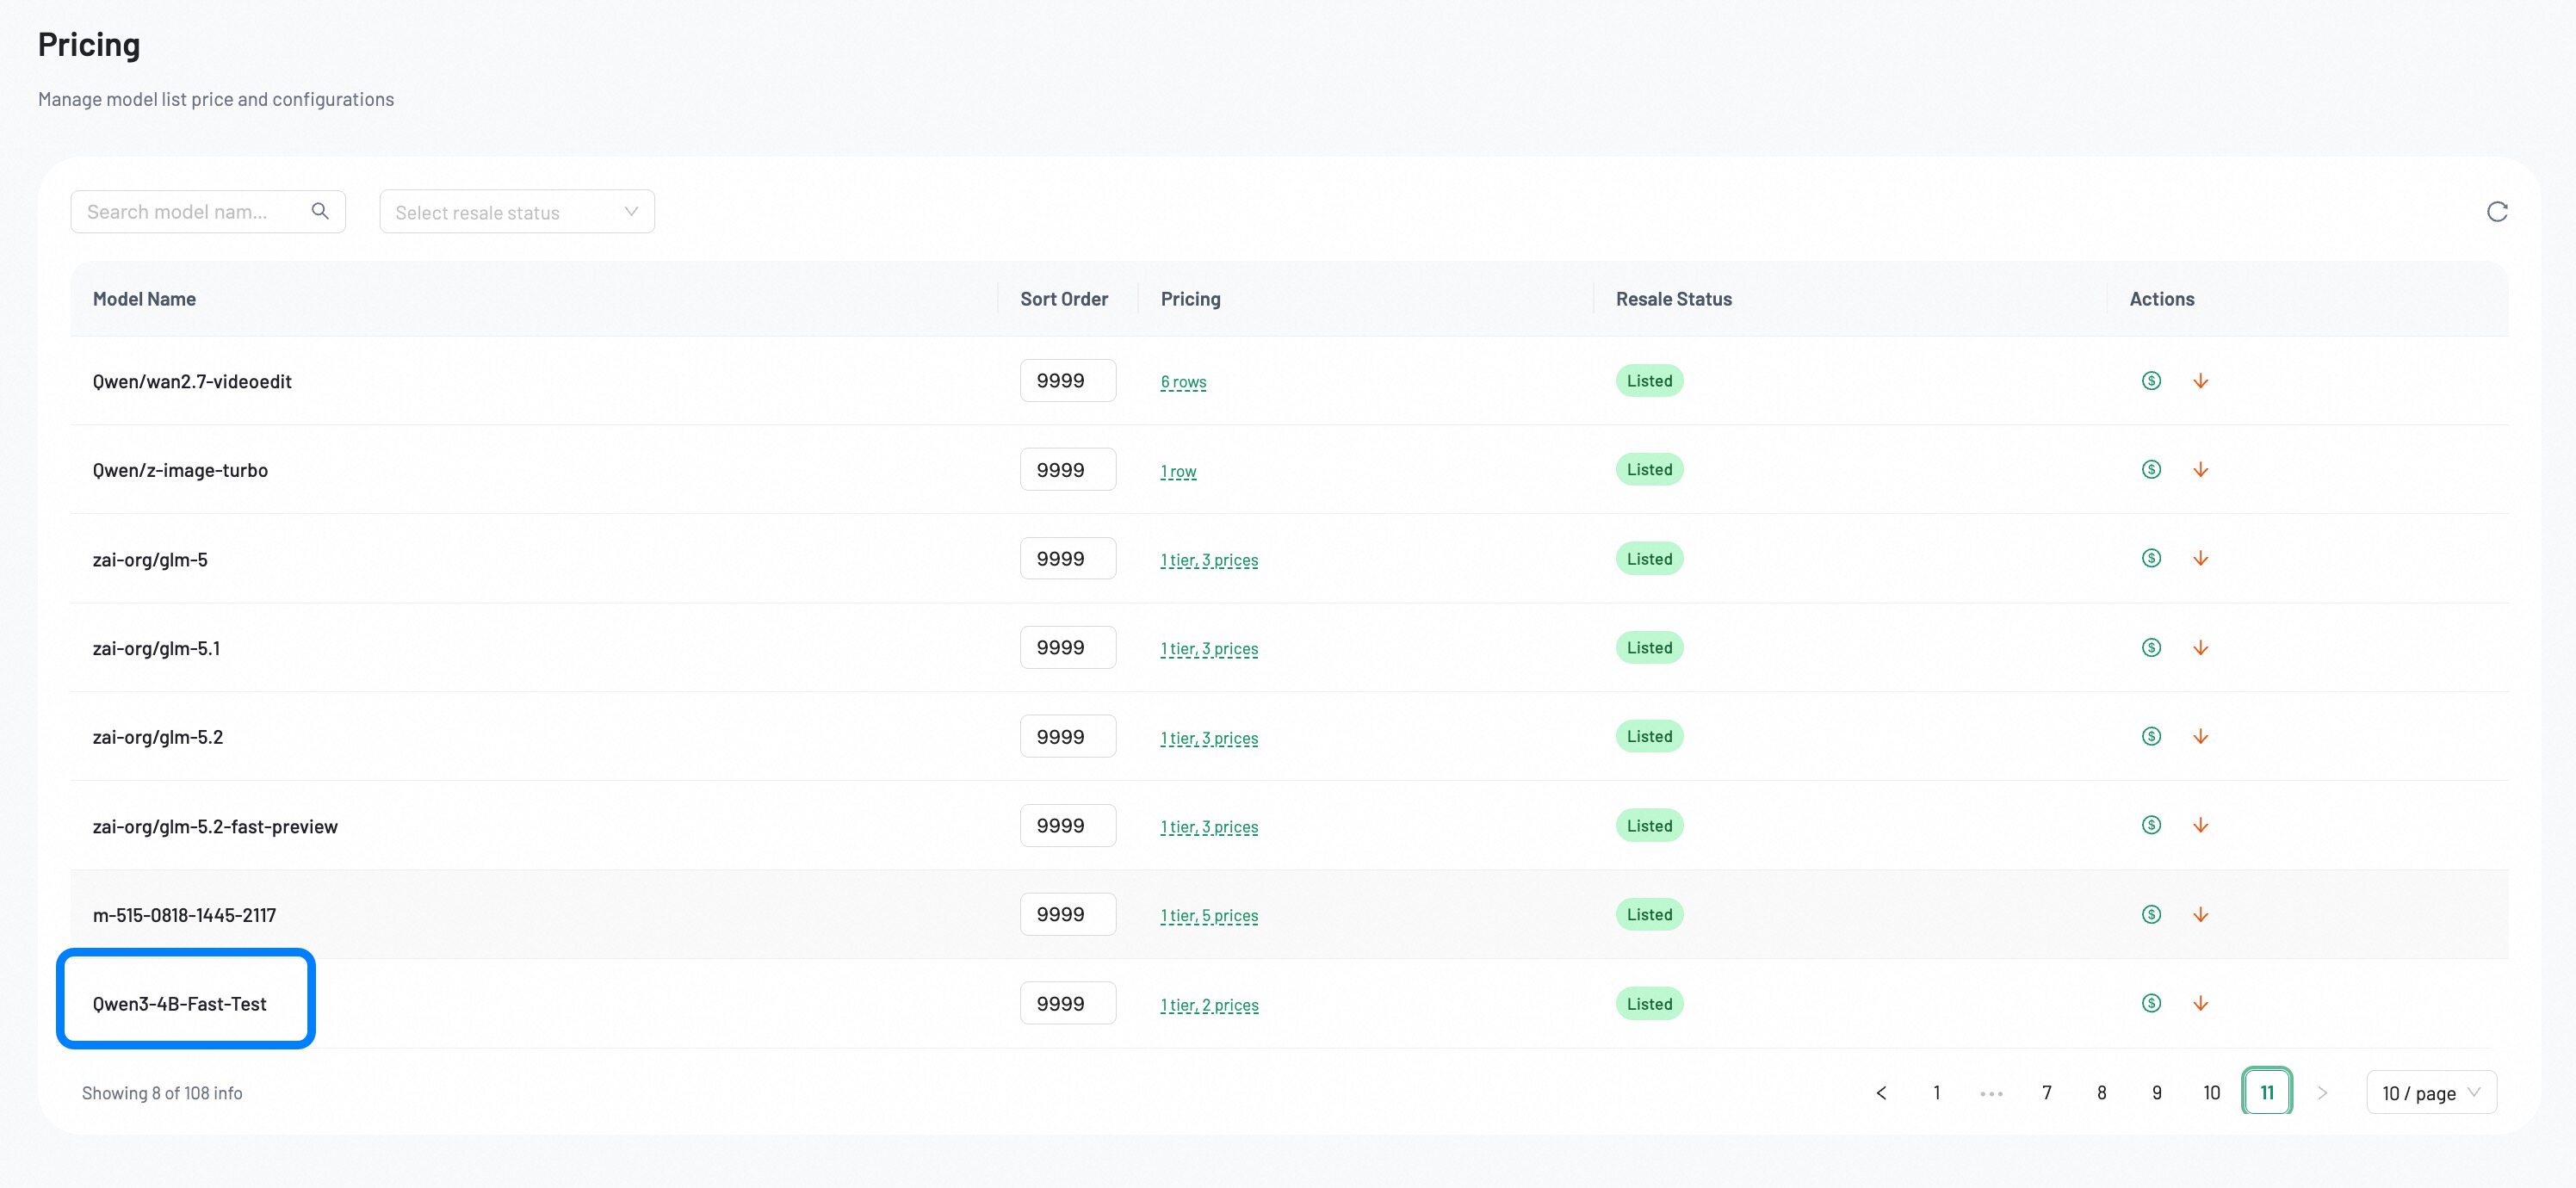
- Find the model to list in the table.
- Set the selling price for the model. The price-setting interface is identical to the one used for defining costs.
- After entering the model prices and saving, click List button to make the model available to the public.
- You can enter a number in the Sort Order field to control the display order of listed models in the Model Gallery on the user console. Models with lower numbers appear first.
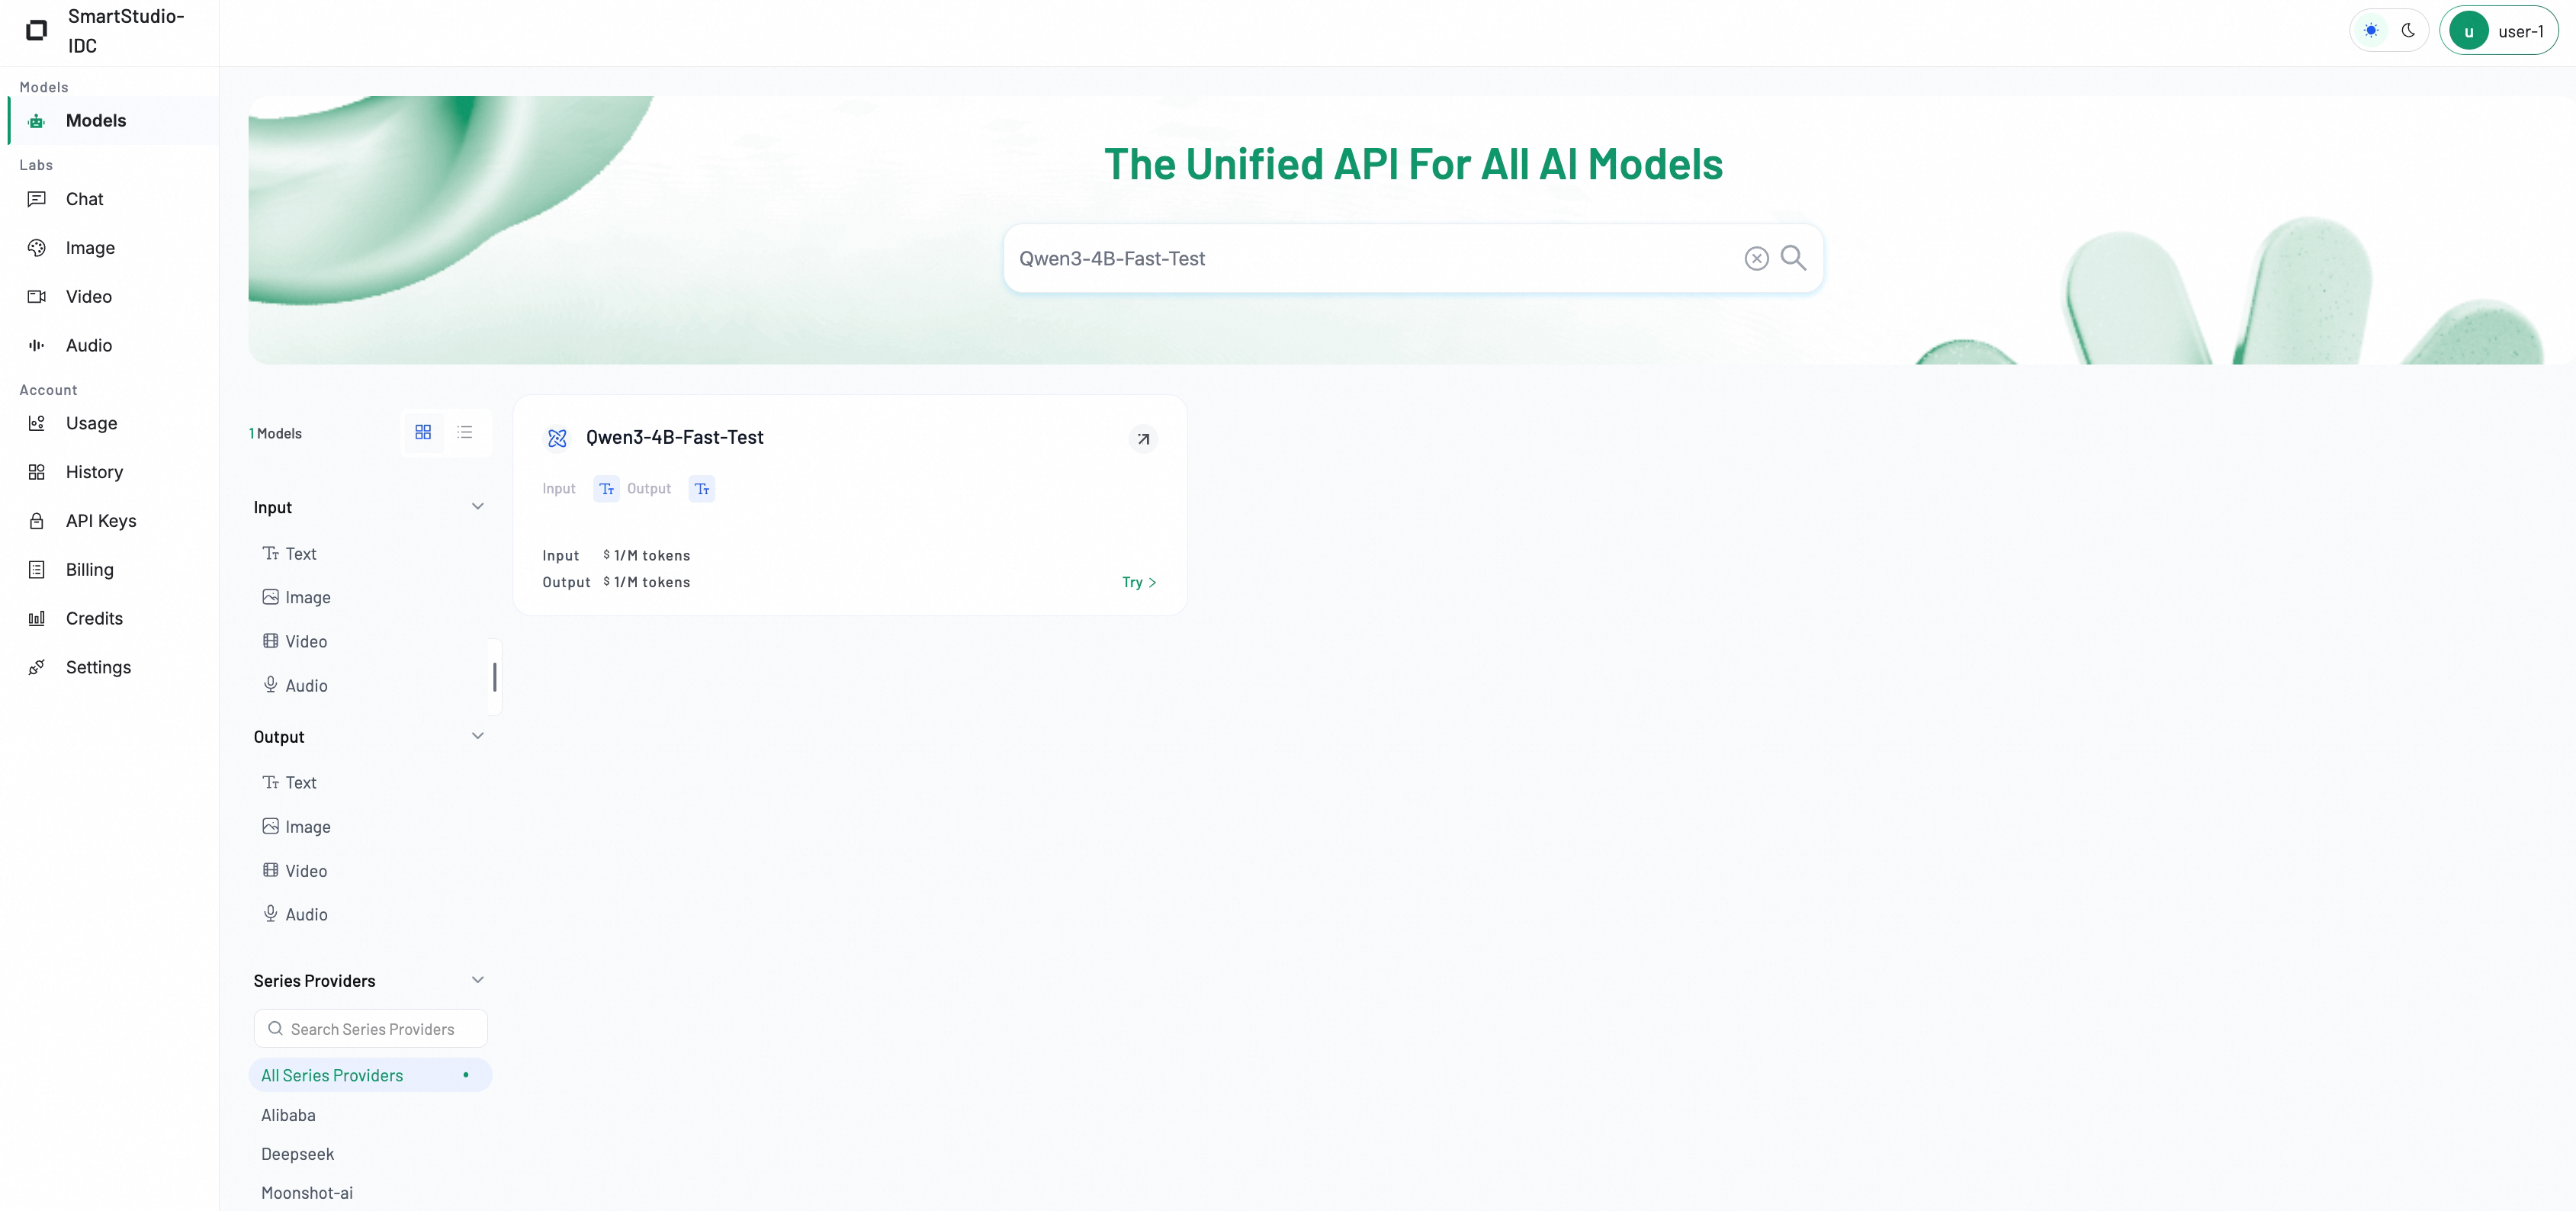
After listing, the model becomes visible and accessible to your end-users in the user console. Your customers can use and call these models via API.
Set customer-specific pricing
This feature sets custom model prices for individual customers. It overrides the standard public pricing.
Manage customers
Navigate to the Customer Management page. This page shows all your customers. Admins can add new users, set customer-specific pricing, offer free credits, reset passwords, and delete accounts.
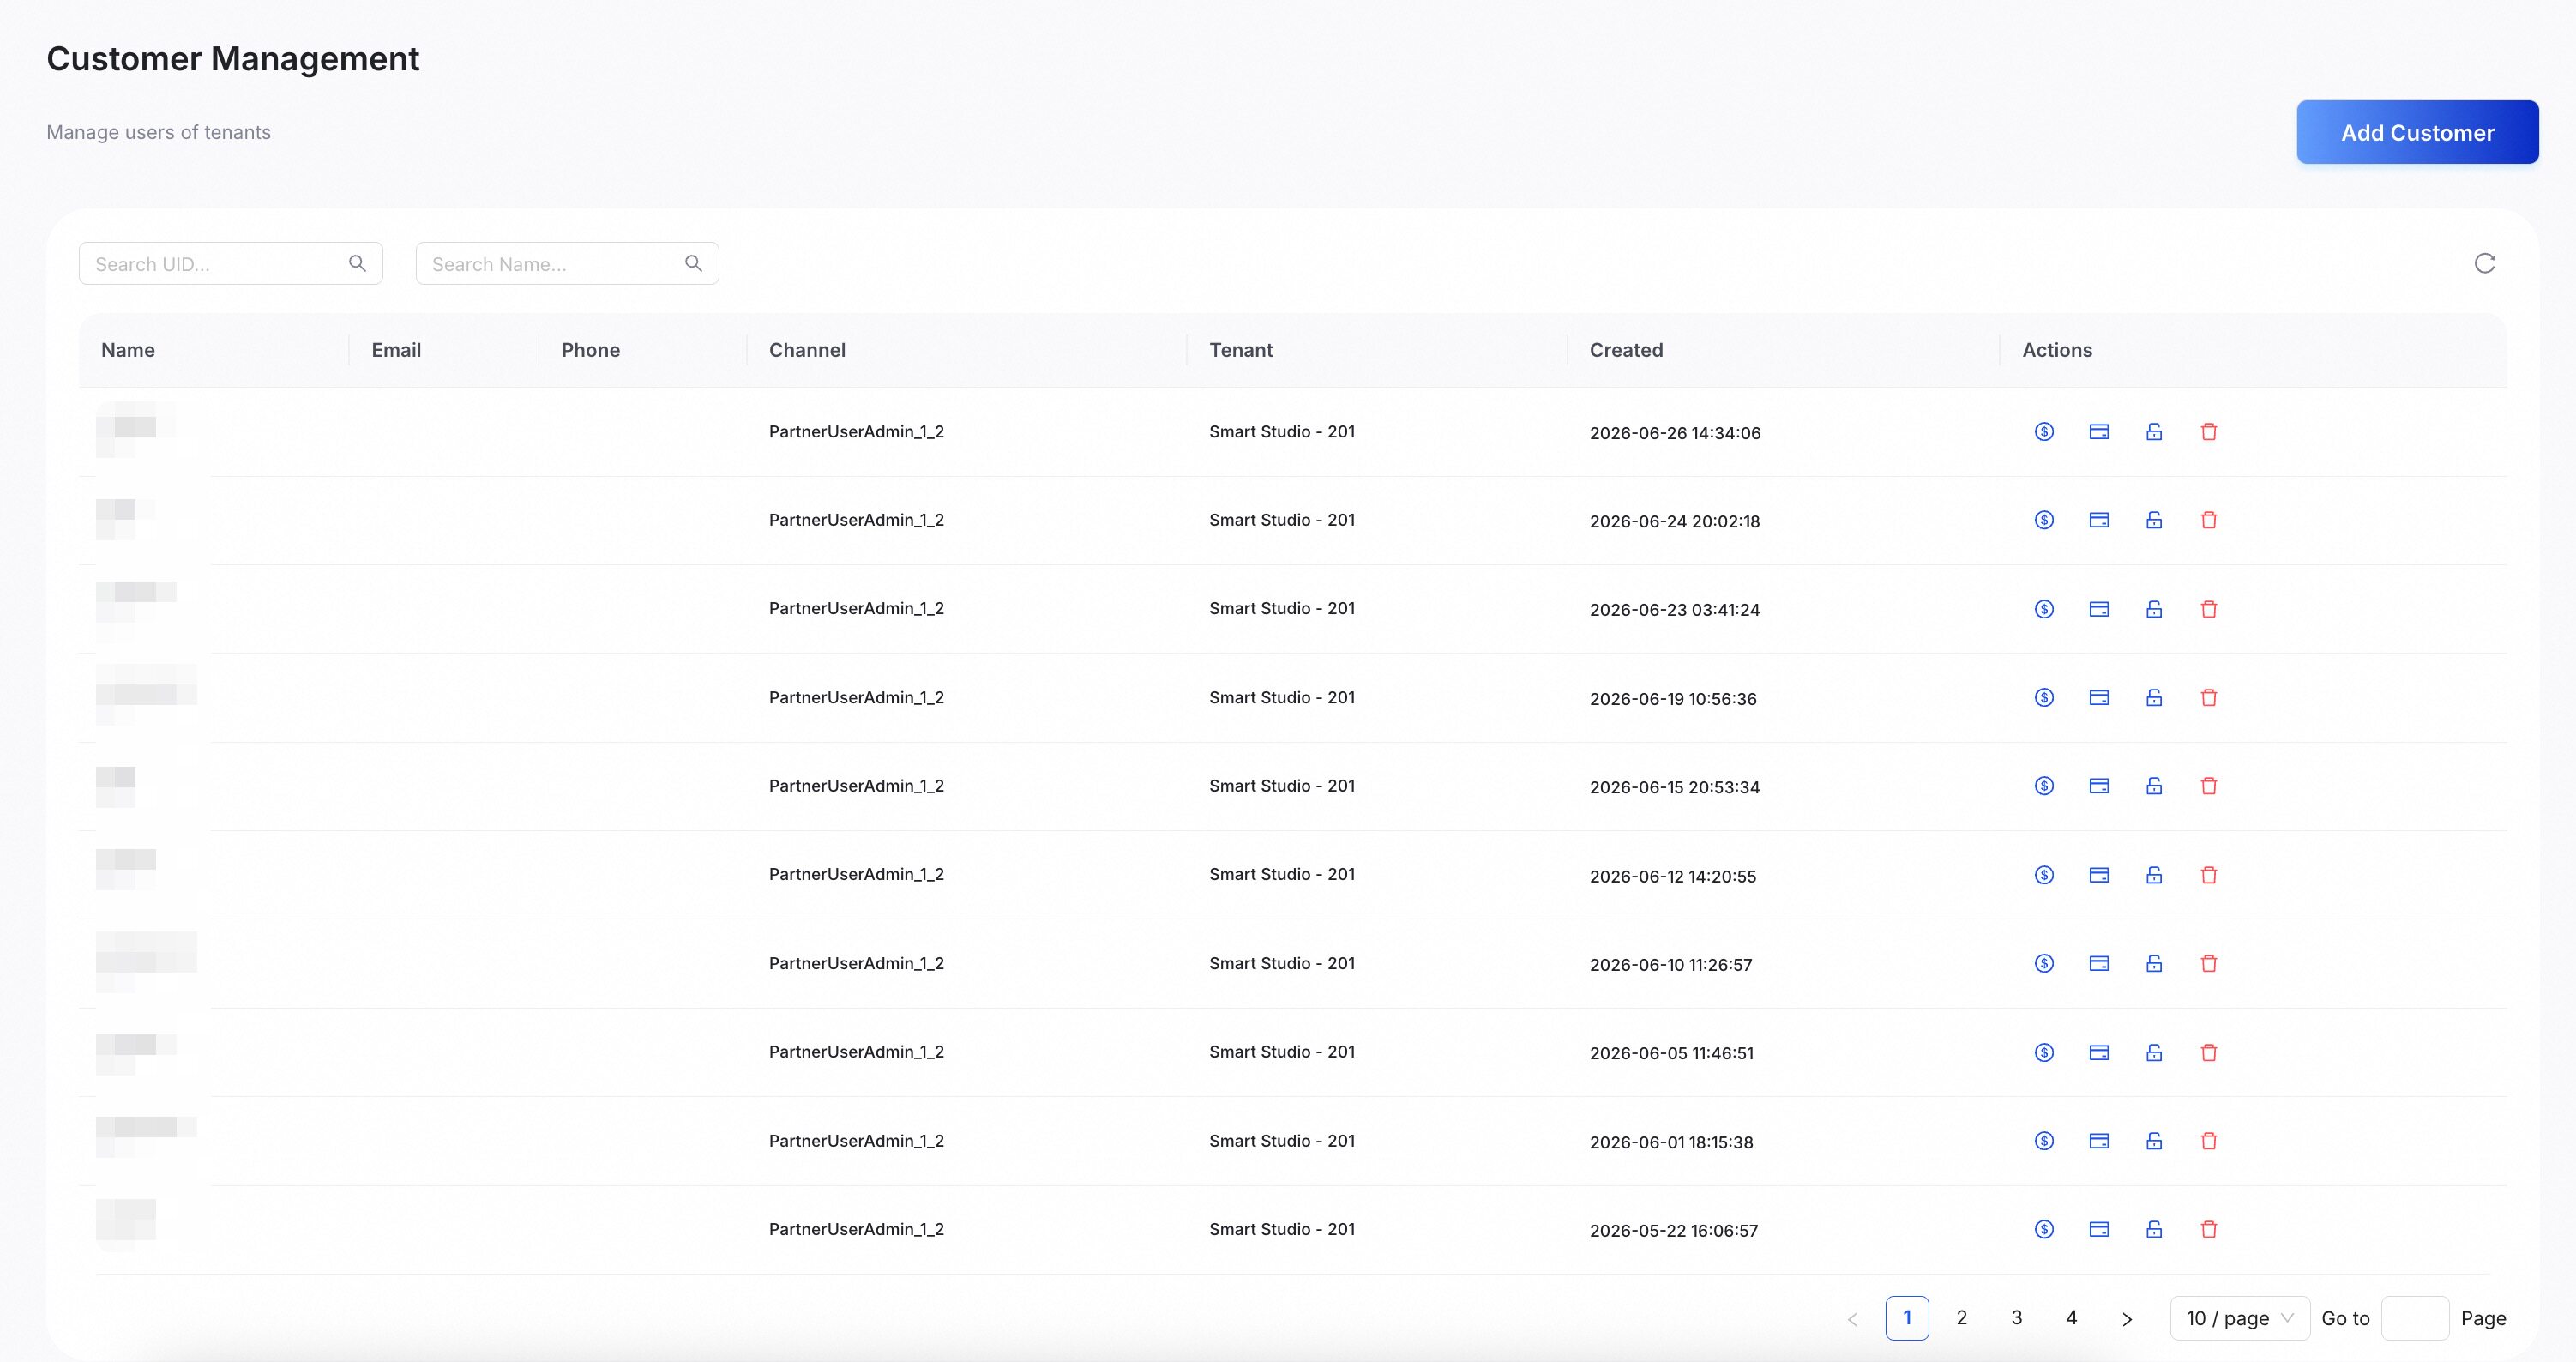
To set a custom price for a user, select the user and click the Pricing Settings icon.
Configure custom pricing
Click the Pricing Settings icon. The model pricing page opens for that customer. Set the custom price for each model.
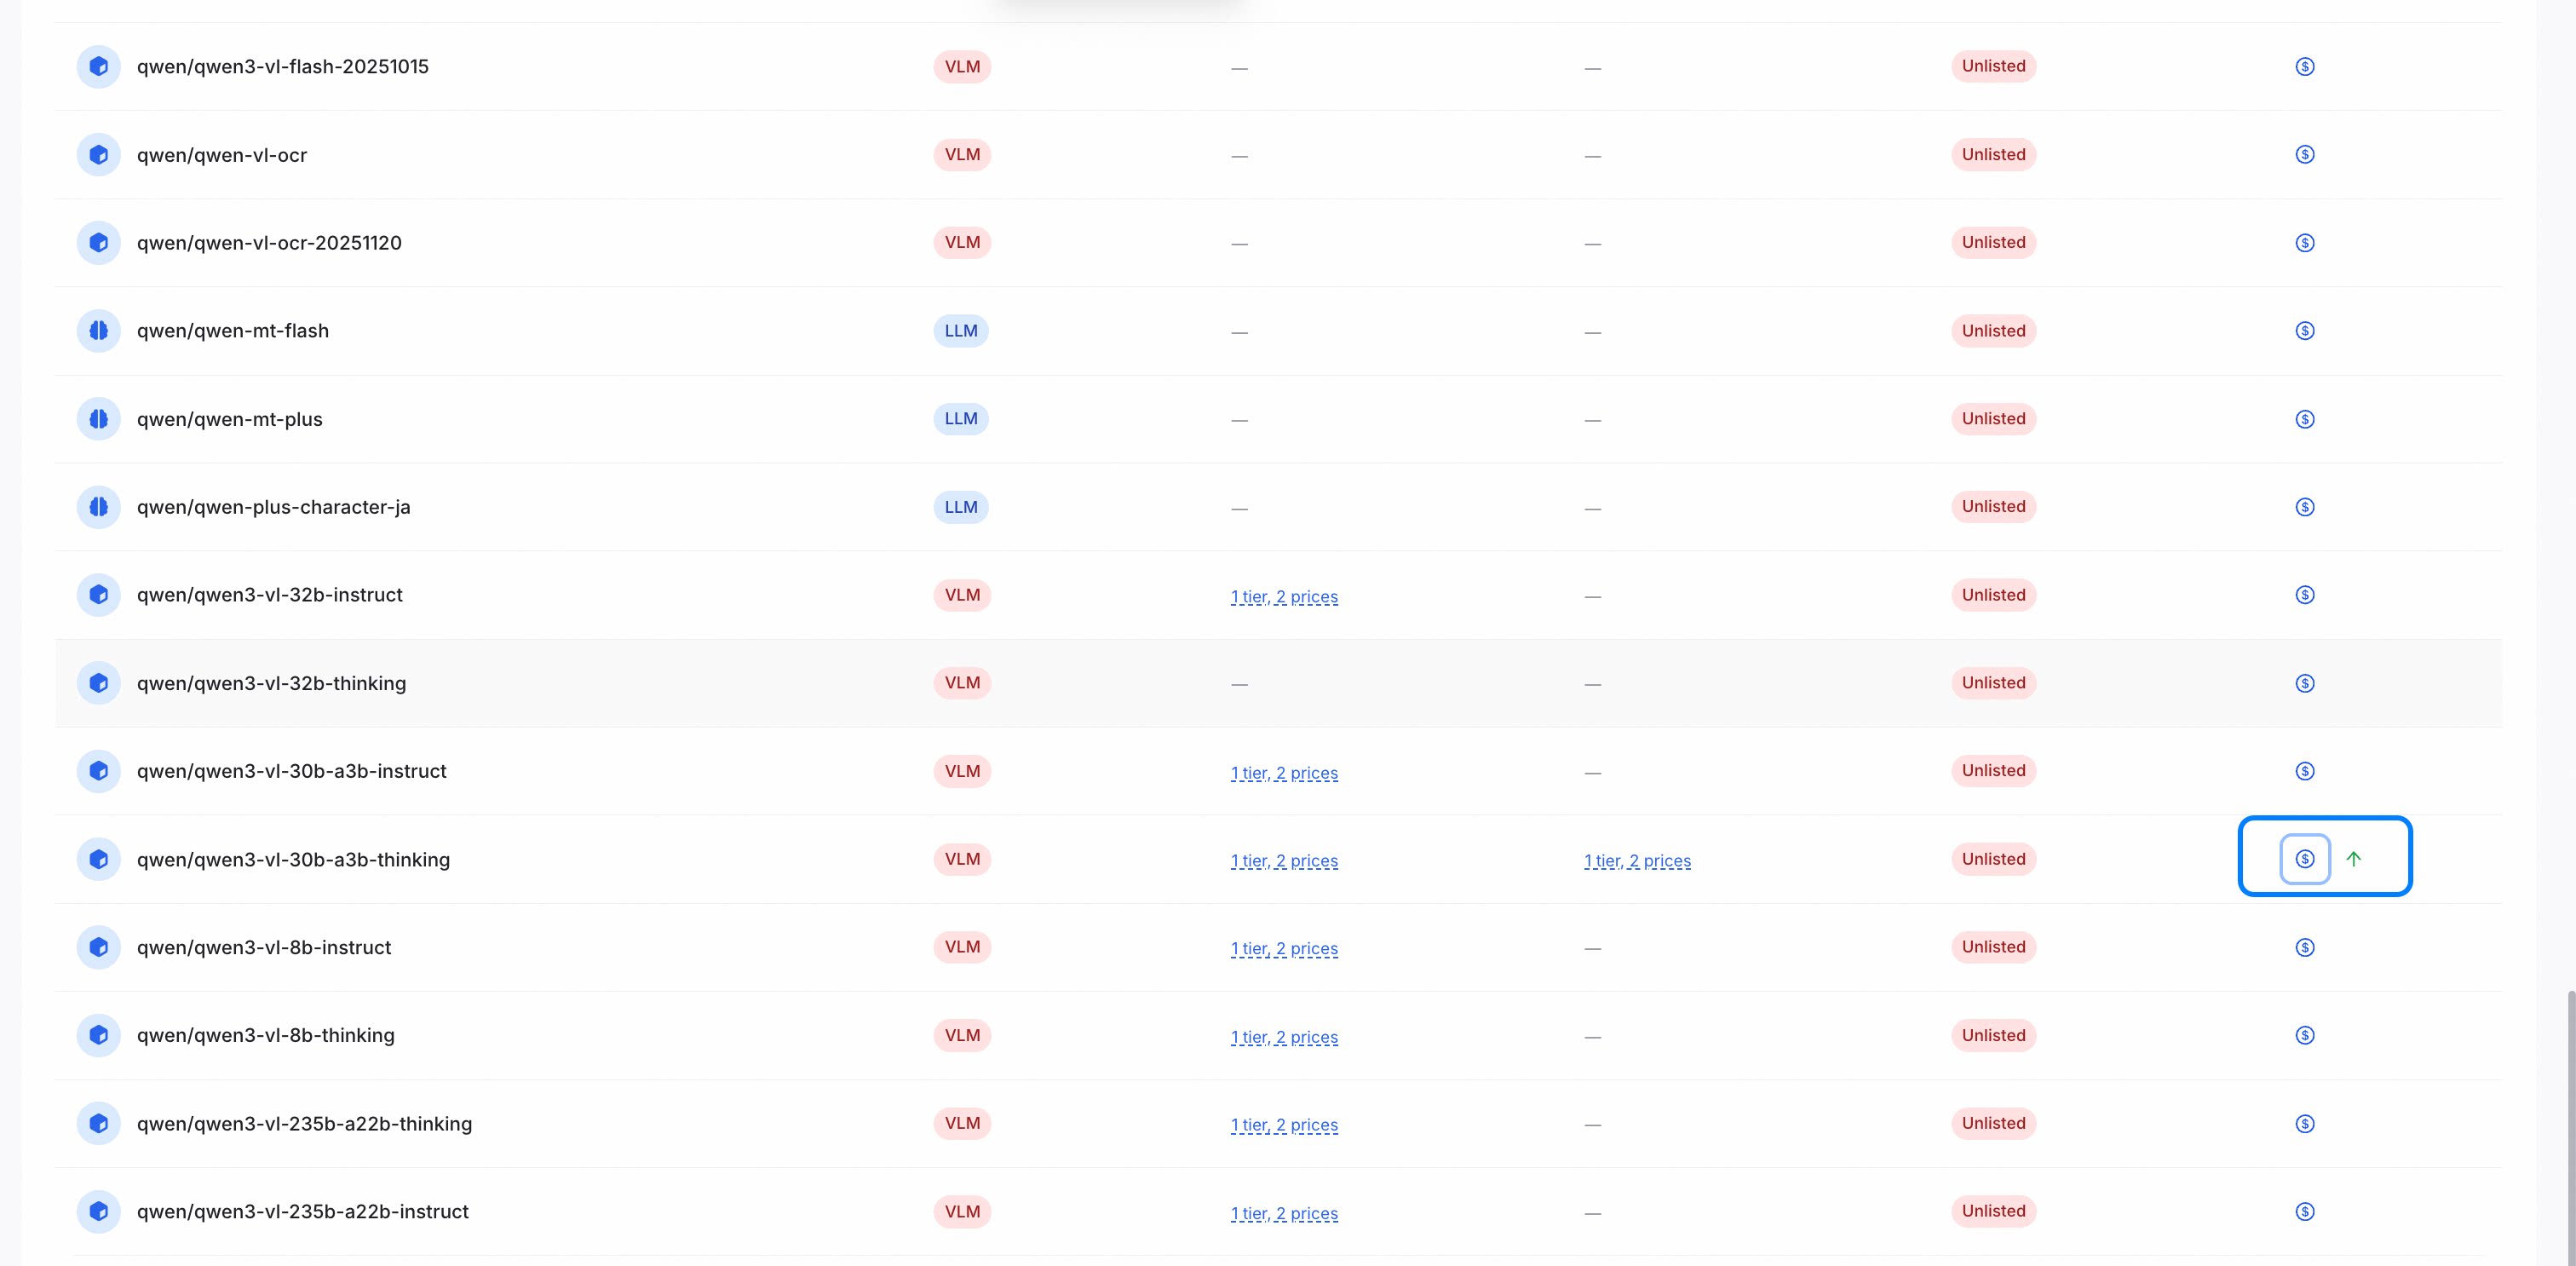
There are two methods for setting the price:
-
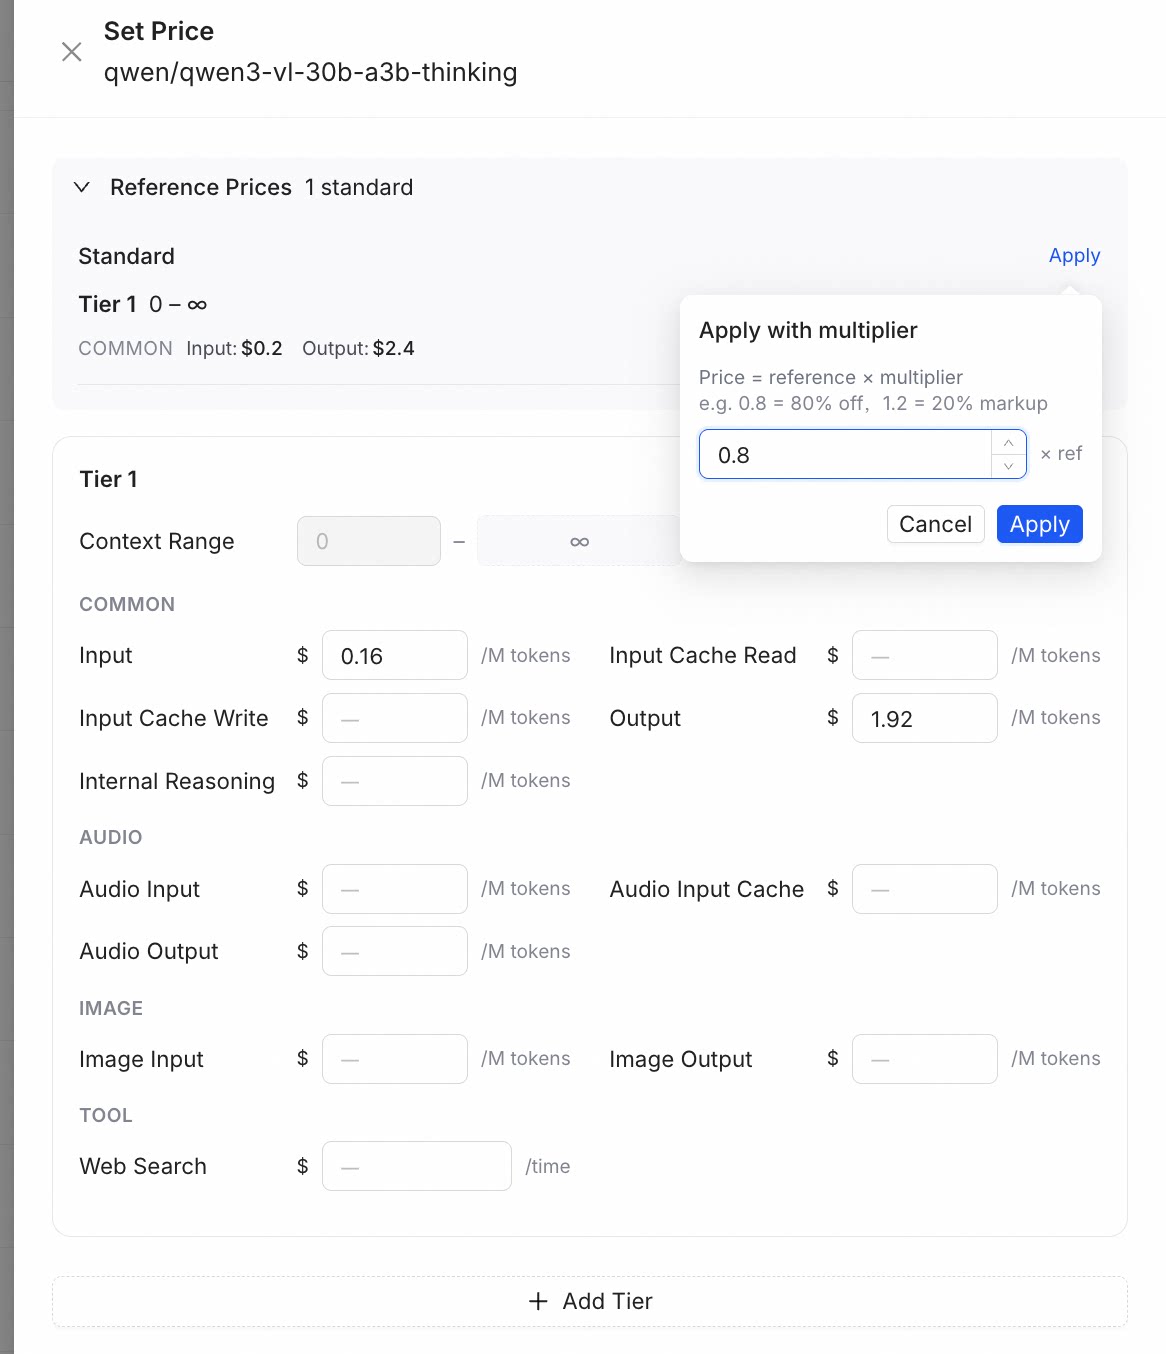
Apply a Multiplier: Click Apply next to the Reference Prices. Enter a multiplier in the dialog. For example, 0.8 is a 20% discount. The system then calculates and populates the price fields.
-
Manual Entry: Enter your prices directly into the Input and Output fields. This method offers maximum flexibility.
After saving your price, click the List button to make sure the custom discount is active for this customer.
Apply batch discounts
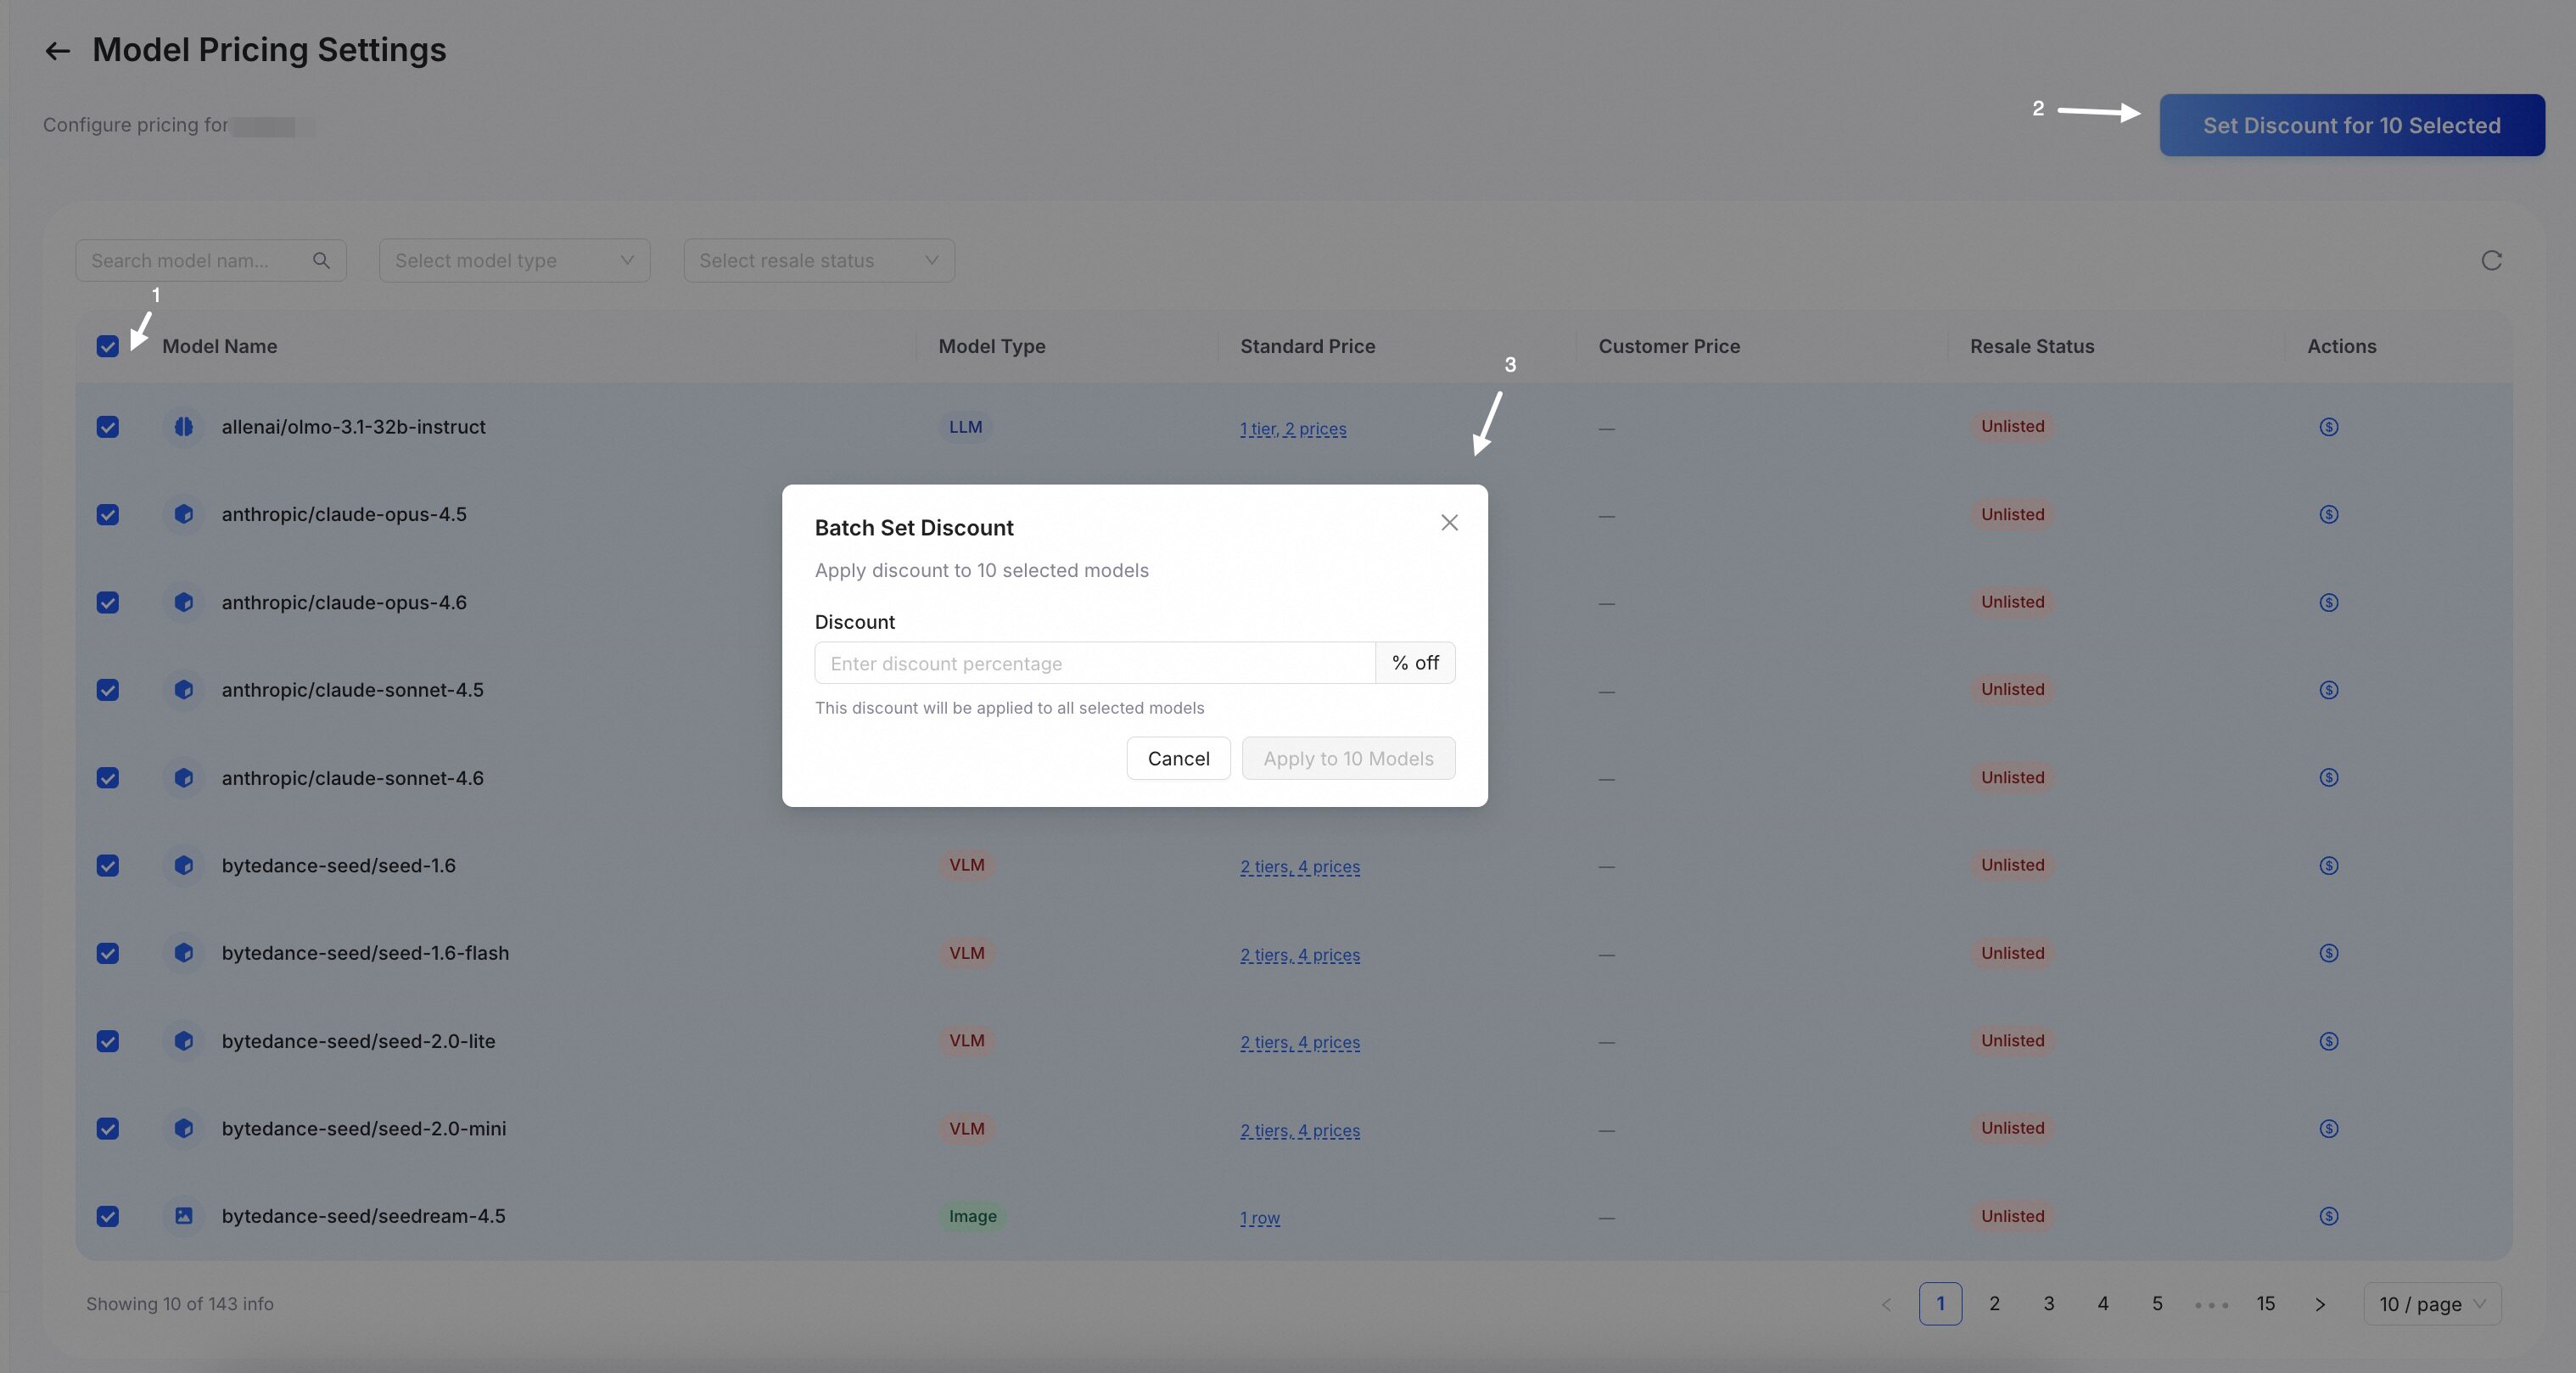
Apply the same discount to many models at once. Select the models in the list. Enter the discount percentage (e.g., 20 for 20% off). The system updates all selected models' prices in one step.
Grant free credits (optional)
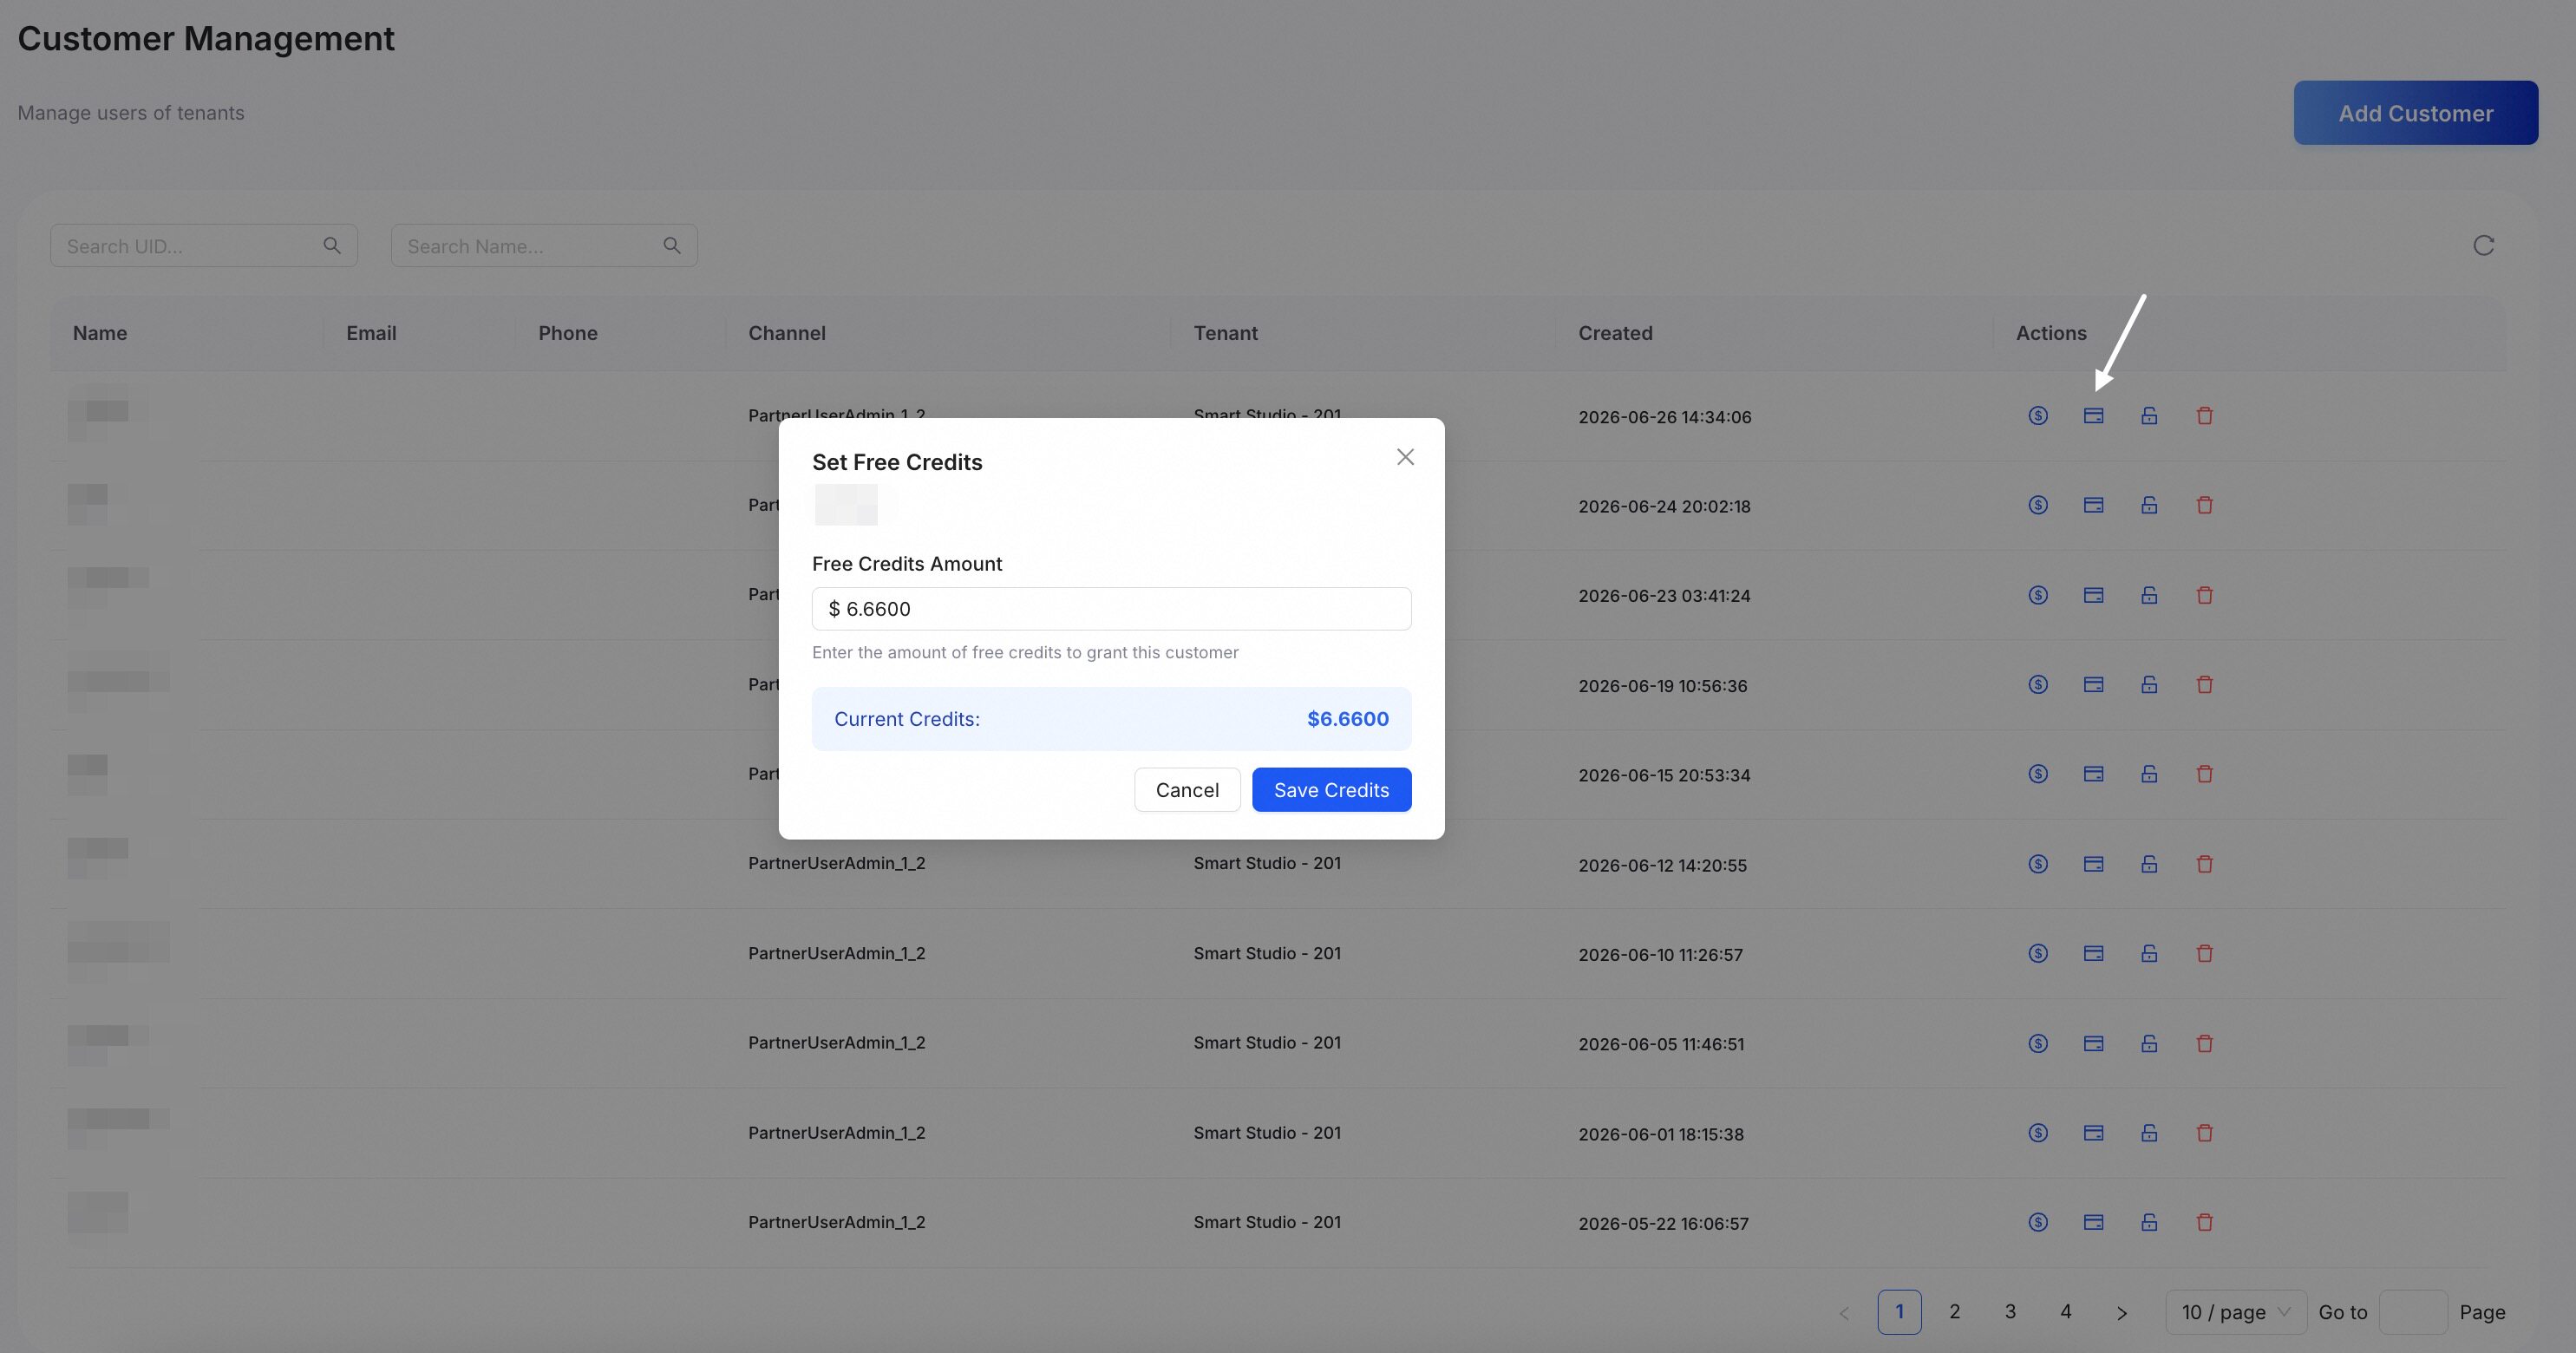
Give an end customer free credits to spend on your platform. Set credits directly from the customer list. Enter the amount to grant. Click Save Credits. The customer's credits take effect immediately.
View billing and analytics
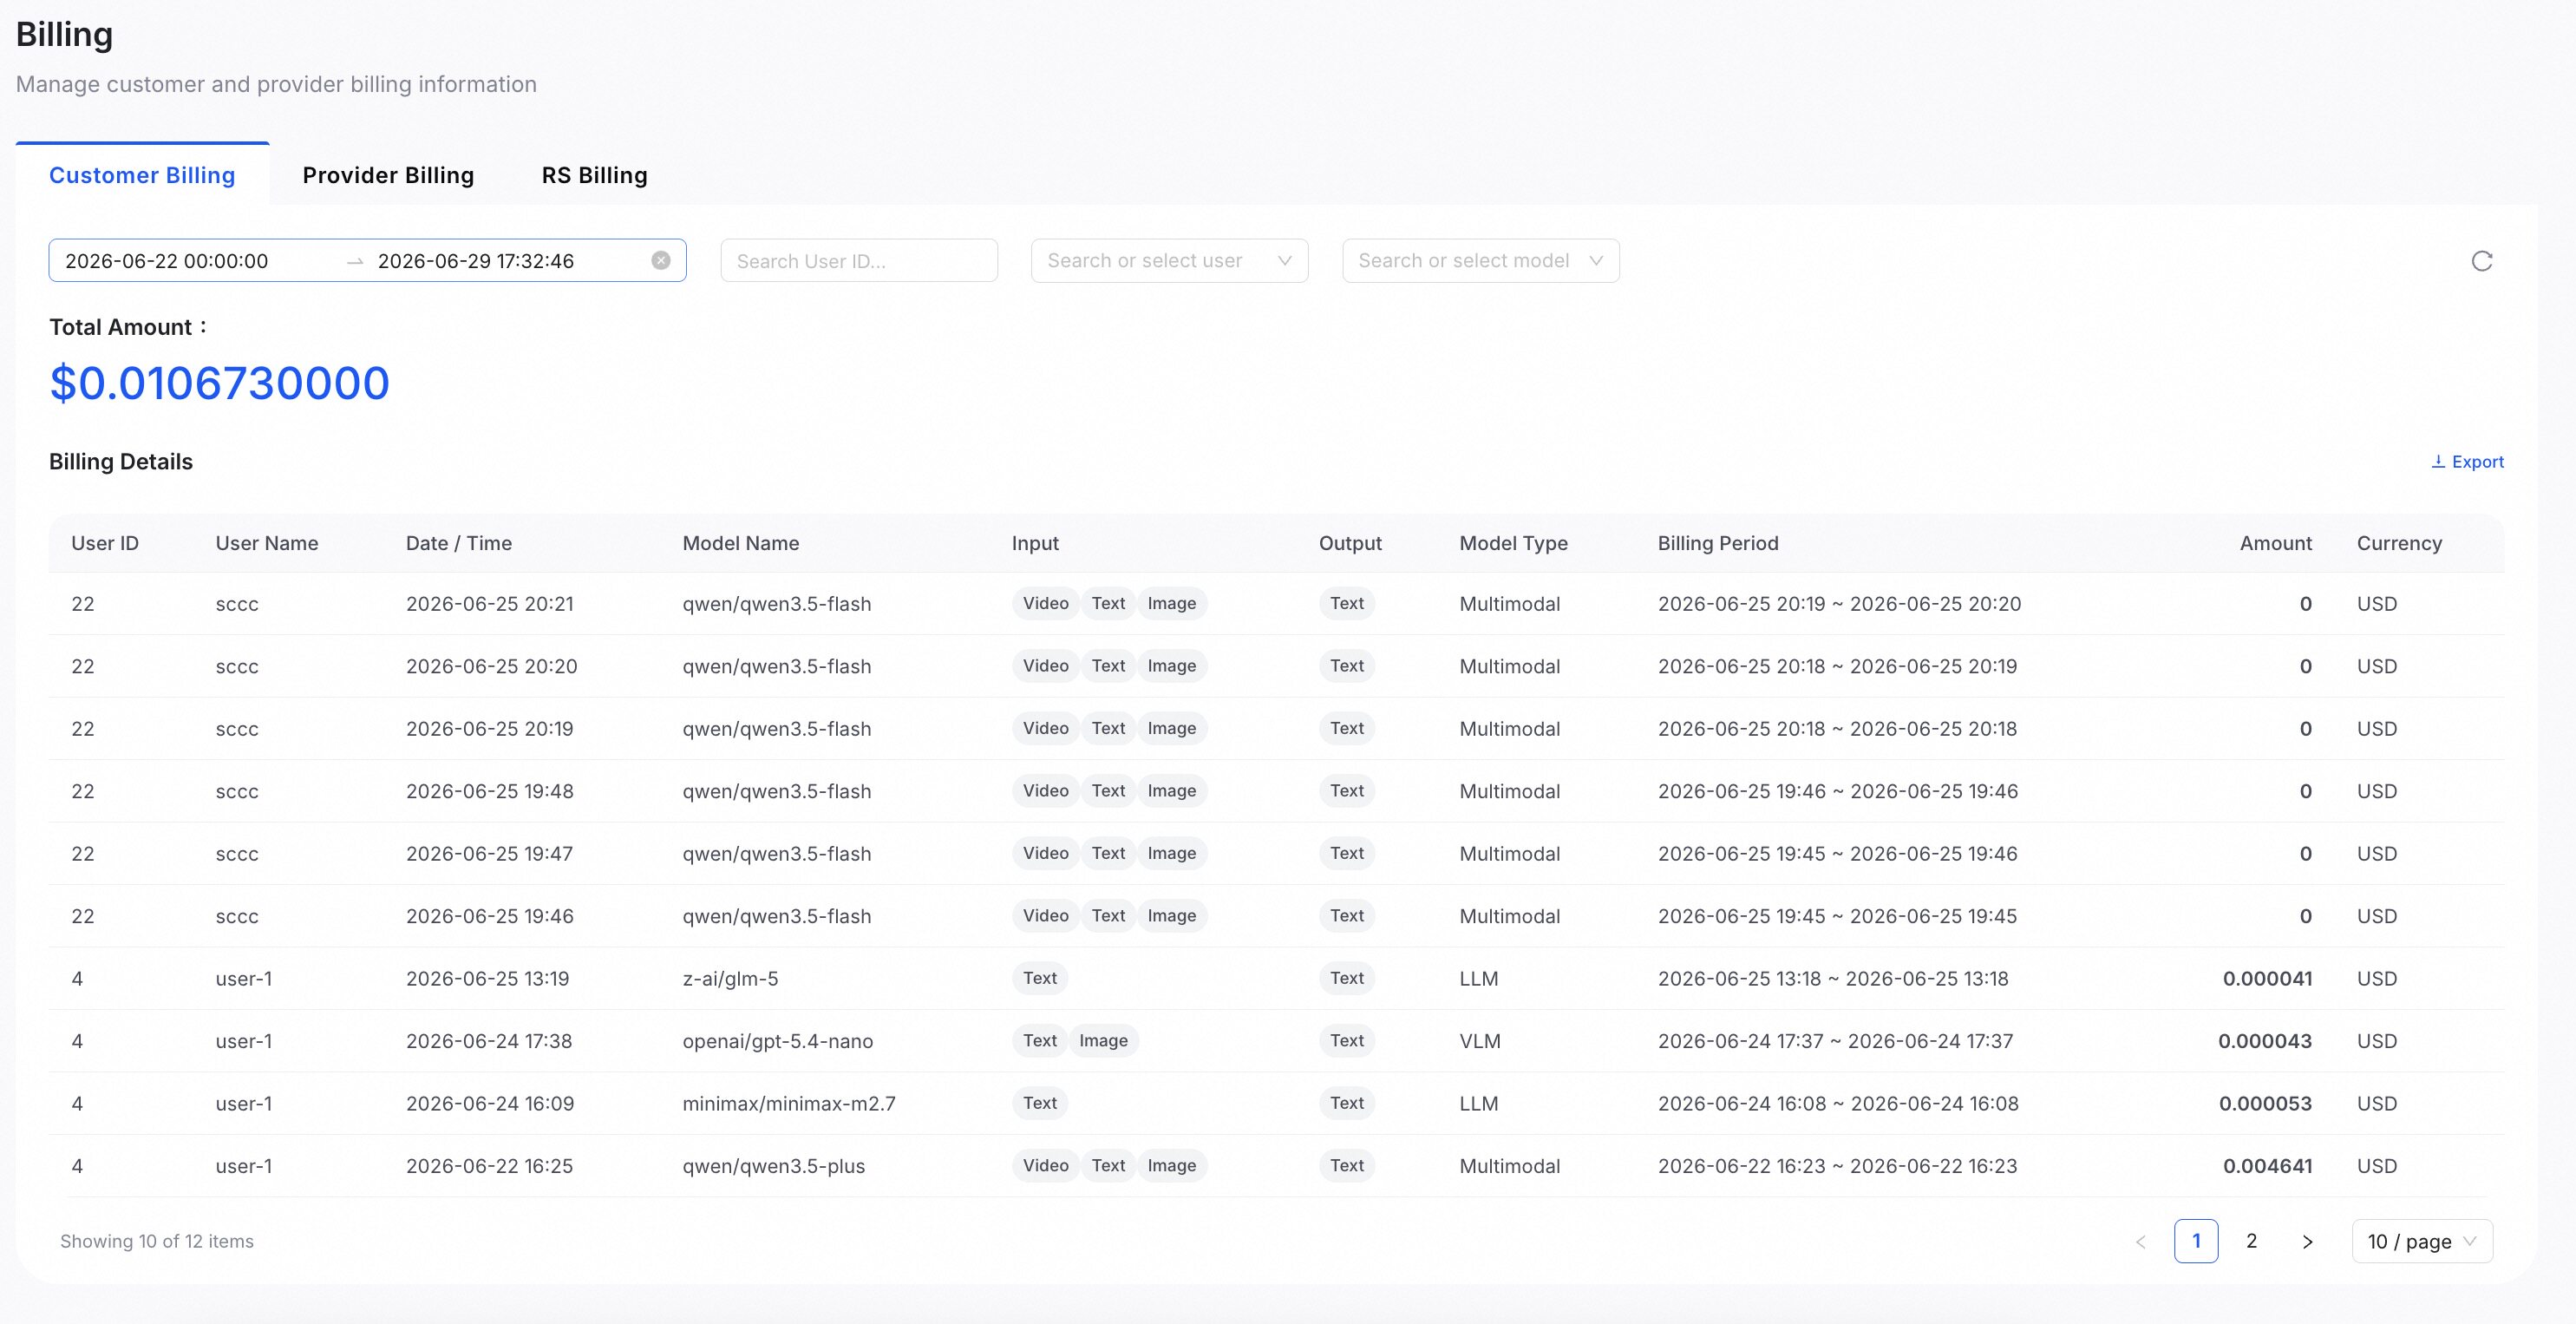
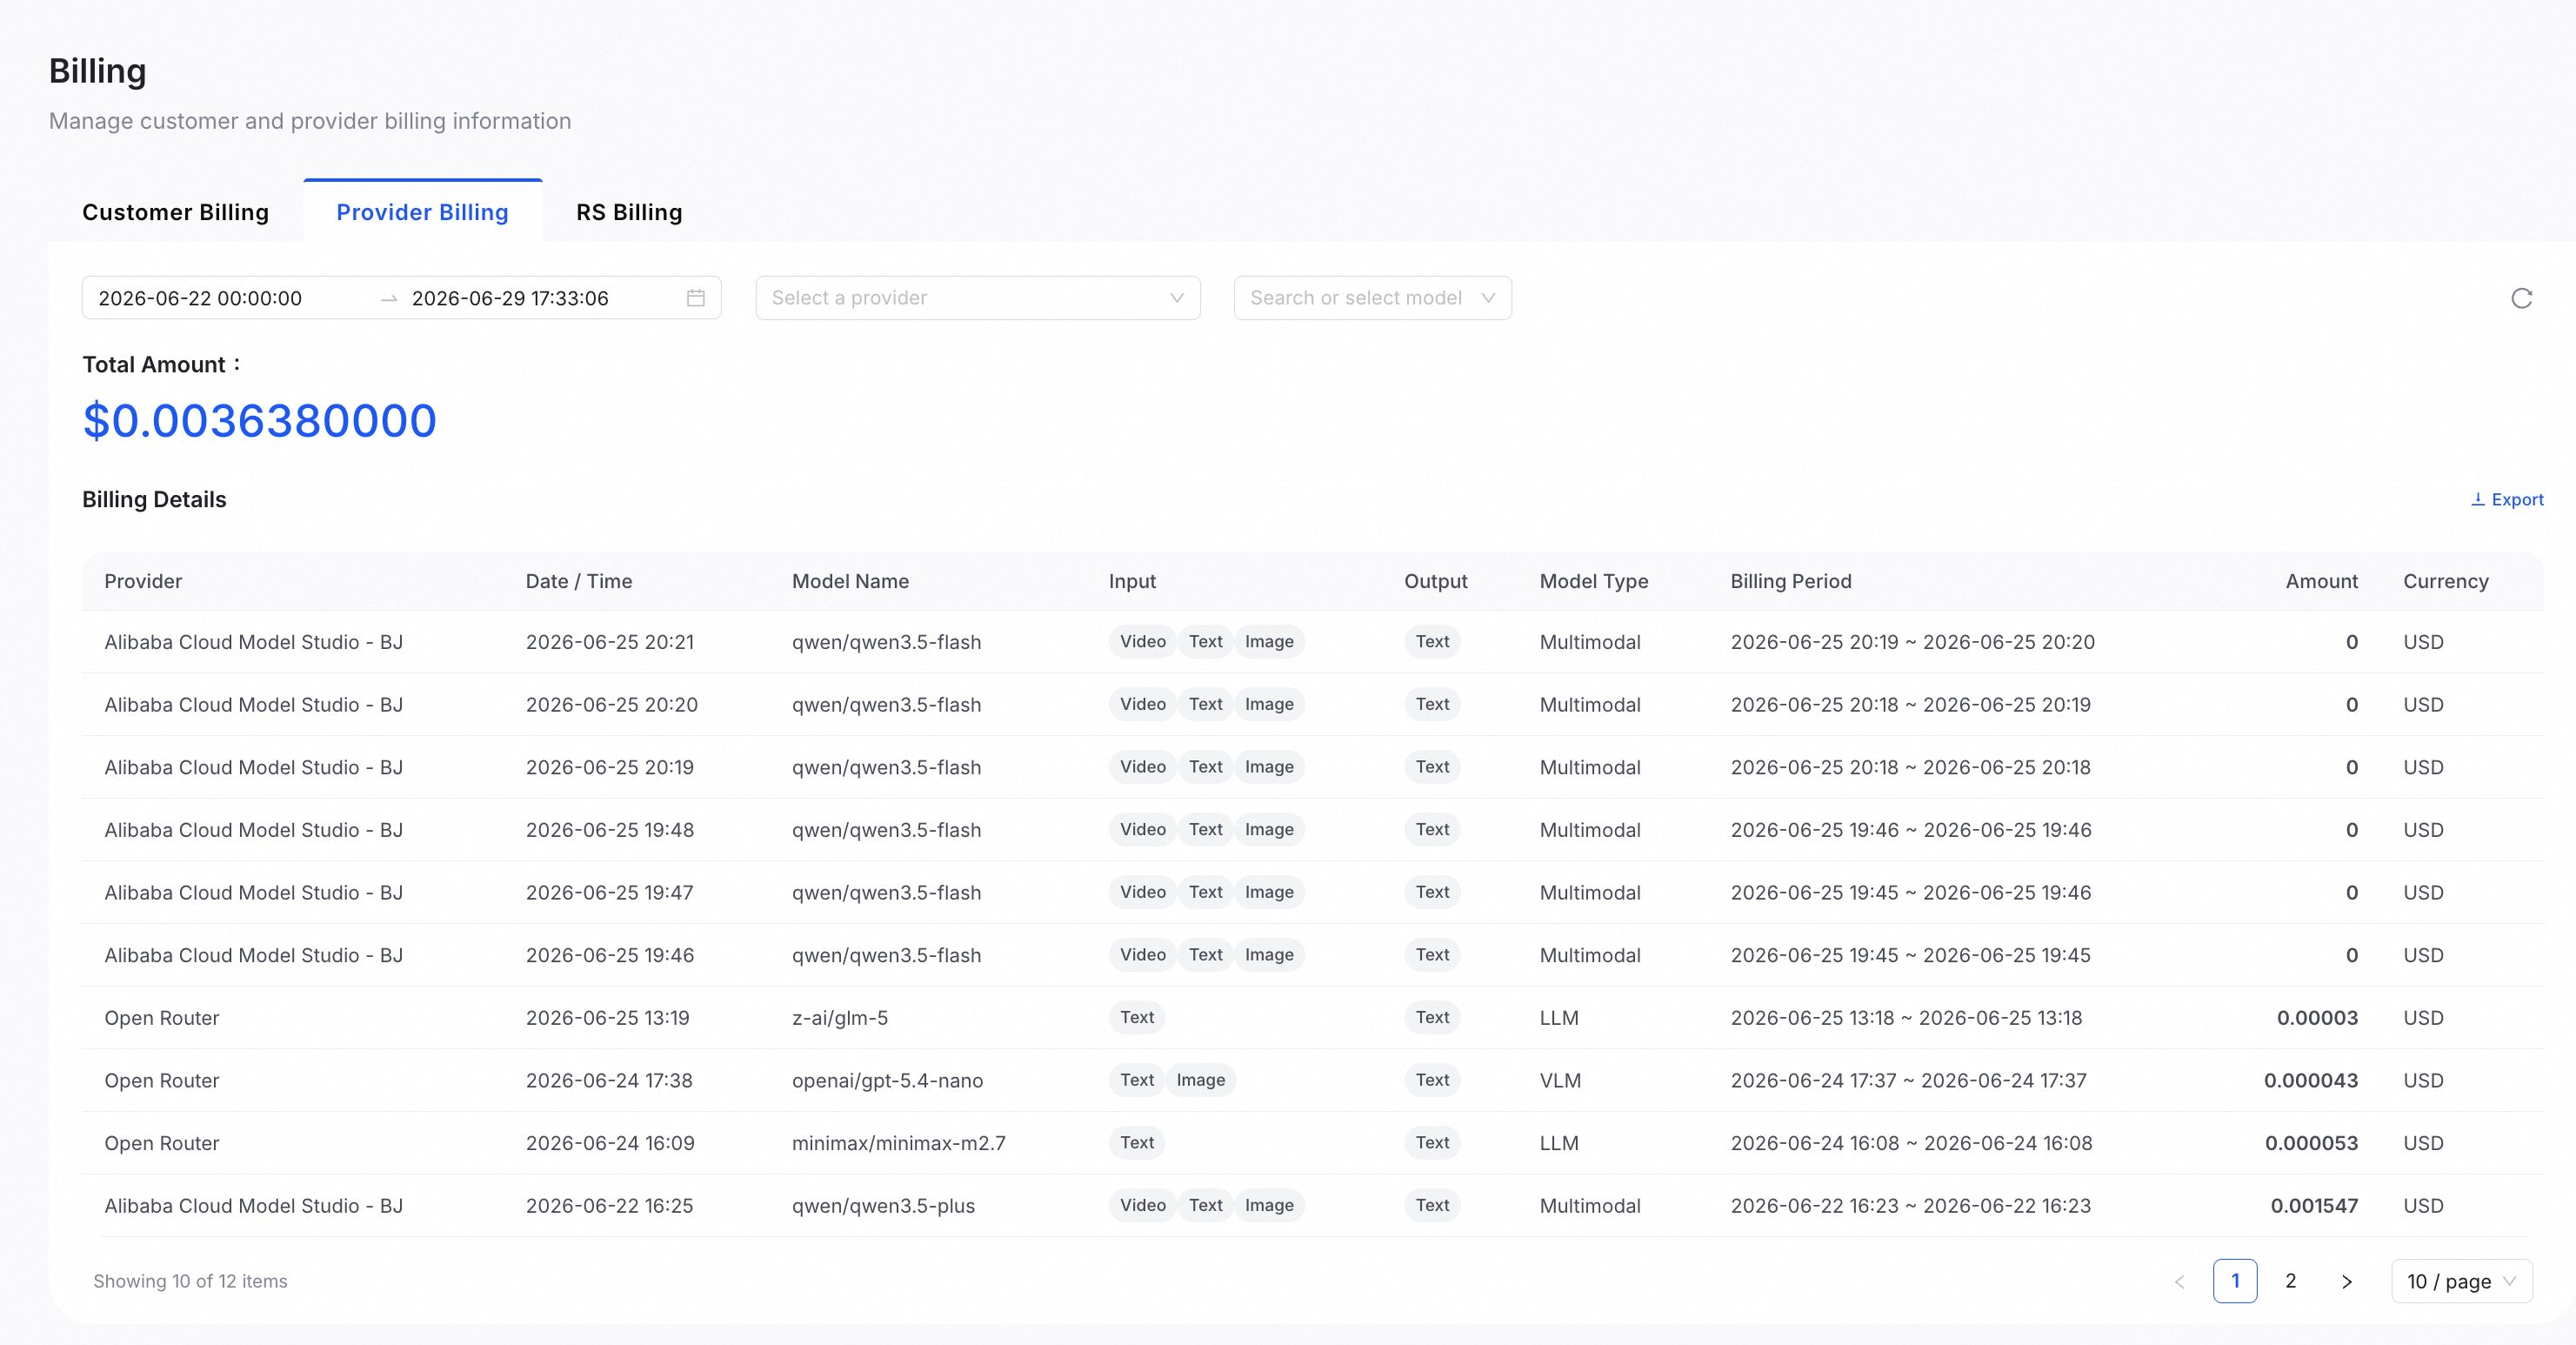
The Billing page provides a view of your customer billing and provider billing.
Customer Billing
Provider Billing
Configure platform settings
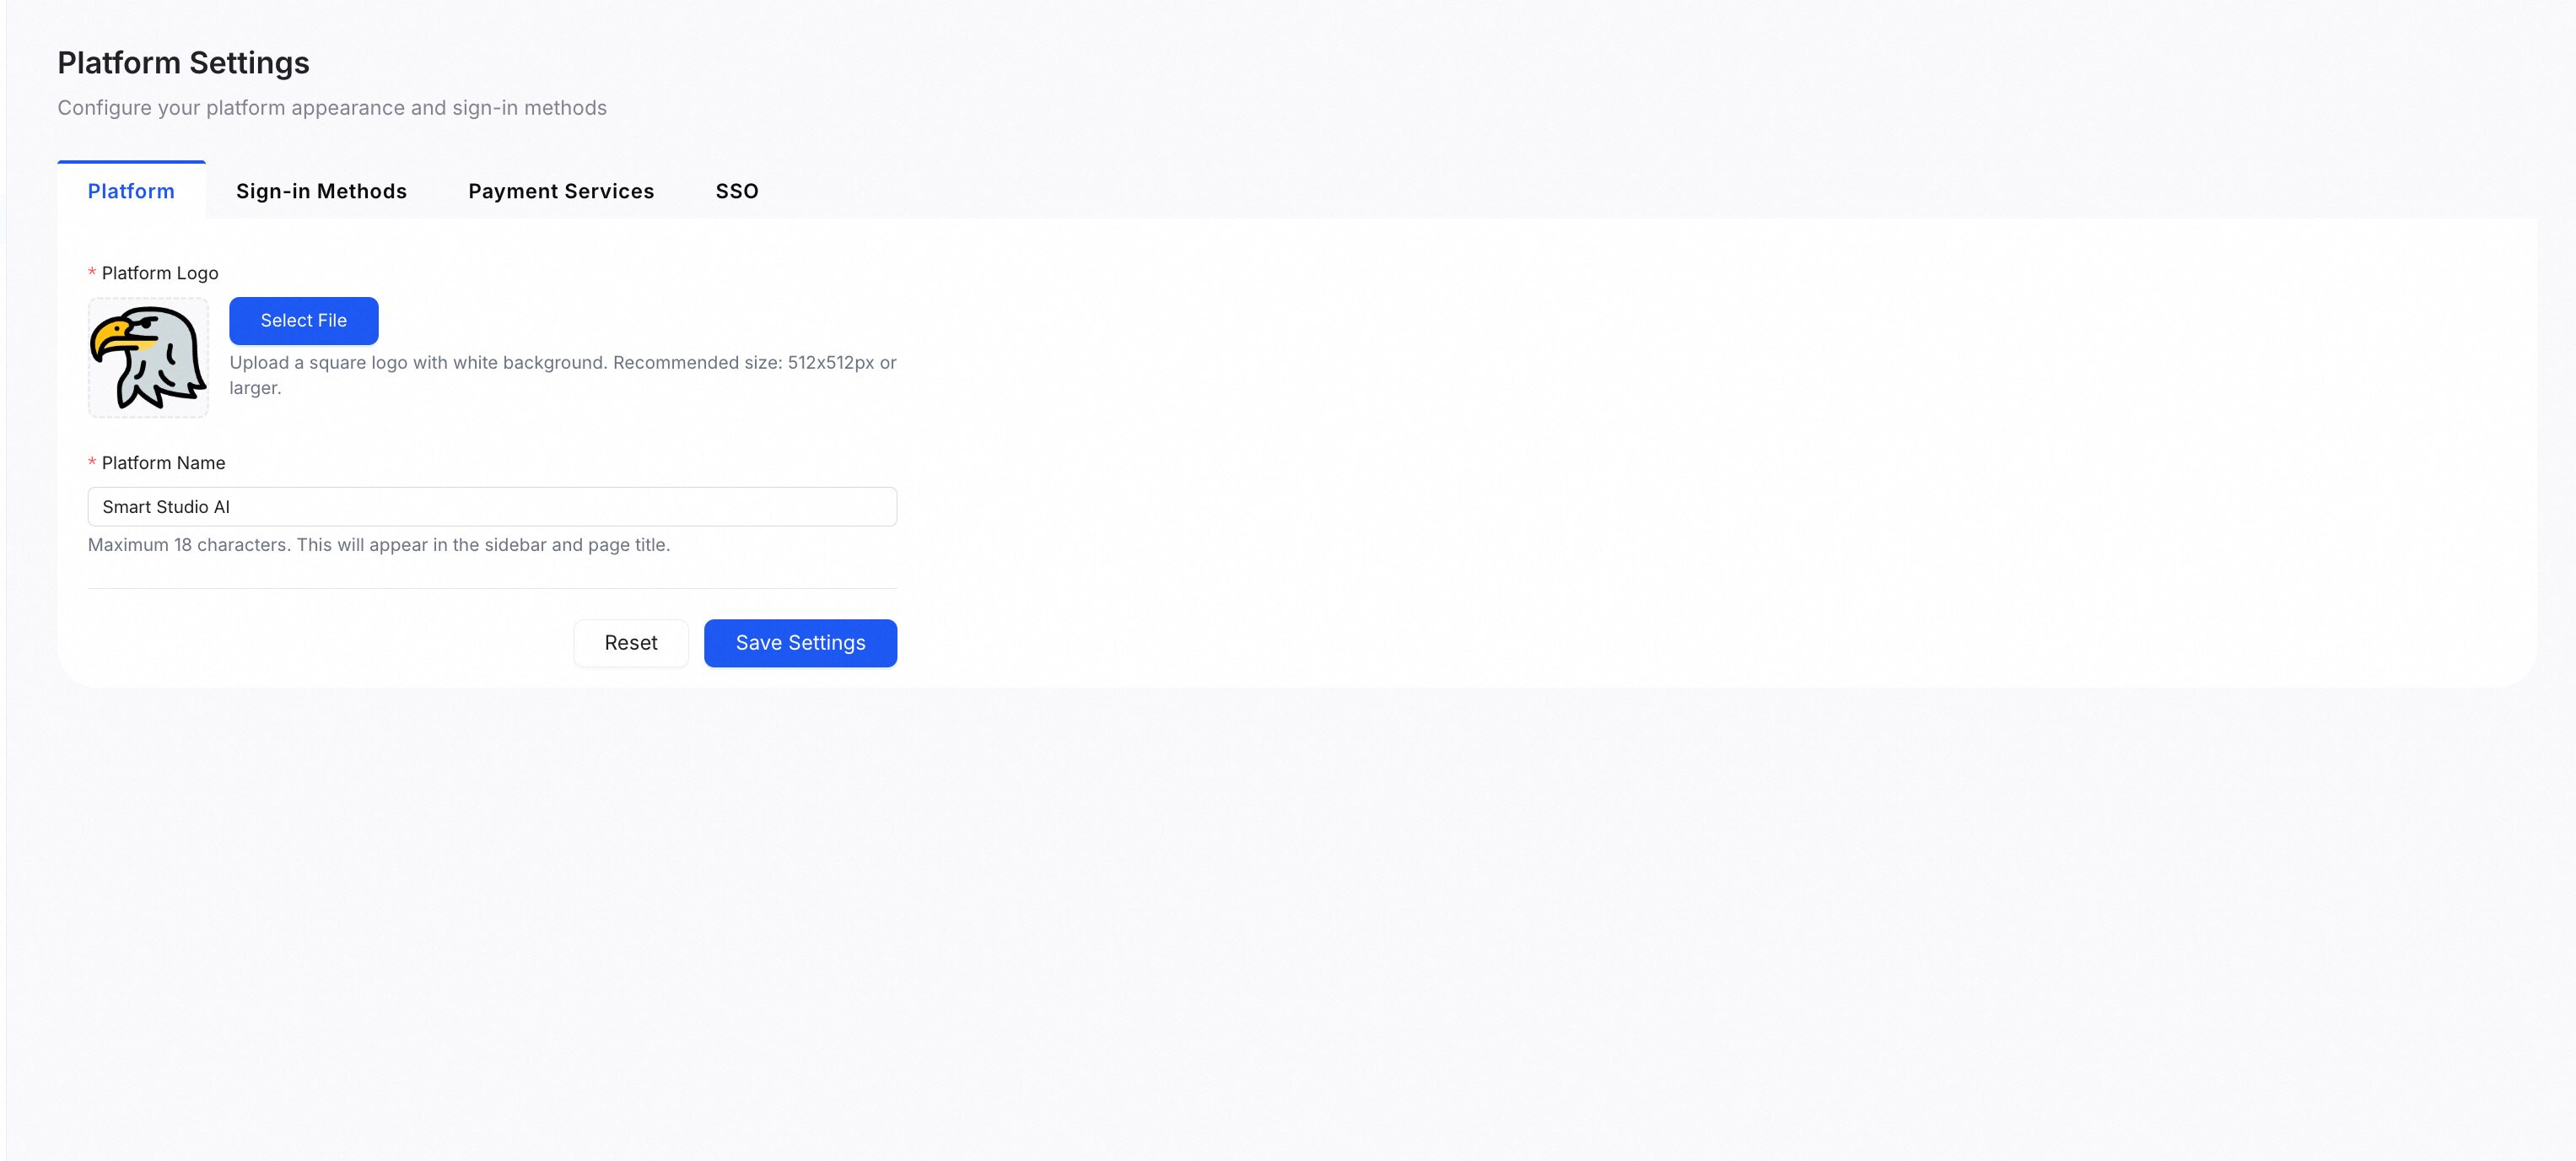
The Settings page customizes the platform logo and name. Configure the login and payment methods available to your customers.
Platform
On this page, you can upload your company logo and set your platform name.
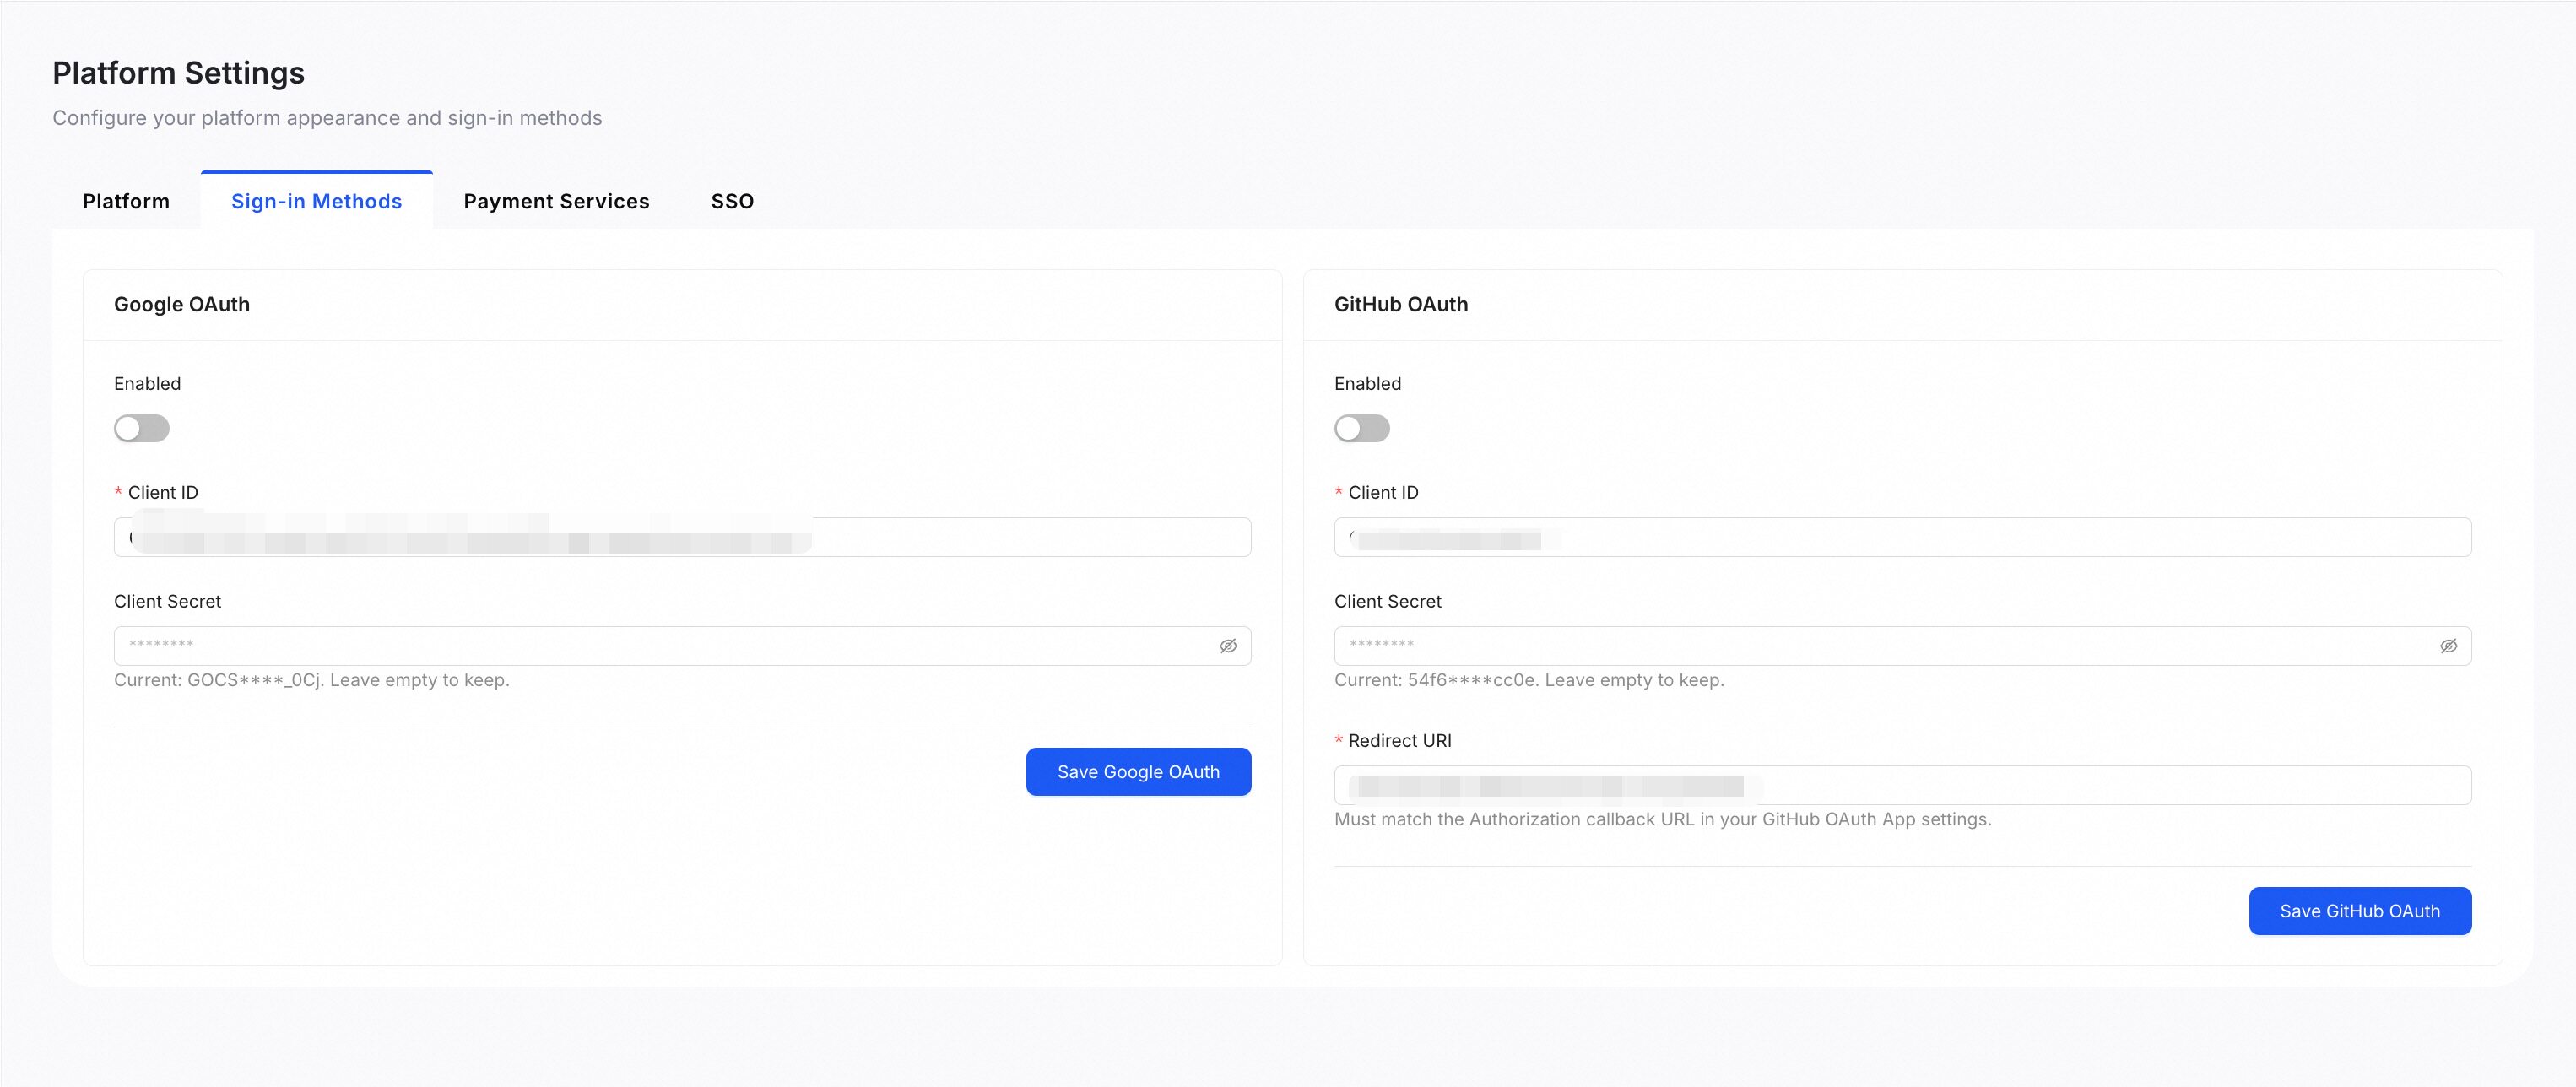
Sign-in Methods
Enable Google or GitHub OAuth sign-in for your customers by entering the Client ID and Client Secret from each provider.
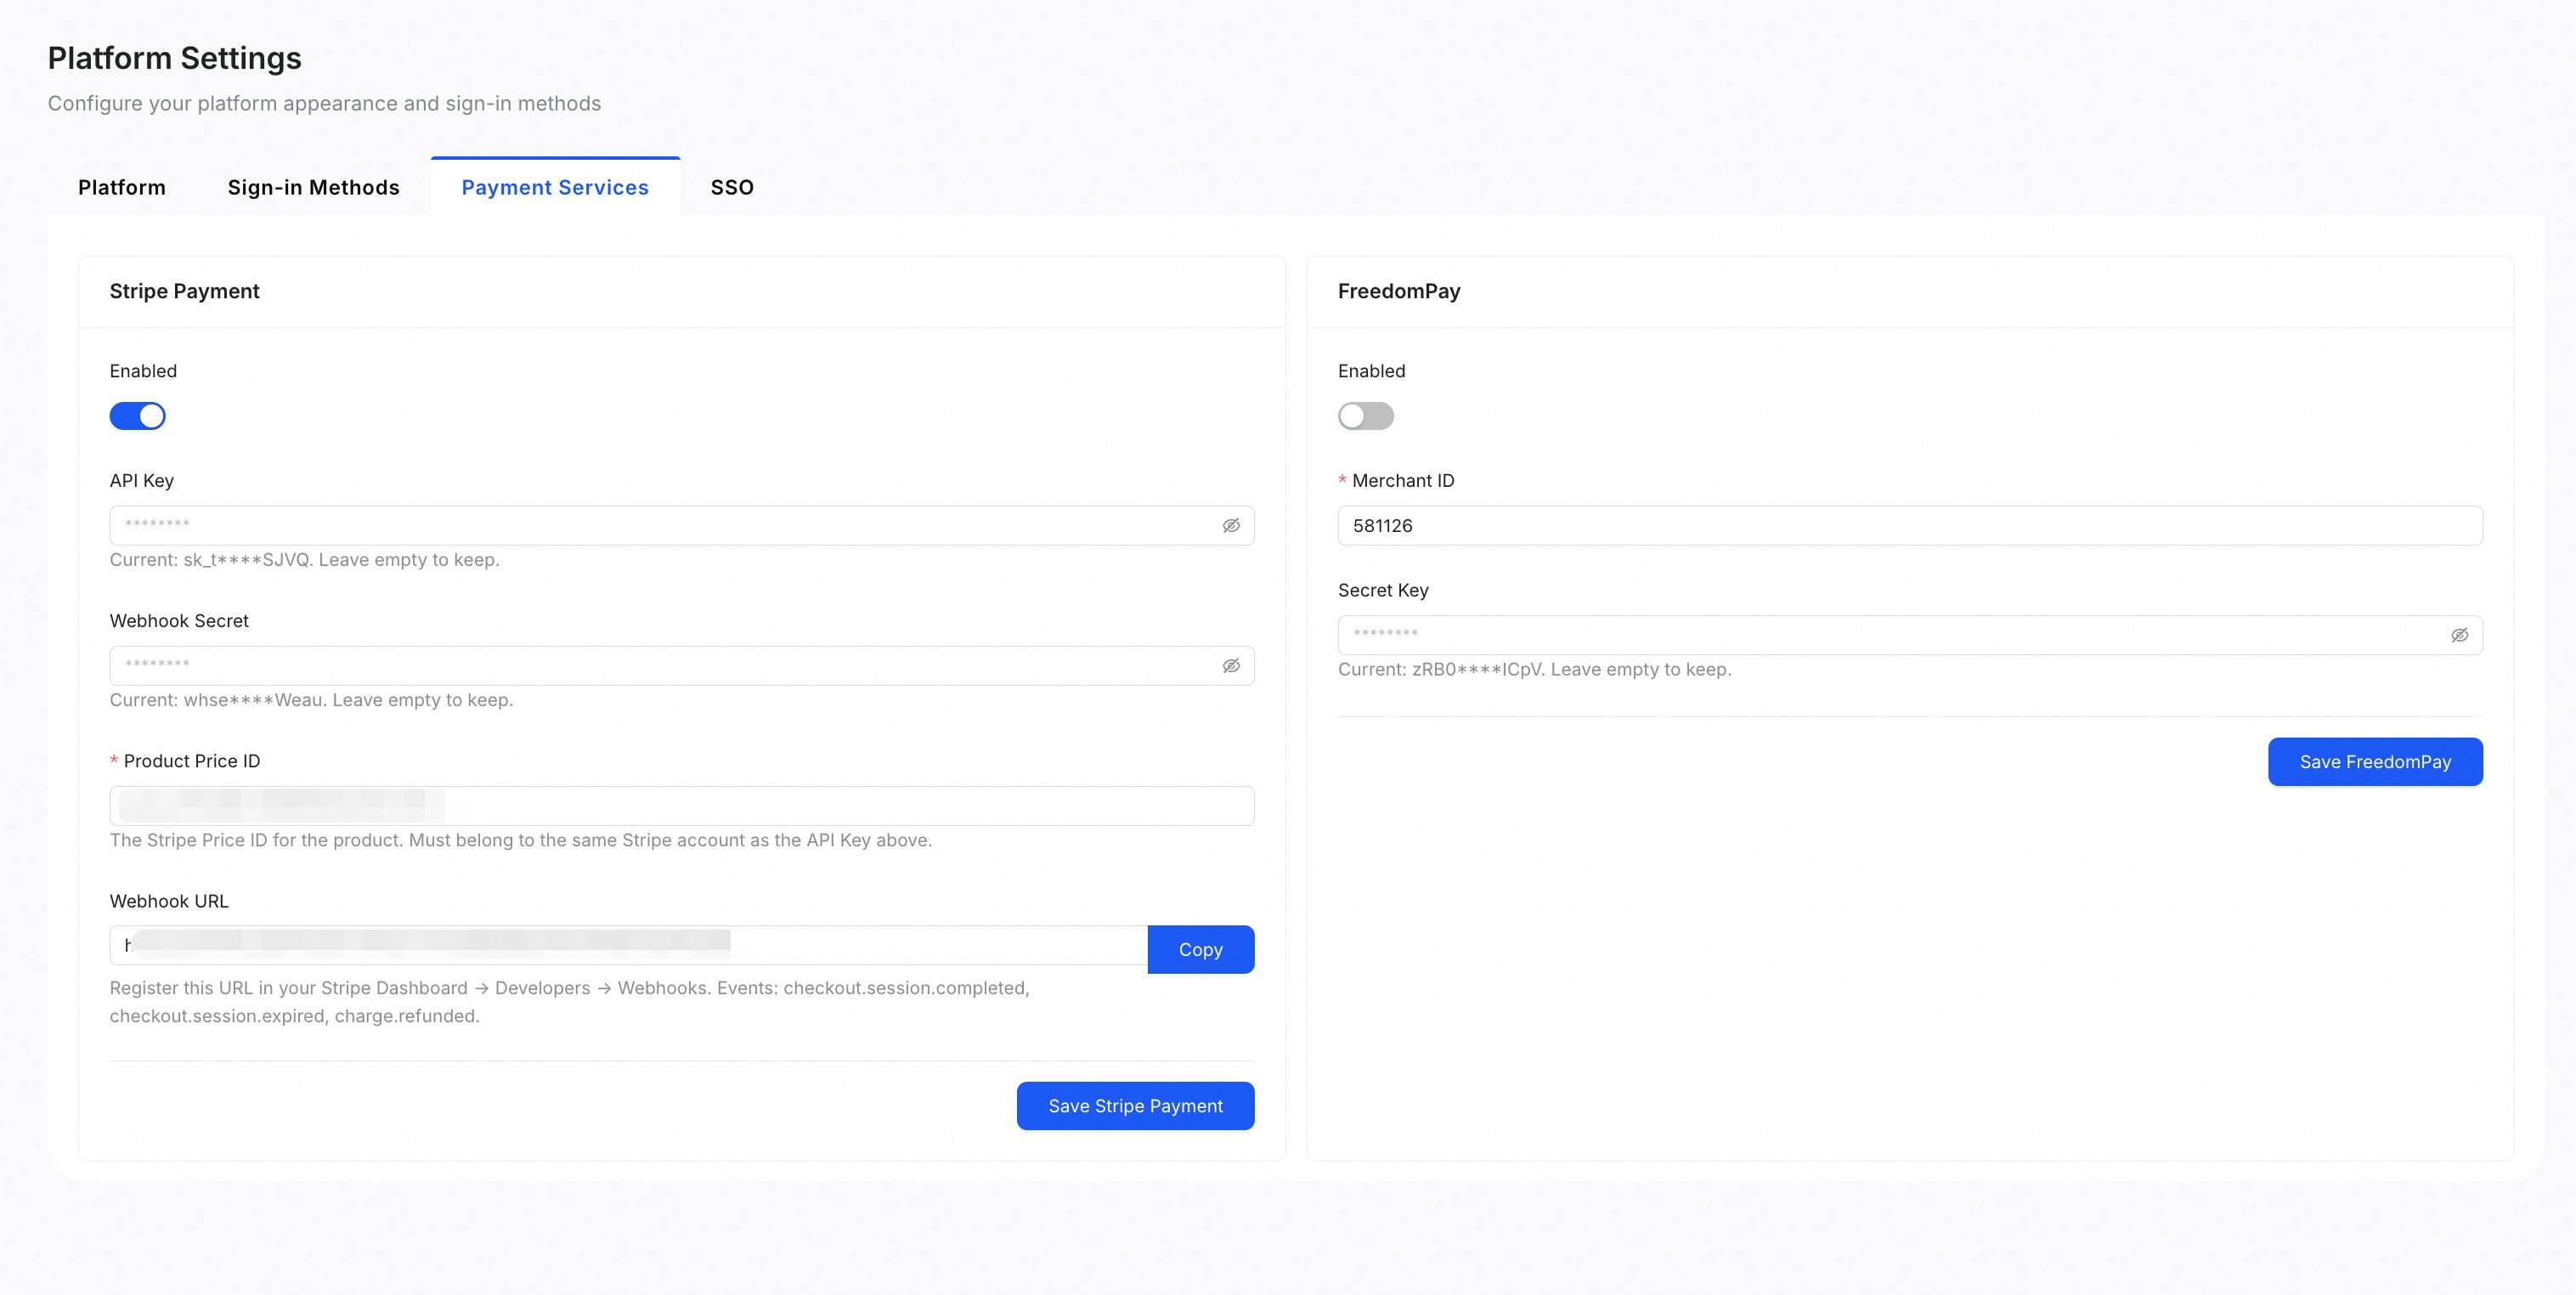
Payment Services
Enable Stripe or FreedomPay as your platform's payment processor by entering the corresponding API keys and credentials.
Single Sign-On (SSO)
Smart Studio supports SSO login through your corporate identity provider (OIDC and SAML 2.0).
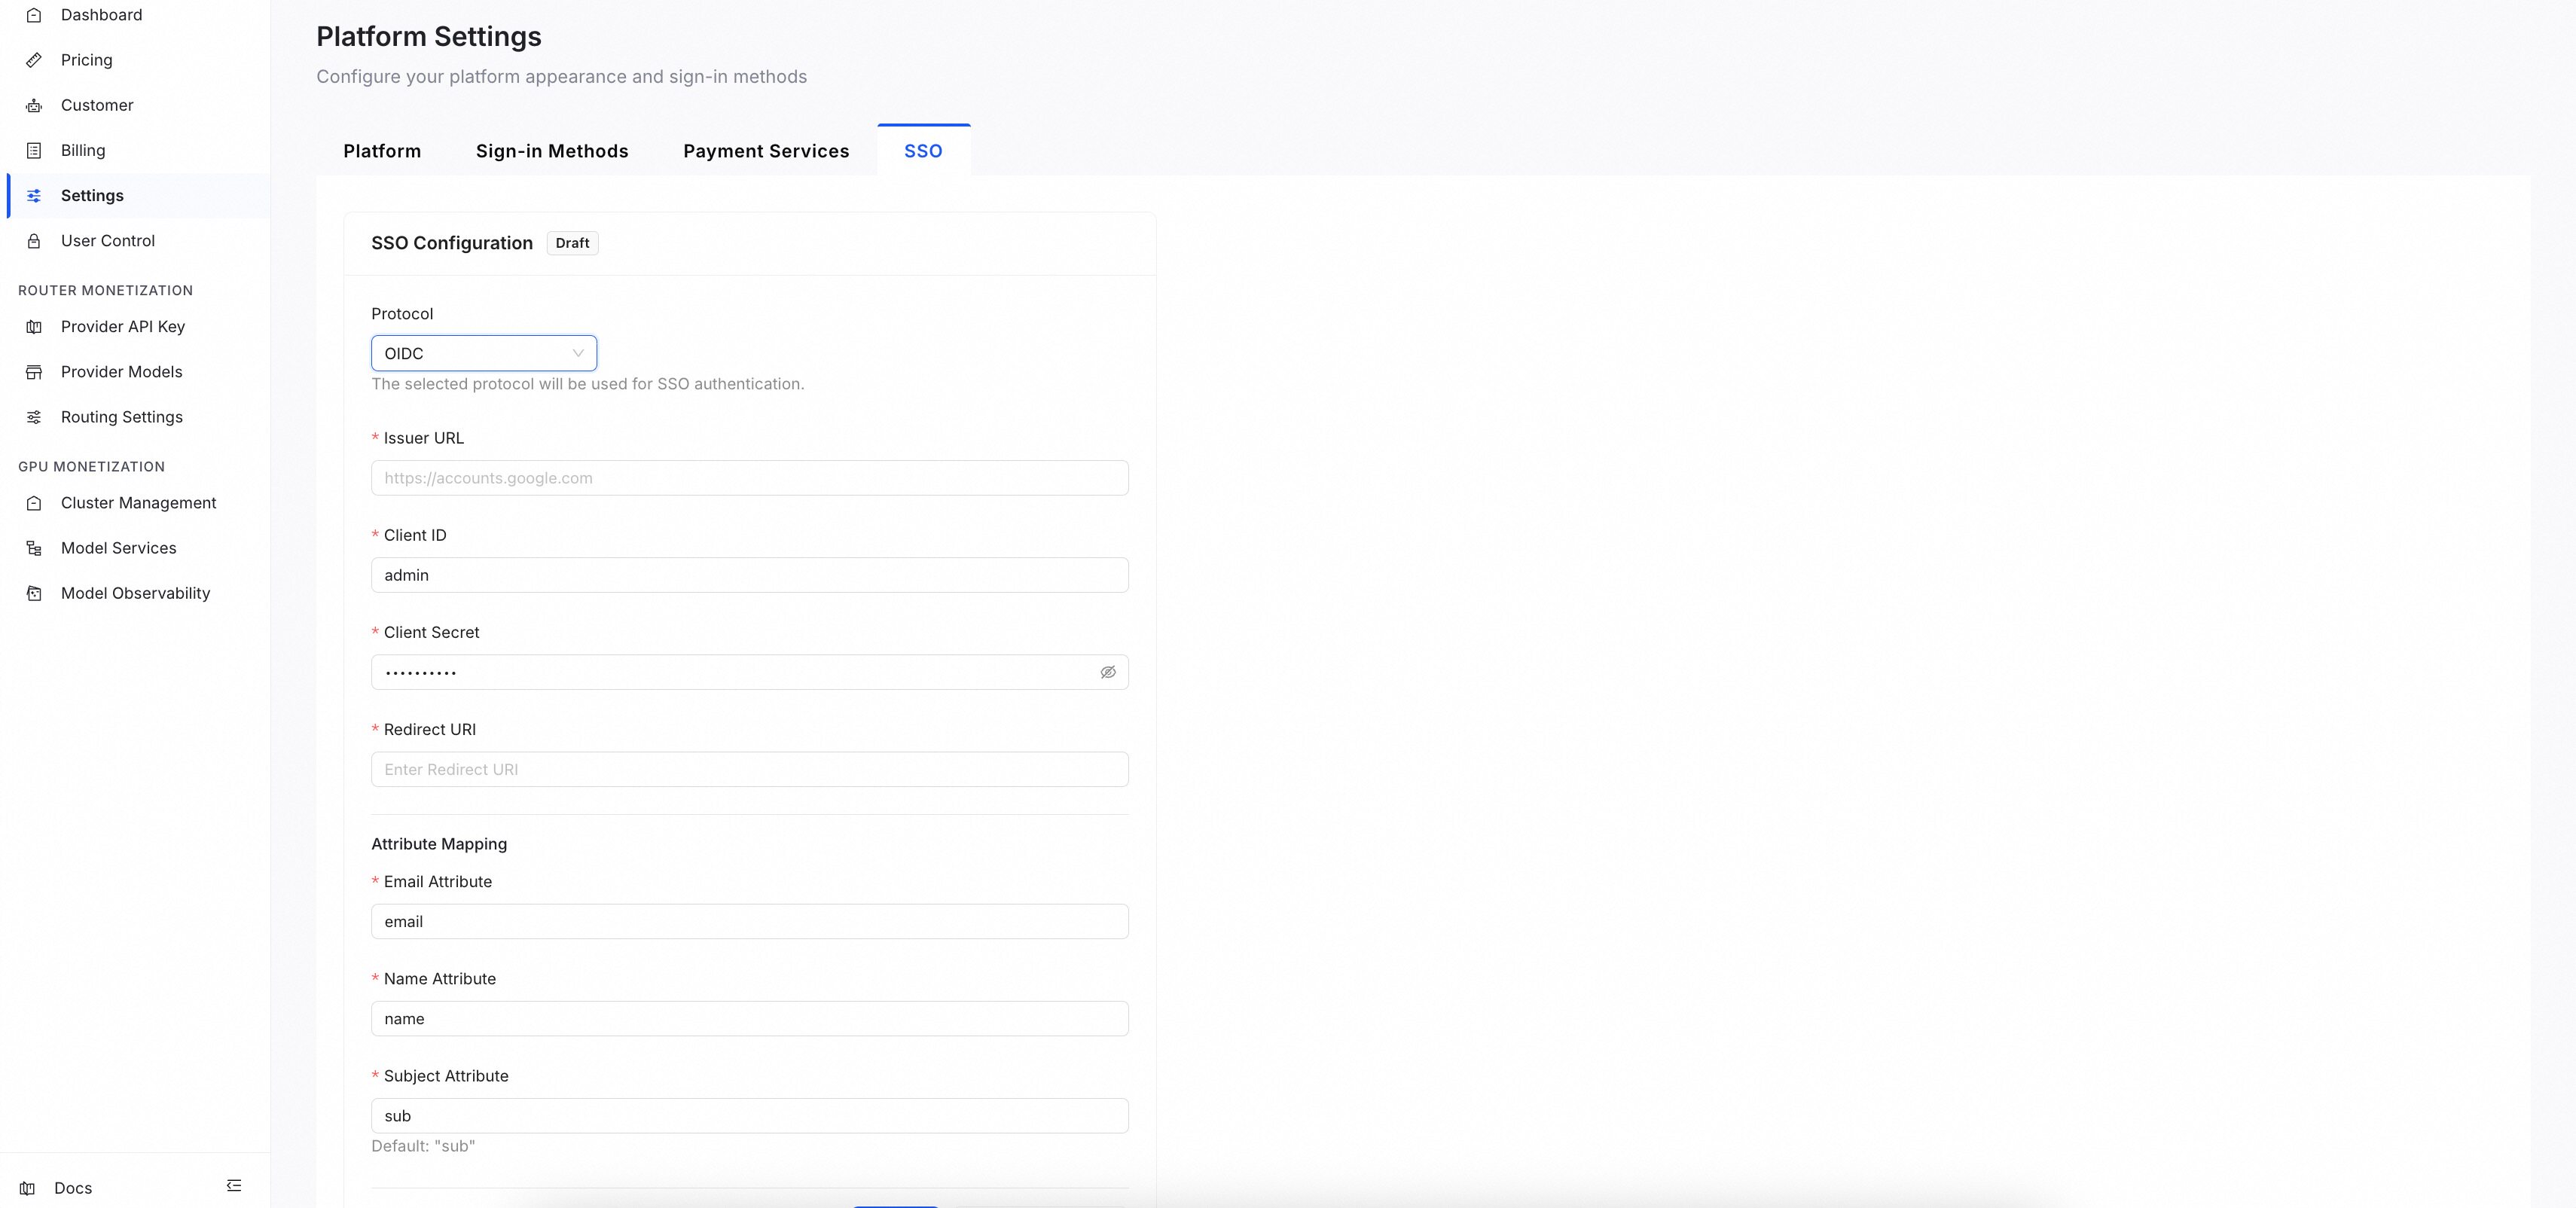
For setup steps, see Configure Single Sign-On (SSO).