Create Deployment
Upload your own models, or use existing fine-tuned models with full configuration control.
Step 1: Select a model
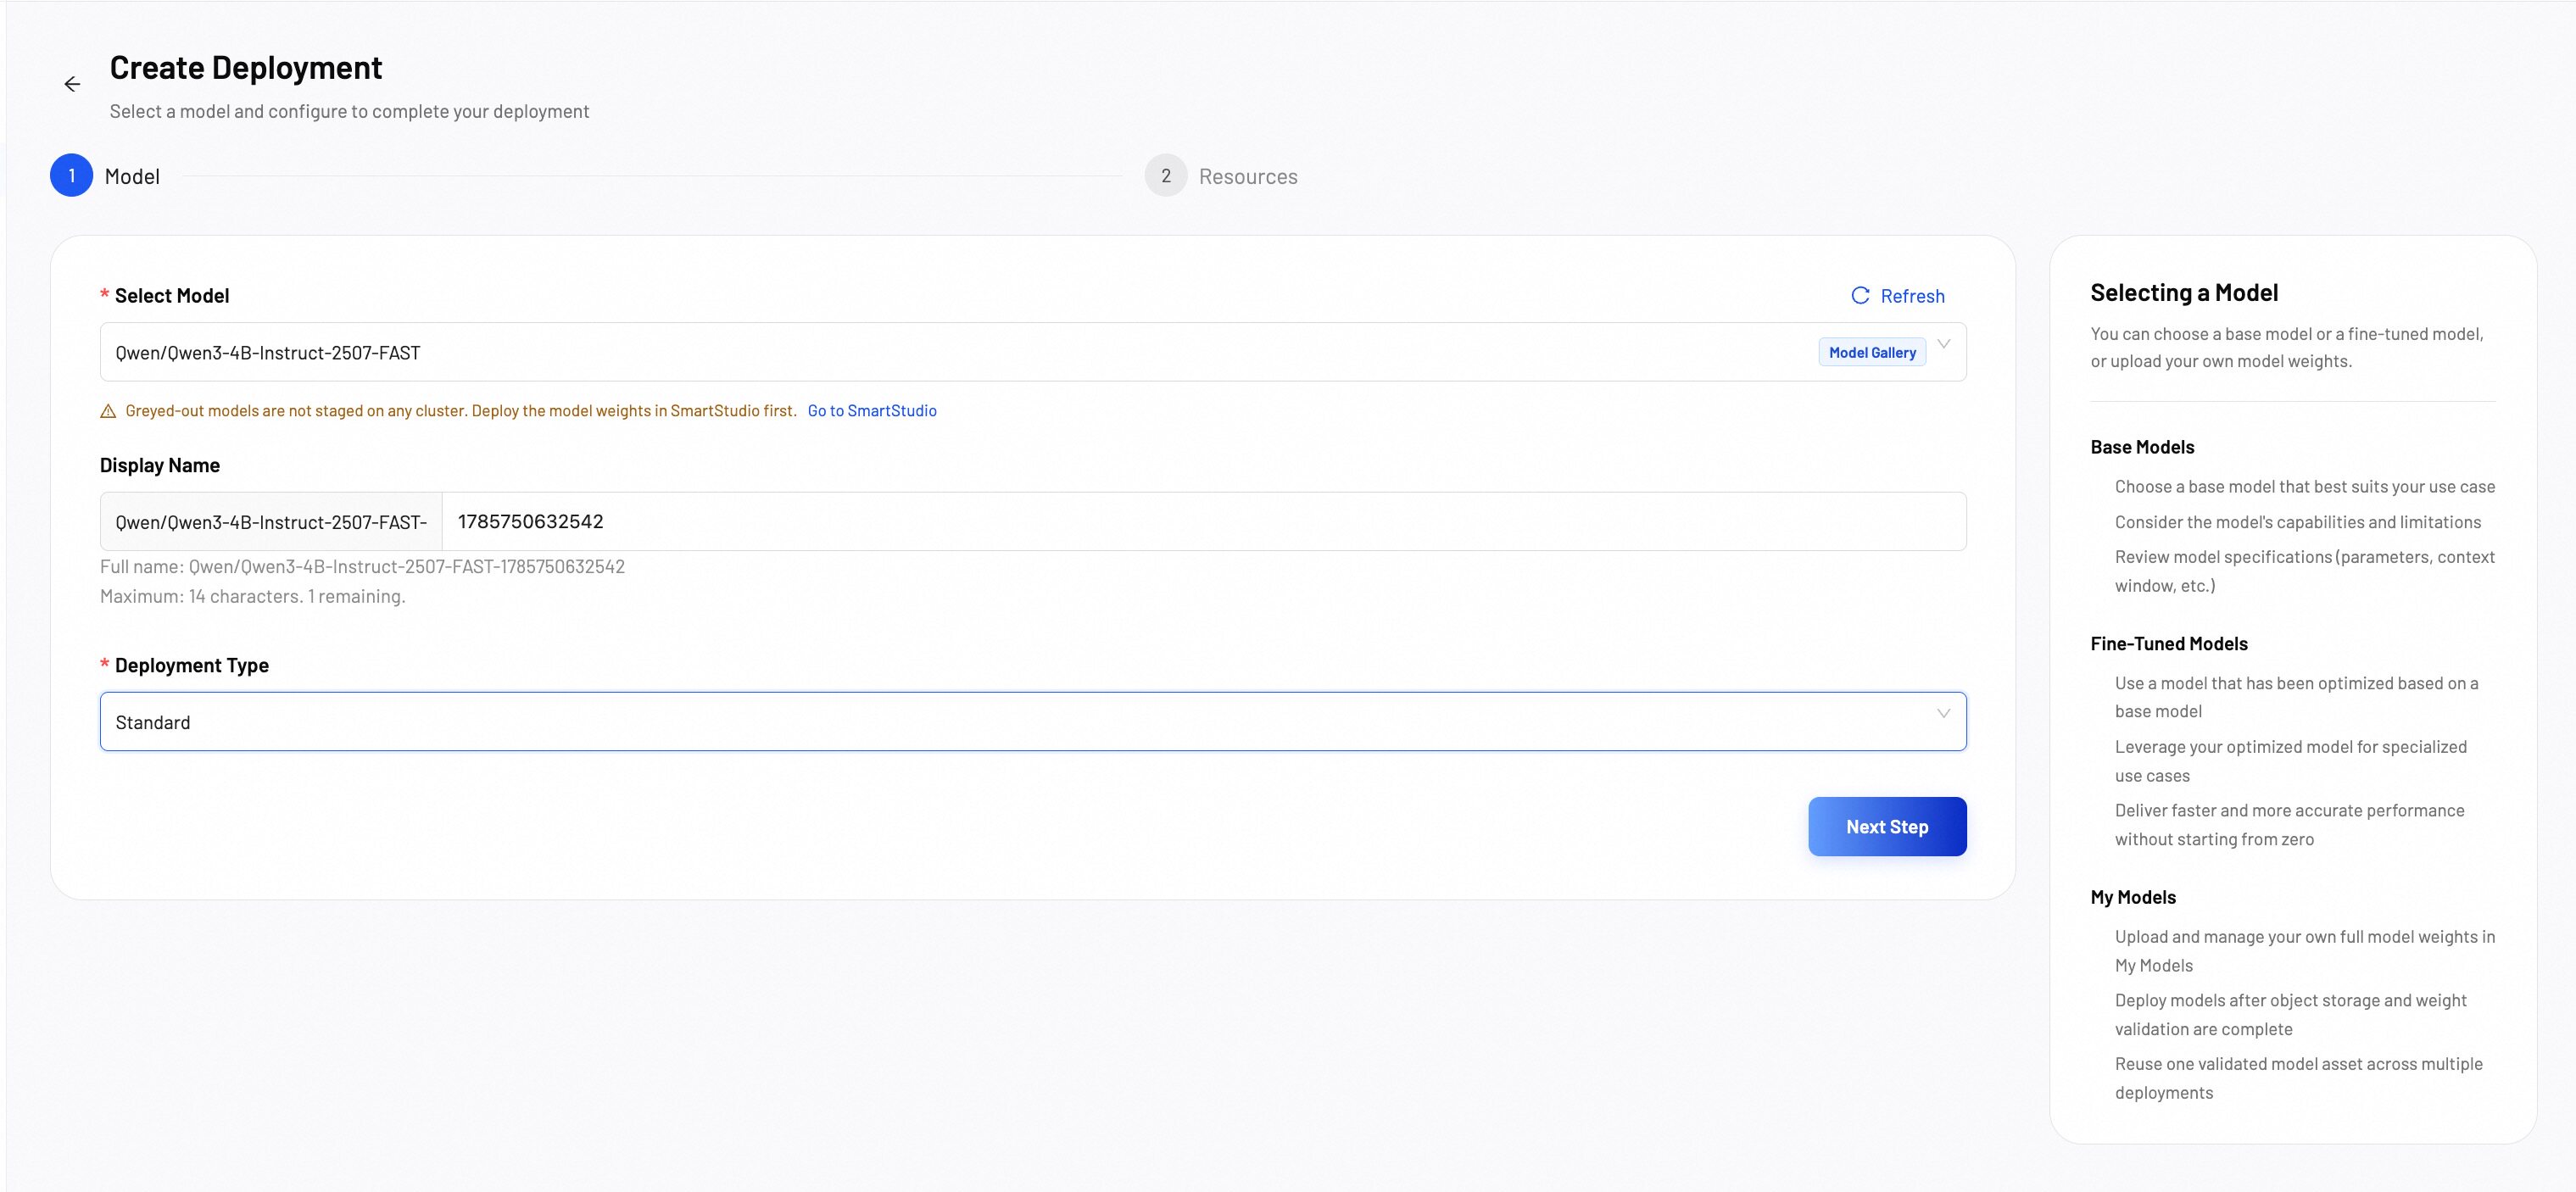
Choose a model to deploy from one of the following sources and click Create Deployment to start the process.
- Browse pre-configured models for faster response times
- Deploy models with optimized configurations out of the box
- Leverage inference acceleration for production workloads
- Leverage your optimized model for specialized use cases
- Deliver faster and more accurate performance without starting from zero
- Deploy models trained on your custom datasets
- Deploy models after object storage and weight validation are complete
- Reuse one validated model asset across multiple deployments
- Manage model versions and track deployment history
Configuration options
- Model: Select a model from the dropdown. Use the search box to find specific models.
- Display Name: Enter a complete deployment name of up to 128 characters. It may contain letters, numbers, slashes, dots, hyphens, and underscores, and must start and end with a letter or number.
- Deployment Type: Select the Deployment Type (Standard or P/D Disaggregated).
Step 2: Configure resources
Select the appropriate compute resources and deployment settings for your model.
Resource configuration
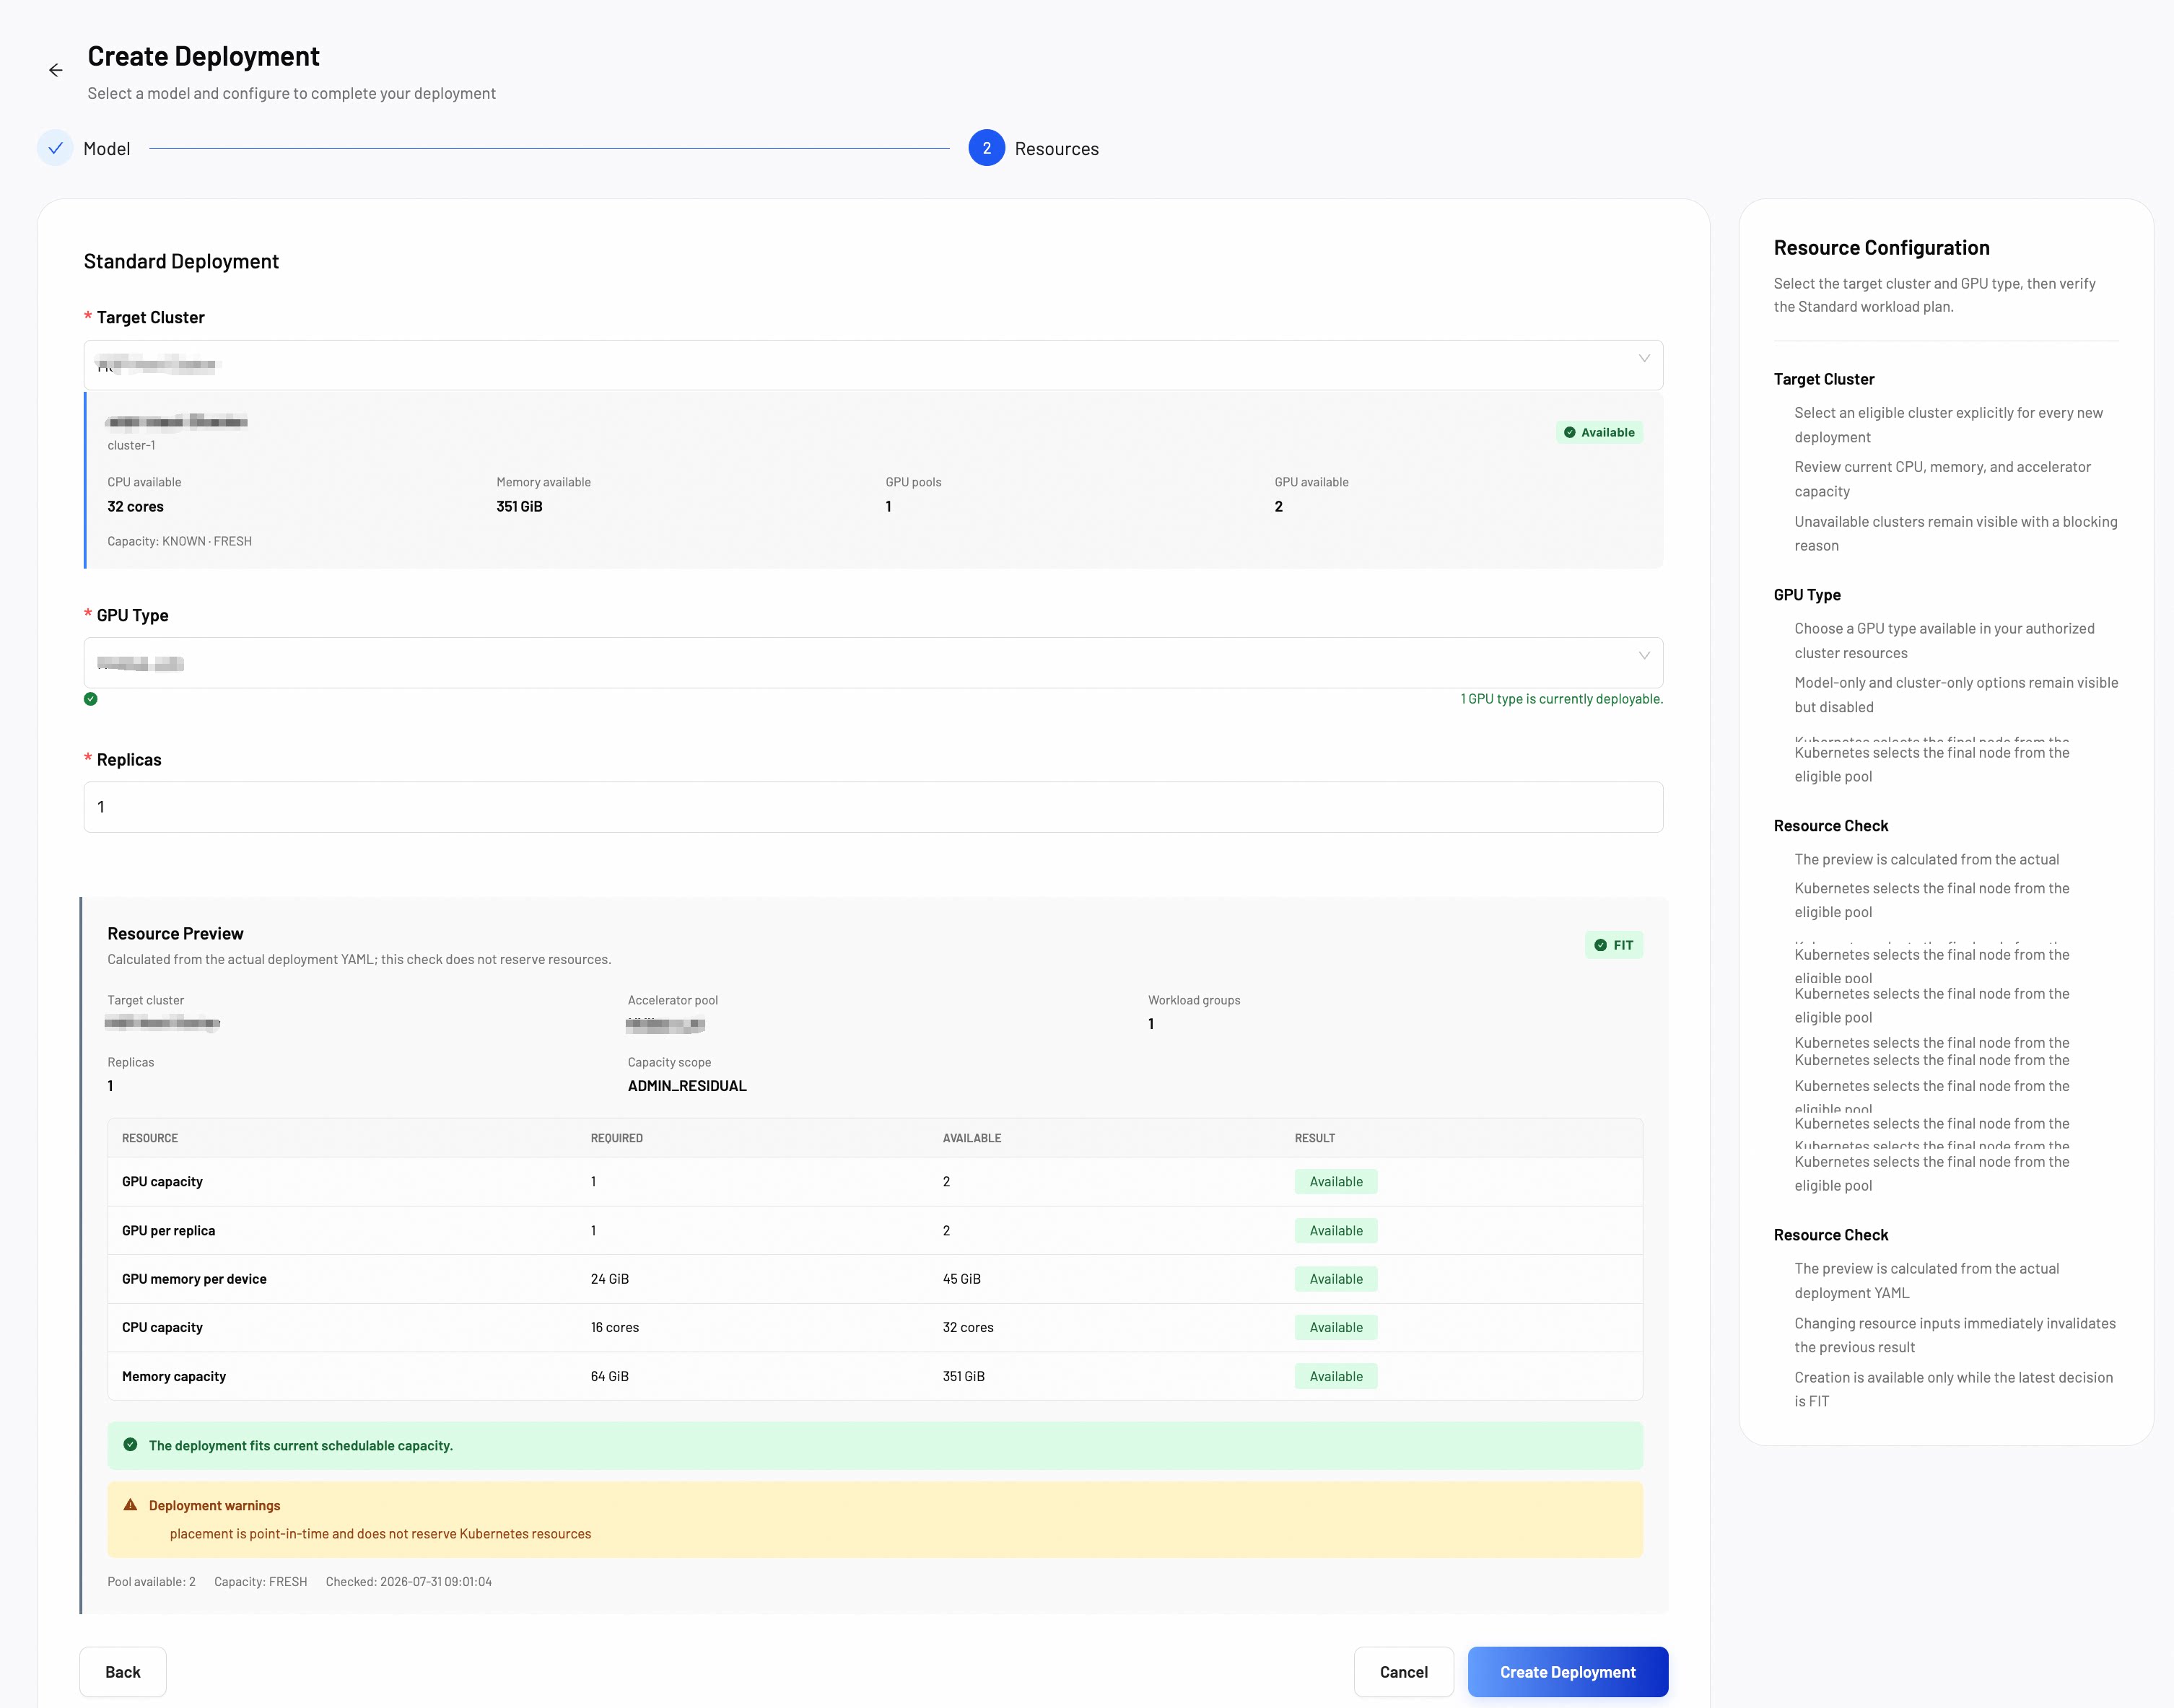
- Target Cluster: Select a target cluster for deployment.
- GPU Type: Select a GPU type based on your model's requirements. You must select a target cluster first to view available GPU options.
- Replicas / P/D: Number of deployment replicas or P/D instances. Default is 1, 1p1d.
- Standard Deployment: Deploy with a fixed number of replicas.
- P/D Deployment: Deploy with Prefill/Decode disaggregated architecture for optimized inference performance.
Step 3: Review and deploy
Review your configuration before creating the deployment. Click Create Deployment to start the deployment process. The system validates the configuration and provisions the required resources on the selected cluster.
Manage deployments
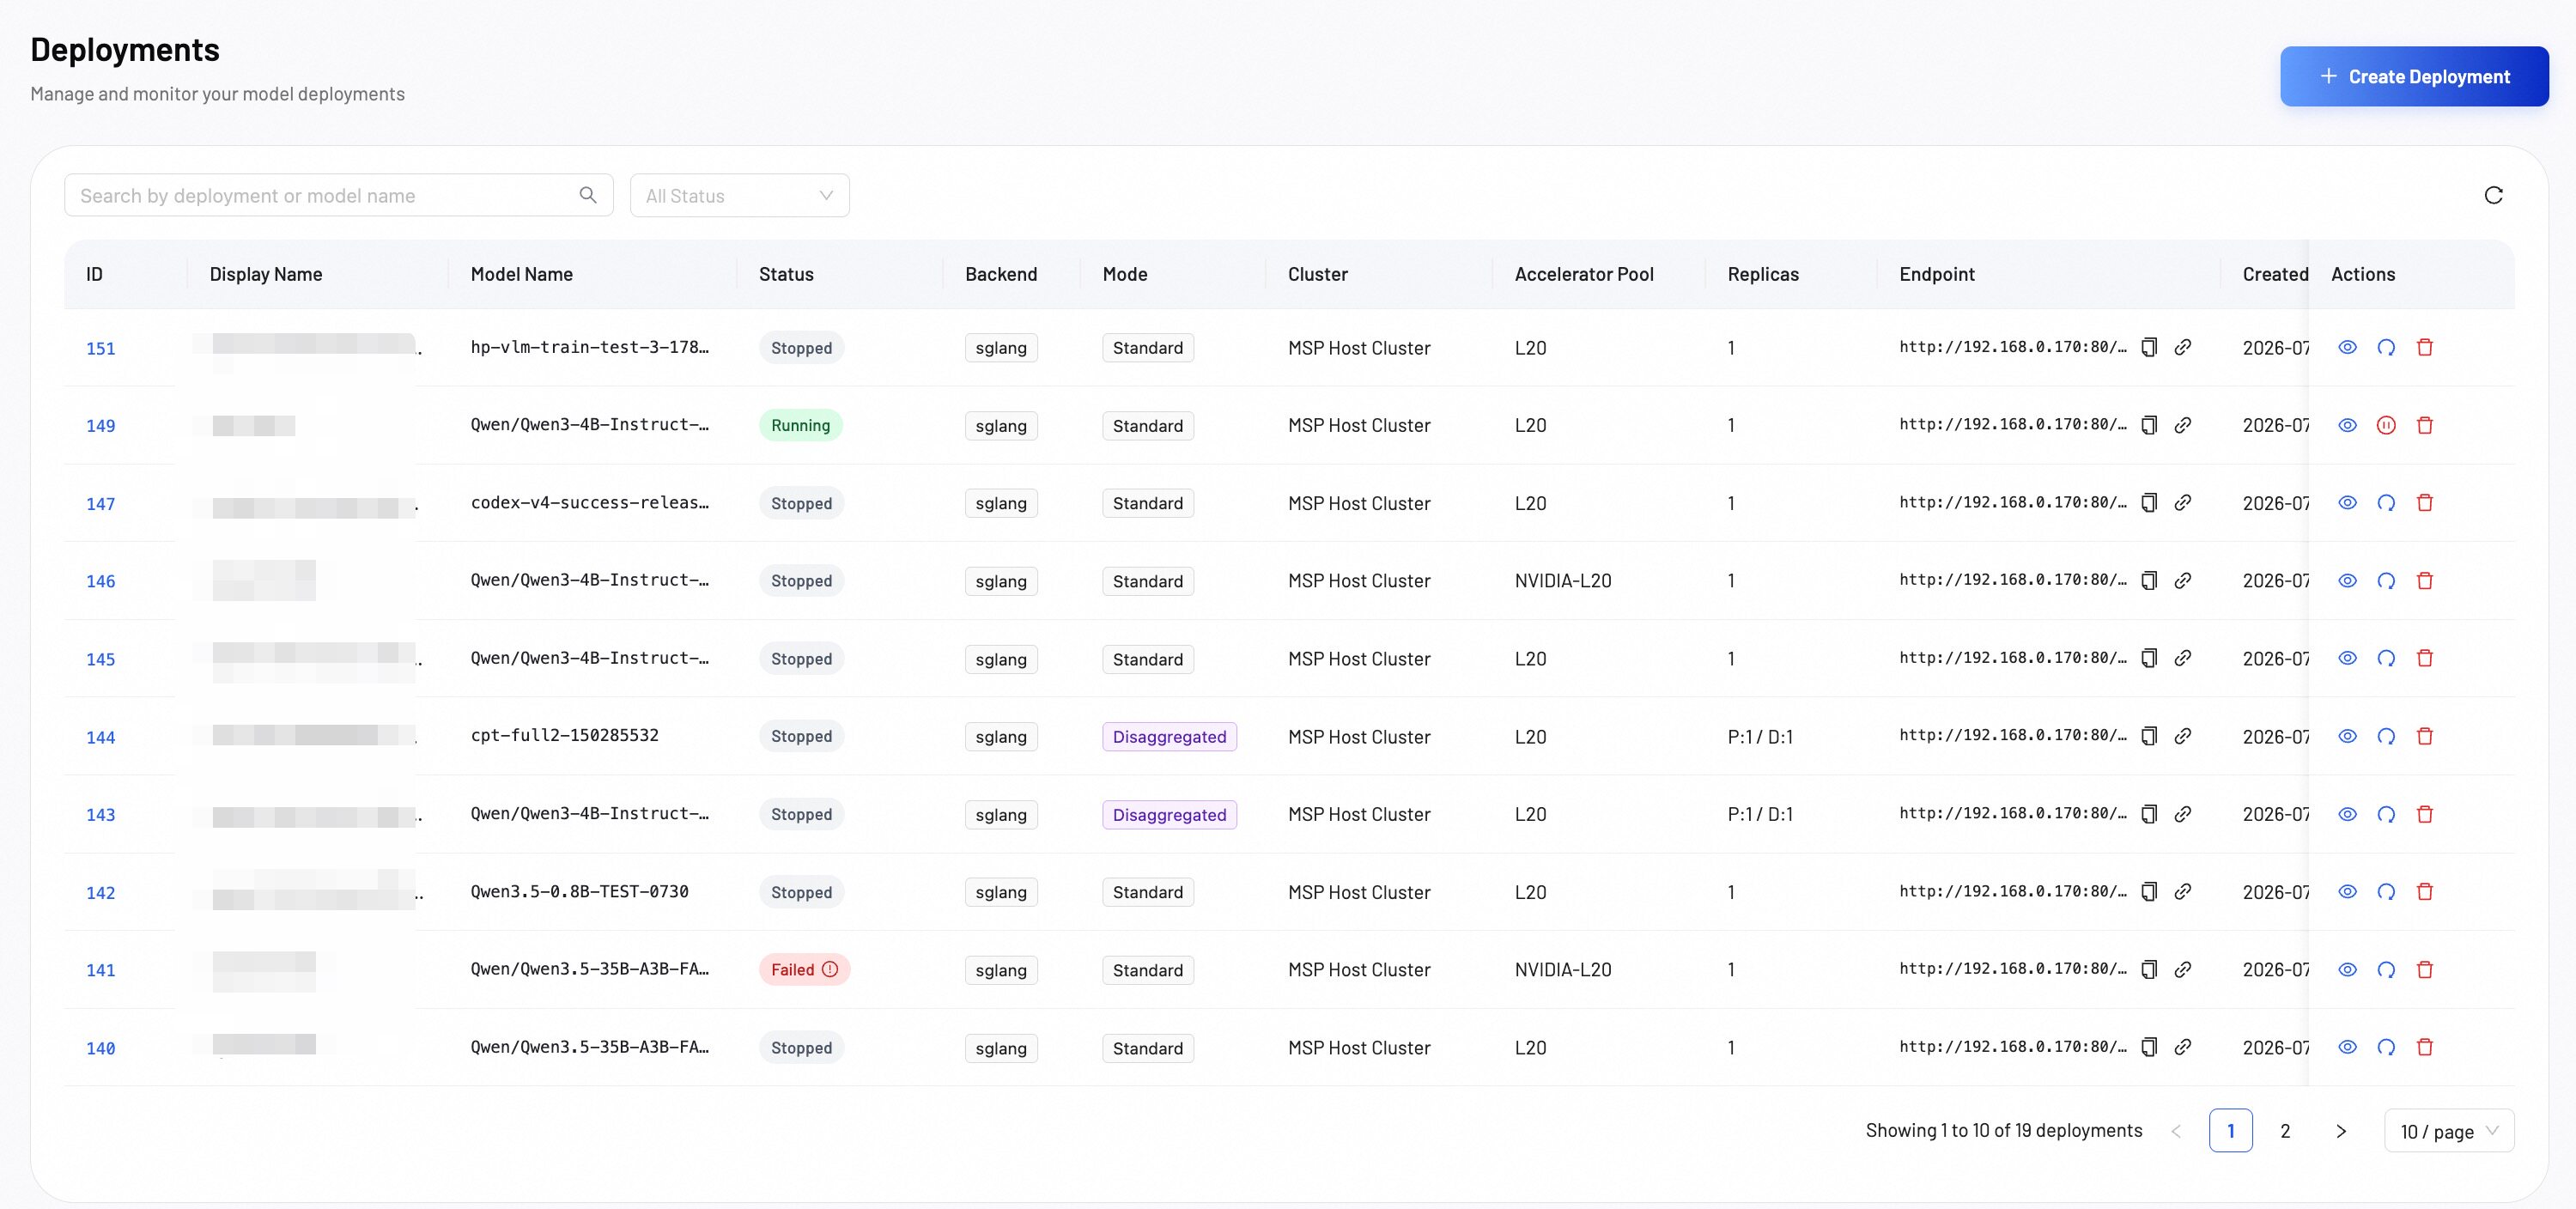
After creating a deployment, you can manage it from the deployment list. Search or filter deployments by status, view details, edit configurations, or stop and restart deployments.
Deployment details
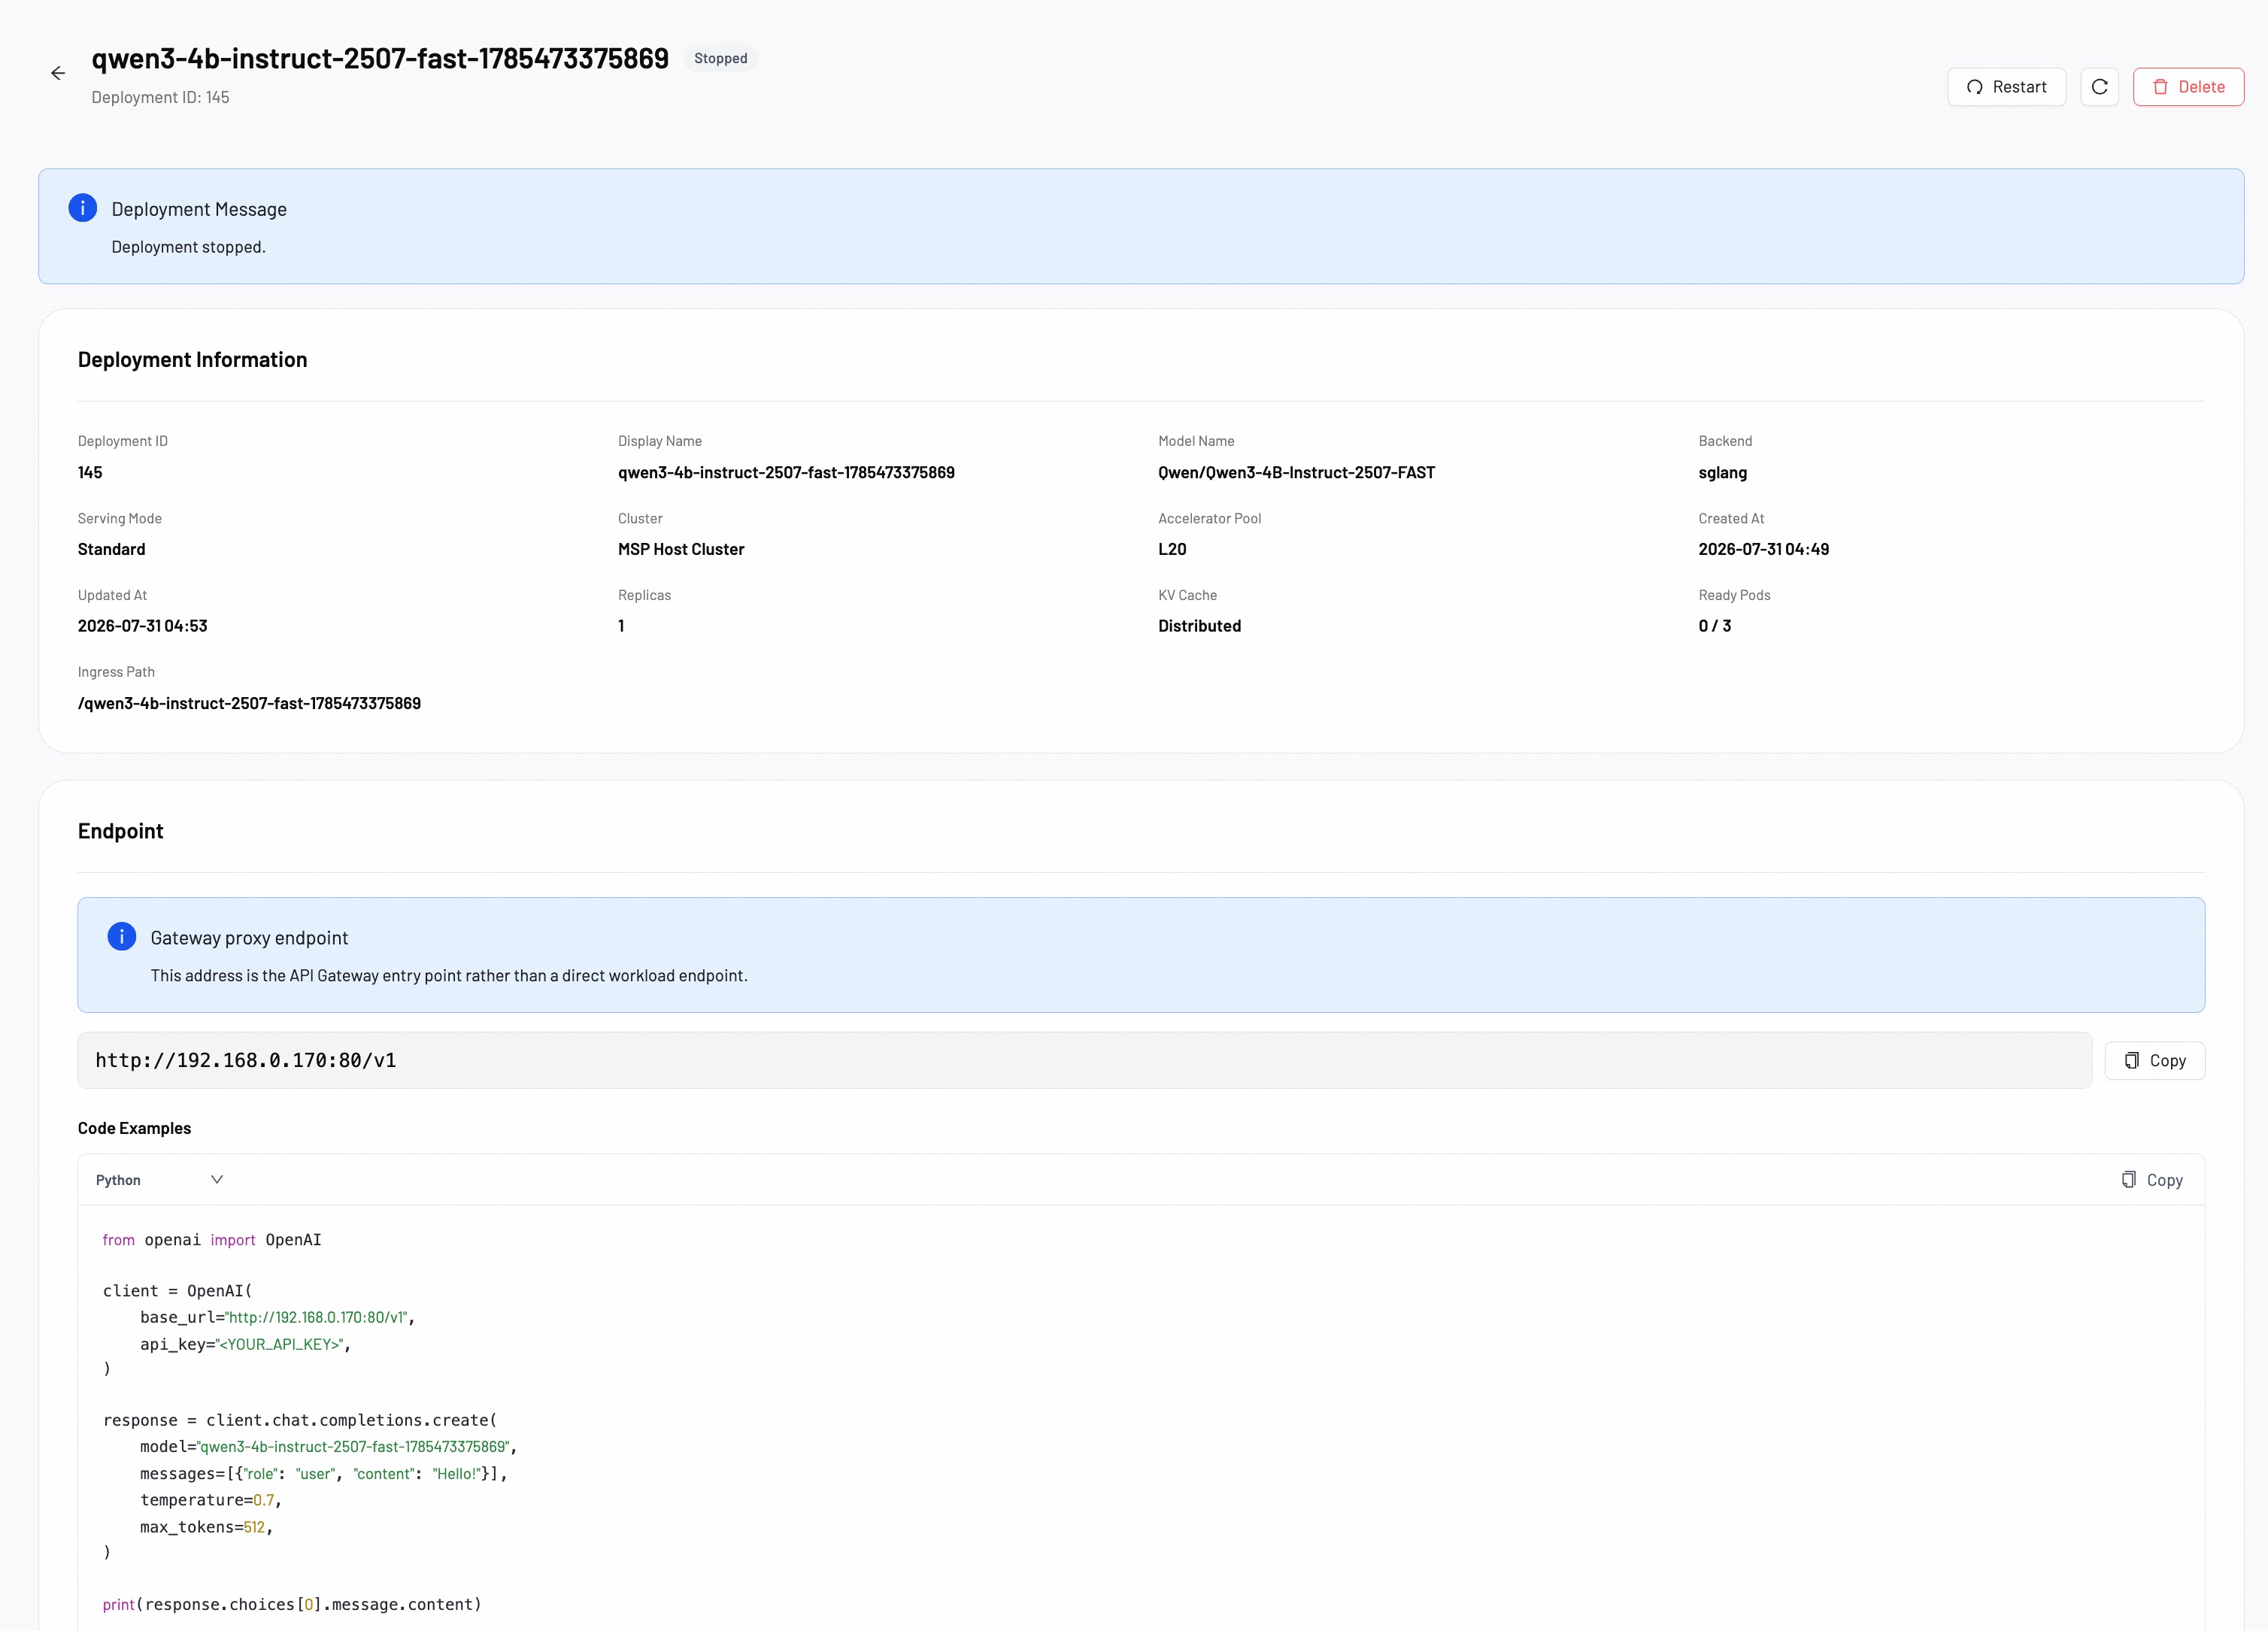
The deployment details page displays deployment information and provides code examples for calling the deployed model API in Python, TypeScript, Java, and Shell (cURL).